1. Introduction
 Labelflash
technology was recently introduced by Yamaha Corporation and Fuji Photo Film
Co. This technology promotes the ability to burn images directly onto a
specialised dye layer on the disc label side, with the same laser used for data recording.
This technology allows consumers to personalise and customise their DVDs with
photos, text and graphics, replacing traditional sticker and marker labeling.
Labelflash
technology was recently introduced by Yamaha Corporation and Fuji Photo Film
Co. This technology promotes the ability to burn images directly onto a
specialised dye layer on the disc label side, with the same laser used for data recording.
This technology allows consumers to personalise and customise their DVDs with
photos, text and graphics, replacing traditional sticker and marker labeling.
Labelflash technology allows a consumer to burn pictures and/or write titles
on the label side of the DVD discs, specially developed for the Labelflash system
with DVD writers with the Labelflash function. There is no need for printers and
consumables for printing. To obtain high resolution and high contrast pictures
in blue and silver colour, a consumer only needs to turn the disc upside down
and insert it into the drive again, after burning the data. The technology burns
the image 0.6mm deep into the media in as little as five minutes, creating
a more stable and permanent image than traditional printable media that uses
the
top layer of a disc for labeling.
| General Specifications of Labelflash System |
| Laser wave length |
655nm |
| NA |
0.65 |
| Picture-burning time |
5min (Fast mode) - 20min (High Quality mode) |
| General Specifications of Labelflash Disc |
| Depth of the picture-burning layer |
0.6mm from the disc surface |
| Dye for the picture-burning layer |
Organic Dye |
| Picture-burning area (radius) |
25mm - 58mm |
A look at the past
The technology marries the unique Yamaha DiscT@2 ("Tattoo") technology
for picture burning on the data side with the photochemical expertise of Fuji
Photo Film, which is a leading company in technologies for optical media.
Back in 2002, YAMAHA had developed the DiscT@2
technology, allowing laser printing on a CD. It was a technology on which Labelflash
is based. In that case however, users had to sacrifice some of their data space
on the CD,
since printing took place on the data side of the disc and usually
on
the outer region of the CD. In other words, the DiscT@2 labels were "burned"
on the same side as the data, and not on the top side (label side)
of the disc.

Following on the DiscT@2 concept, LabelFlash is quite straightforward to use.
The image (label) consists of grayscale information with x-y coordinate values. The LabelFlash-capable application converts the x-y
coordinate information to polar coordinate information. The application then
sends the
data with polar coordinates to the LabelFlash drive, which in our case is the
NEC
ND-4551A.
LabelFlash printing can be theoretically done on any DVD-/+R media, by simply placing the disc right side up
in the tray and printing the label on the data side as was done with DiscT@2. Of course, that would require that the burner's firmware
support printing on non-LabelFlash discs. In our tests, we used
the NEC ND-4551A with firmware v1.07 installed and the drive managed to print
on DVD-R and DVD+R media, but not on CD-R media (not supported).
How it works
Usually, a burning application will supply a DVD recorder with raw digital
data, to which the recorder's hardware adds header and error correction information
and then converts it to the so-called eight to sixteen (EFM+) modulated
patterns. These are the little chunks of data that get written to the disc.
The modulated patterns for DVD writing vary from a minimum value
to a maximum value. A combination of
these patterns,
is
used for writing to DVD-R and DVD+R. The result is that the burned area looks
darker than the unused area. LabelFlash takes things further and breaks free
from
the limitations imposed by normal
modulated patterns. This allows for more flexibility in how the laser burns
onto DVD recordable media,
making the formation of visible images possible.
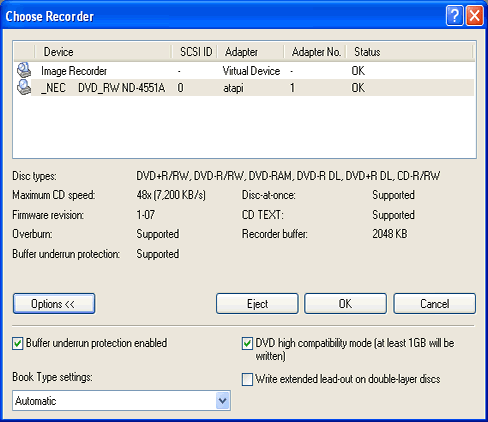
2. The Drive, the Media and the Software
- The Drive
In order to test this technology, we used the NEC
ND-4551A, flashed with firmware version 1.07, which is the only one that supports the LabelFlash Technology.
As we said previously, you can use Labelflash as well
on the data side of any standard DVD-R or DVD +R media, by burning the label
on the outer area of the data side of the disc, or on the whole area if you
don't burn any actual data on it.


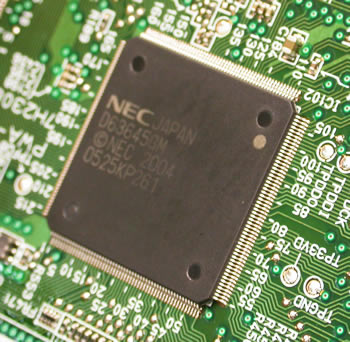 |
| The main chipset of the drive... |
- The media
 The media we used for our test was made by Fujifilm. It was a DVD-R certified for 16X recording. The depth of the picture-burning layer is 0.6mm from the disc surface while the Dye for the picture-burning layer is the Organic Dye. The Picture-burning area (radius) is 25mm - 58mm.


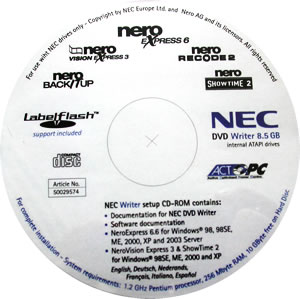
- The Software
Nero in cooperation with Yamaha made a version that supports the LabelFlash
Technology but currently this version is for bundle with OEM customers. The
Nero 6.6.1.3 bundles in the retail package of the ND-4551A recorder and supports
LabelFlash. It is not sure whether Nero
will add this
feature
will be in
Nero 7.
BHA has also announced support for the LabalFlash in its OEM version of the
Bs software, bundled with a LabelFlash burner under the Japanese I-O Data brand.
The familiar interface of Nero Burning Rom will guide you through the simple
steps in order to "LabelFlash" your media.


3. The Tests
We ran Nero Express and clicked on the "More" button in order to see the extra features. By selecting the "Burn Label" button, you enter the label maker screen.
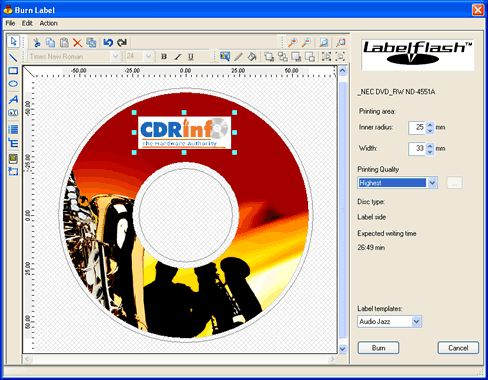
We made a print project and selected to print it at the highest available printing quality. There are three available qualities you can use to print your project. For each one, there is an estimated time, reported by the software. We selected the highest...
There are also some extra settings regarding the print quality that you can change:

As soon as you are ready, press "Burn" to start the printing procedure.

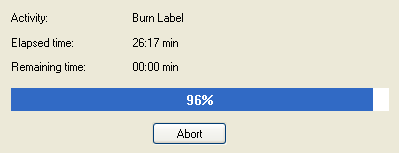
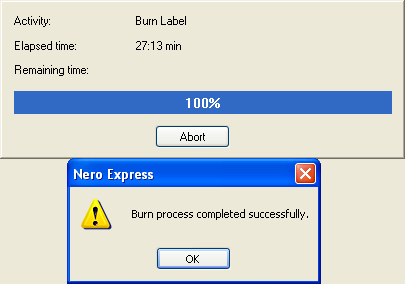
When the printing process is finished, you'll get an appropriate message. In our case, the time needed was 27:13 minutes, while the program's estimated time at the start was 26:49 minutes, a negligible difference. What was the result? Check below:

Despite our attempts to provide as realistic photos as possible, the effect is nowhere near as impressive as seeing the actual disk itself. The disks have a very shiny surface, due to the protection surface on the dye, which cannot be portrayed in our two images.

The labels have a consistent look while the protective layer on the disc provides some degree of protection and durability.
We also experimented with non-LabelFlash certified DVD-R and DVD+R media to see what the results would be. We printed an image on the data side of the disc that took up the entire surface area on the disk. The resulting label was barely visible (the contrast between light and dark areas is minimal), and in fact, you can only discern an image if you look very hard at the disk and without reflections. All in all, if you didn't know that an image had been printed, you wouldn't have noticed it. Despite this, we took our experiment a step further and tried to write actual data on the disc. Lo and behold, Nero correctly identified the media and proceeded to burn our project (a DVD movie), completing successfully. There was no noticeable difference in the label quality other than perhaps that it was a shade darker.
The real test though was yet to come. Was this disc a working disc? Would our drive read it? Alas, no. We tried playing the DVD with Power DVD but to no avail. Interestingly enough though, with Windows Explorer, we could explore the disk's contents and list the video files that are normally present on a DVD movie compilation. Double clicking on a VOB file, in many cases actually played for a fraction of a second and then stopped. With the merging of what the label's image and then the data had burned on the disk, it appeared like a corrupt or badly damaged disk.
Not that we were terribly disappointed because the label image quality was hardly worth the effort in the first place. But why wasn't the disc rejected by Nero when we burned our data on it, after we had printed the image? What we believe happened, is that when data is written on a DVD, it has to follow a particular format, including IDs, error correction, etc, much in the same way a hard disc is formatted by an operating system before any data can be written to it or read from it. Now, remembering that the image and data are written on the same side of the disk using the same laser, obviously, the image we printed did not follow the DVD formatting rules and most probably, as far as Nero was concerned, looked like blank DVD media.
As a side note, we should say that you cannot use Lightscribe
media with the NEC drive, even if you place it upside down in the drive's
tray.
Current
firmware
for
the
ND-4551A
does not recognize any LightScribe discs. In addition, the ND-4551A could not
label on our old, DiscT@2 CD-R discs since CD-Rs are not supported by LabelFlash.
Just a thought :)


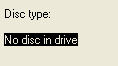
We tried with our NEC ND-4551A, to burn CD-R media but we got the following
message:
| DiscT@2 Media |
LightScribe Media |
 |
 |
- Final thoughts
Printing with LabelFlash is certainly interesting, but as in the
case of the competing LightScribe labeling technology, the time needed to
label a disc is substantial. We expect that there will be wider support from software and media, as well as a more consistent behavior from LabelFlash drives through updates in their respective firmware. The sleek and glossy finish of a LabelFlash
label is definitely a plus, making it an attractive way to promote your
DVD-ROM presentations with potential customers. The availability as well as the price
for LabelFlash media are also factors that will decide its future. FujiFilm
will commercialize its 16x DVD-R discs later this month, and Ritek also plans
to release LabelFlash media in Q1 2006.