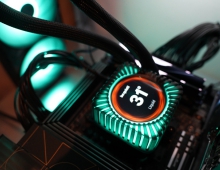
be quiet! Light Wings Pro IO fan
3. IO Center
IO Center is where Light Wings Pro IO separates itself from a standard ARGB fan: one app covers lighting, fan curves, firmware and monitoring, and a browser version is available as well. It manages all compatible be quiet! IO devices, including the Dark Power Pro 14 IO power supply, the Dark Mount keyboard and the Dark Perk mouse, each shown as a tile on the home screen.

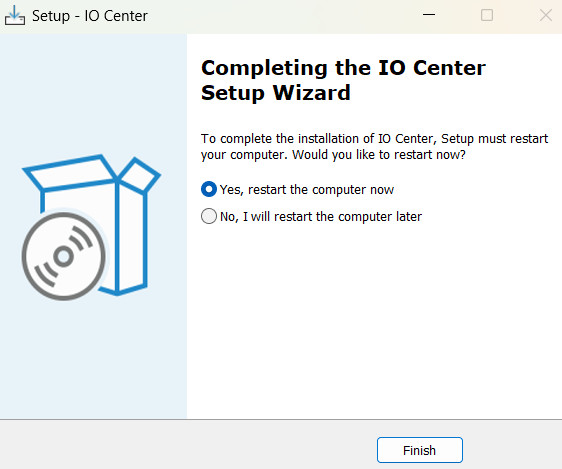
Users can download the software installer from the official be quiet! website.

Two design choices stand out. IO Center needs no internet connection and no user account, so configuration stays local. Settings are also saved in onboard memory on the device, so the app does not need to run in the background.
A side panel holds a customizable Hardware Monitor covering CPU, GPU, memory, temperatures and fan speeds. In be quiet!'s screenshots it also shows Cooling Studio profile quick-switching, RAM use, mouse battery, and PSU efficiency and power.
First launch and firmware update
On first launch, IO Center asks for a firmware update before it unlocks the fan's features. In the screenshots, each Pro IO device's tile on the home screen carries a red warning icon and a message saying a quick firmware update is required. The message says the update unlocks all features and optimizes performance, and that it "only takes a moment". An orange Update the firmware button sits under it.


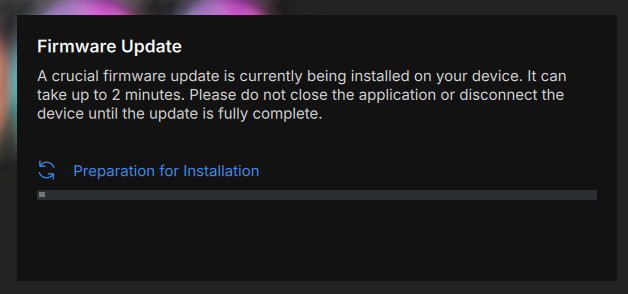
The update runs in a dialog that says a crucial firmware update is being installed, can take up to 2 minutes, and that you should not close the application or disconnect the device until it finishes. It starts with a "Preparation for Installation" step and a progress bar, and ends with "Installation complete" and a Finish button.

IO Center posts a "Firmware update complete", saying firmware version 0.0.39 for Light Wings Pro IO 420mm white controller was installed. The patch notes describe it as an IO Controller update, which suggests the firmware lives on the controller and that the controller ships without Pro IO support. That would explain why the first-launch update is required.


After the initial process, a basic setup wizard appears.


The home screen shows several be quiet! IO products at once: a Light Loop IO LCD water cooler tile next to a single white fan named Light Wings Pro IO and a white triple frame named Light Wings Pro IO 2. Devices are named by instance, not by size or model. The same name appears on a single fan in one screenshot and on a triple frame in another, which could make multi-device setups confusing.


You can only add a two-digit number to the name of your 360/420mm Light Wings Pro IO fan, not fully rename it. We don’t know whether this is fixable, and in setups with many different fans you might face a naming or identification issue.
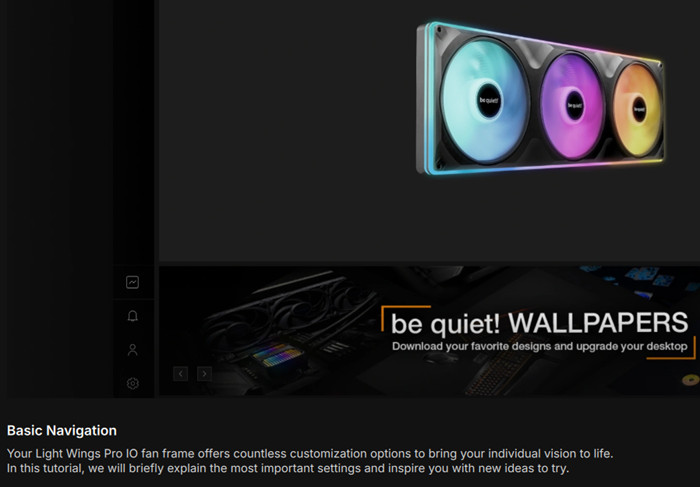
The layout is easy to learn. A left rail holds Home, one icon per device type (a drop for the water cooler, a fan icon for fans with a tooltip reading "Fan"), and at the bottom a monitoring icon, notifications, the user profile and settings. Inside a fan, three icons switch between Illumination, Cooling Setup and Product Settings, and a device picker at the top lists each connected unit. A Profile dropdown (Profile 1) sits above the live preview. The home screen also carries a promotional banner for be quiet! wallpapers. Captions that appear to come from be quiet!'s IO Center tutorials walk through the same five areas: basic navigation, personalized illumination, cooling settings, device settings and LED calibration.
Illumination
The Illumination menu is built around the four-zone design, with a General tab, a Dynamic Lighting tab and a profile selector.
- Master switch and preview: a toggle next to the Illumination title (apparently an on/off switch for lighting) and a live preview of your actual fan, with the hub LED ring drawn around each impeller logo and the frame as an outline that glows in the chosen color.
- Grouping: All applies one setting to everything. Zones lets you pick Impellers or Frame. Individual lets you pick the 1st, 2nd or 3rd impeller or the Frame, and Shift-click selects several. An info icon next to Group explains the modes.
- Effects: Off, Static, Color Wave, Tornado, Breathing and Temperature.
- Colors: the options depend on the effect. Static offers Single Color or Gradient. Single Color gives a swatch with a Change link, eight presets (orange, yellow, green, cyan, blue, purple, pink, red), a slot to save your own and a brightness slider. Gradient gives a color bar, five gradient presets, a Linear or Conical direction, an angle slider (set to 90° in the screenshot) and brightness. The guide's Tornado screenshot also offers dual color, rotation direction and speed.
- Apply to all: a button under the preview copies the current illumination settings to the other connected device, named in the caption (Light Wings Pro IO 2 in the screenshots).
- Temperature lighting: the fans change color automatically based on CPU, GPU or other monitored sensors, turning them into a live heat indicator.
- Color calibration: a wizard under Product Settings. The calibration wizard works in steps. Each step shows a color on screen and a single-channel slider, and you move the slider until the fan's LEDs match the color. The screenshots show Calibration 1 (a yellow swatch with a green channel slider) and the guide shows Calibration 2 (magenta with a blue channel slider). Every step has Back, Next and Reset buttons, with the Reset described as cancelling current changes. The tutorial says to follow the steps and adjust the sliders until the colors match your preference.


Cooling Setup
The Cooling Setup page has three tabs: PWM, General and Cooling Studio.
- PWM mode: hands control to the motherboard for traditional PWM operation, and you can still enable semi-passive mode here.
- General mode: choose Quiet or Performance, each with an info icon, and toggle Semi Passive Mode, whose tooltip reads "Fans activate only when temperature exceeds threshold". A graph plots PWM percentage against temperature from 20 to 120°C, with a marker and live RPM readouts for each impeller. A Reset to default button sits at the bottom.
- Quiet curve: holds about 20% PWM up to roughly 30°C, climbs to 80% at 90°C and then stays flat at 80%, so Quiet mode looks capped below full speed. At 53°C the marker reads 30% PWM and 871 RPM on a single fan.
- Offset middle fan: at 29% PWM and 55°C the three impellers read 844, 779 and 845 RPM, so the middle fan runs about 65 RPM (roughly 8%) below the outer two. be quiet! says the offset prevents turbulence and gives quieter operation, smoother airflow and better cooling than identical speeds.
- Semi-passive behavior: Fans stay stopped at 40% PWM or lower, then ramp up smoothly as temperatures rise. The tutorial's semi-passive curve appears to hold the fans at zero until roughly 40°C, then step up to about 28% PWM.

Single 120mm fan curve

420mm fan curve

Cooling Studio
Cooling Studio is the advanced tool, and where the fans and software work together most closely.
- Profiles: one-click Quiet, Balanced, Performance and Full Speed.
- Custom curves: drag-point graphs of PWM against temperature, built from system sensors, with editable curve names.
- Per-fan assignment: Each fan card has its own group, sensor (such as CPU or GPU temperature), curve and live PWM readout. The impellers of the 360/420mm units follow different curves and sensors, so individual control is visible in the interface.
- Custom groups: Sort fans into groups such as front, rear, top and bottom, and give each group its own curve, for example a gentler intake curve and a steeper exhaust curve across several IO devices.
- Per-impeller RPM: You can set RPM for each impeller separately.

IO Center | Web
IO Center | Web is the alternative for people who do not want to install vendor software or who are not on Windows.
- Runs in Chromium-based browsers on Windows, macOS and Linux
- Offers most of the desktop customization features
- Stores settings on the device, so they stay active with the browser closed
- Needs no account, cloud connection or background app, and typically no administrator privileges
Browsers cannot read third-party sensors, so these features are missing:
- Hardware Monitor
- Temperature-based lighting
- Microsoft Dynamic Lighting
- Sensor-driven cooling control: it is PWM fan control only, though semi-passive and active modes can still be set in the product settings
For a set-and-forget setup that is enough. For sensor-linked curves or temperature-reactive lighting you need the desktop app.
What it means for the fans
The software is what makes the hardware features reachable: semi-passive mode, per-impeller control, the middle-fan offset and the four lighting zones all depend on IO Center. The trade-off is lock-in to be quiet!'s IO ecosystem, since the fans use a proprietary IO connector and controller rather than standard motherboard fan headers and 5V ARGB. Your motherboard's RGB software cannot control the lighting directly, apart from the Dynamic Lighting tab in the Windows app.