Primera Composer - Signature III
2. Installation
Primera Composer/Signature III System - Page 2
Installation of Signature III CD Printer
- Installation:
The installation part was much different from those we had ever done in
past, when reviewing CDR-W drives. In start we were confused by the amount of
cables we had to connect between the PC/Composer/Singnature III systems but
finally after reading the included manuals we managed it. Note that you should
definatly READ the included manuals for both Composer and Signature III systems.
They have detailed pictures and information that will lead you in how connect
the necessary parts. After we finished the assembling task we had both the Composer/Signature
III systems to fire up!
 If
you have both systems you will need to align the Printer among with the Composer
system. This is a crucial part so the robotic arm could grab the CD and drop
them in the Printer's tray. How you can do it? There are 3 Philips screws around
the printer stand. As you use the pickup button (in the front panel) to archive
the perfect fitting position. Tight up again the screws and you are ready to
use your system. We didn't follow that tip in the beginning so we had some problems
with the picking arm alignment. After reading again the manual we solved the
problem immediately.
If
you have both systems you will need to align the Printer among with the Composer
system. This is a crucial part so the robotic arm could grab the CD and drop
them in the Printer's tray. How you can do it? There are 3 Philips screws around
the printer stand. As you use the pickup button (in the front panel) to archive
the perfect fitting position. Tight up again the screws and you are ready to
use your system. We didn't follow that tip in the beginning so we had some problems
with the picking arm alignment. After reading again the manual we solved the
problem immediately.
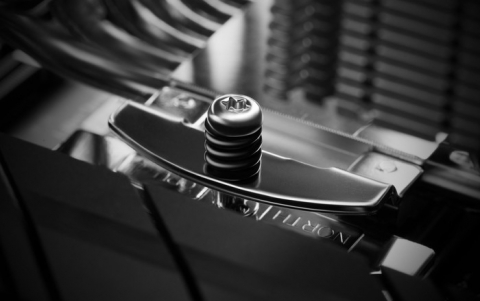
 The
Signature III CD Printer is a very solid machine. In the front of the printer
you will find the loading tray among with 2 led (can show you the exact state
of the printer and if something go wrong you will find a list of possible explanations
inside the printer manual) and 3 buttons in the top (power off, load/eject tray
and the ink cartridge buttons). Pulling down the front panel we can have a very
easy access to the inside of the Singature III printer. You will notice the
extended use of metal inside the printer, which makes it a very good option
for not so easy environments.
The
Signature III CD Printer is a very solid machine. In the front of the printer
you will find the loading tray among with 2 led (can show you the exact state
of the printer and if something go wrong you will find a list of possible explanations
inside the printer manual) and 3 buttons in the top (power off, load/eject tray
and the ink cartridge buttons). Pulling down the front panel we can have a very
easy access to the inside of the Singature III printer. You will notice the
extended use of metal inside the printer, which makes it a very good option
for not so easy environments.
 In
the back of the printer you will find the power port, the auxiliary port (used
to connect with the Composer system), the serial interface port (not used-only
for factory use) and of course the parallel interface port (connection with
PC) and a label with the proper settings for the alignment of the printer (check
below picture).
In
the back of the printer you will find the power port, the auxiliary port (used
to connect with the Composer system), the serial interface port (not used-only
for factory use) and of course the parallel interface port (connection with
PC) and a label with the proper settings for the alignment of the printer (check
below picture).
 For the "Signature III" printer you will need to use the included
CD in order to install the printer drivers among with the 32bit Spooler software,
which however gives higher printing times than the "direct write to port
setting" - not sure why Primera suggests installing 32bit Spooler in the
first time.
For the "Signature III" printer you will need to use the included
CD in order to install the printer drivers among with the 32bit Spooler software,
which however gives higher printing times than the "direct write to port
setting" - not sure why Primera suggests installing 32bit Spooler in the
first time.
Primera also suggests that you must install the Signature III in an ECP/EPP printer port in order to have the maximum speed and lower CPU load. Note that the 32bit Spooler software is not needed under Win2k. Finally you should install the included SureThing CD Labeler software. It's just the best software for printing CD labels around. For our tests we used a newer version (v2.10.18) than the one included.