Noctua NH-D14
2. The package
The Noctua NH-D14 comes in a big retail box - possibly the biggest we have seen for cpu cooler. The product is listed for €78/$85 (backed by a 6-year warranty), making it one of the highest-priced cpu coolers. The product offers full compatibility with Intel LGA1366, LGA1156, LGA775 & AMD AM2, AM2+, AM3 sockets.

Let's open the box. The CPU cooler is placed in the middle of two other white boxes for the extra components:

These are two printed manuals for the Intel/AMD sockets, Intel/AMD installation sets, several common parts compatible with all sockets and a screwdriver that will be used for the installation:

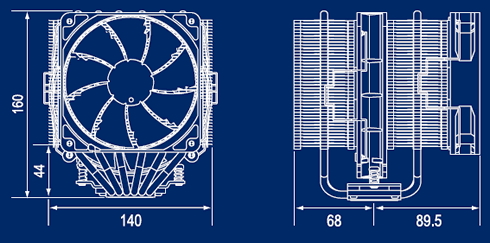
The cooler consists of two main tower style heatsinks. Each of them is connected to the base of the cooler with six U shaped copper heatpipes (6 mm diameter each). A fan is placed between the two main heatsinks, maintaining air-flow among the aluminum fins of each heatsink. A second fan is further contributing to a better air-flow:


Special anti-vibration plastic strips are also placed between the heatsinks and the fans in order to reduce the noise.

Let's proceed with the installation of the cooler. Notice there is not much free space inside your PC case for the massive cooler to fit, you may remove the 120mm fan and move it to the other site of the cooler.
Reading the manual is a very good idea before installing the cooler. As usual, you have to carefully position the backplate under the motherboard until all four screws fit in the corresponding holes around the CPU area:

The next step is to decide the orientation of the cpu cooler according to the available space inside your PC case:

Place the provided brackets and secure them using the available screws, as you can see in the picture below. The procedure is simple and would take you just 5mins to complete:

After that point you are ready to apply the thermal paste and gently place the cpu cooler on the top of your processor. The 140mm fan - the one installed between the heatsinks - should be removed first in order to fasten the two phillips flat head screws:

We have finished the installation and the cooler is standing on the the motherboard, unveiling its huge size.. As we can see, the default installation has the 120mm fan placed upon the memory modules area making it difficult to install high profiles modules:

In case your memory modules are high, you may move the 120mm rotating fan to the front and have the memory area clear.
For even greater air-flow, you may be able to add third fan as well, although Noctua hasn't included a third set of anti-vibration strips or installation clips for this purpose.


You may also connect the supplied Ultra-Low-Noise Adapters (U.L.N.A.) in order to further reduce the fans' operating noise. Use the black adaptor for the NF-P14 140mm fan and the blue adaptor for the NF-P12 120mm fan:

