Thermaltake Tide Water
3. Installation
For out tests, we used an 7800GTX graphics card from ASUS. The specific model comes from the factory, with a great cooling system, designed by Arctic Cooling, already installed.

First, uninstall all components of the stock cooling system.

Mount the aluminium heatspreaders on the memory chips, as shown below. The heatspreaders already have an adhesive compound on them, so its a simple matter to mount them.

Next, come the screws and metal bracket, which will hold the copper waterblock They should look something like the following images.
The metal bracket is a must for the installation, in order for the copper waterblock to sit tightly.

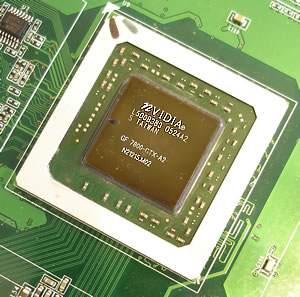
Apply the thermal compound to the NVidia GPU chip...
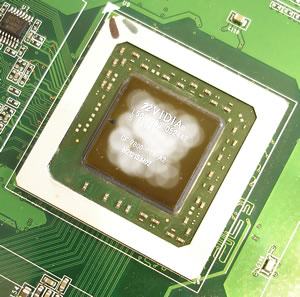
...and place the copper waterblock on it. The pipes should be on the upper side so you don't have any problems later, inside the PC case. You'll need to loosen the metal brackets on the copper waterblock and adjust them so that they fit on the mounting screws.
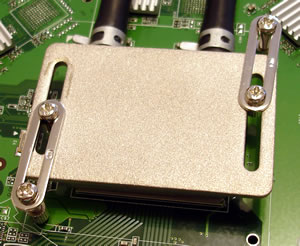
Installation of the Tide Water copper waterblock on the VGA card is finished. It is not too difficult, but it does require a little patience and caution, in order not to damage your valuable graphics card.
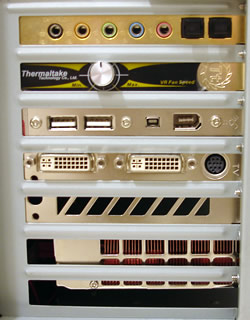
In order to install the Tide Water cooler inside your case, you'll need two free PCI slots. You can place the Tide Water cooler next to the graphics card.
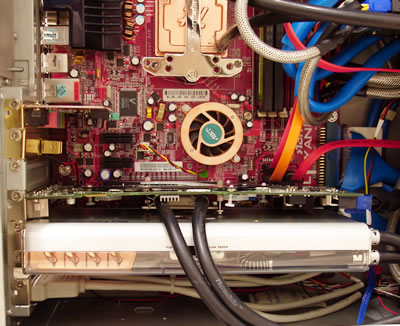
In our case, there was contact between the VGA card and the Tide Water solution, which wouldn't allow the VGA to sit straight. For this reason, we placed the Tide Water cooler one more PCI slot away for more space.

Our VGA card, like many other cards, has a double width mounting bracket, something that makes things a little difficult for the Tide Water cooler. If you can get a single width mounting bracket, it would be more convenient.