Acard ARS-2033N 1-to-21 Duplicator
3. Copying and Testing
With everything connected and ready to go, we flipped the switch. The controller boards give off a beep and load their operating system as seen in the photo below. This takes a few seconds.
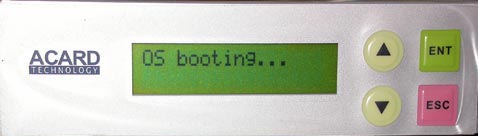
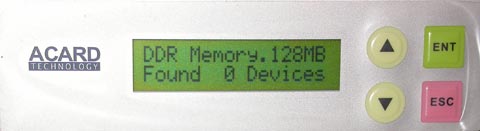
Everything you do with the duplicator is controlled from the front panel. The 4 buttons on the very right, are very similar in operation to the buttons on your LCD monitor which controls the On Screen Display for configuring your display. The up/down arrow buttons cycle through available menu options, ENT selects and ESC exits or backs out. The small but adequate LCD screen provides up to two lines of text display.
The ARS-2033N Duplicator has an extensive list of functions, listed below:
- Copy
- Test
- Test & Copy
- Verify
- Compare
- Prescan
- Disc Info
- Select Source
- Image
- Edit Track
- Setup
- Link Select
- Advanced Setup
These are also the options that appear on the LCD screen as you cycle through with the up/down buttons. For most functions, there are also sub-functions. For example, function 11 has 21 sub-functions, including language, CD & DVD burning speeds, Burn on the Fly and Burn Mode, Eject Disc (this feature selects whether to eject discs or not to eject discs when copying is finished, or the choice I prefer, eject only discs which copied without problems). Function 11 also includes the sub-functions to display the make and model of all ODD installed and the duplicator's firmware version.
Using the duplicator is a fairly straightforward process. You need to initially decide whether you will be using the DVD ROM device or the HDD as the source. To use the HDD, you need to partition it first. Depending on the size of your hard disk, several partitions can be created. What we noticed was that partitions were created in multiples of 1GB. A single 1 GB partition will hold a full CD image. For a single sided DVD, 5 GB are used and for dual layer DVD, 10 GB. You can store several images on the HDD and simply select which image will be used prior to copying.
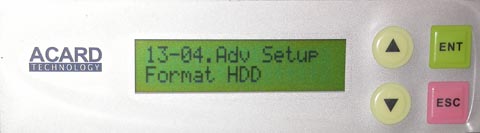
To format the HDD, you need to go to the Advanced Setup function. If you cycle through with the up/down buttons, you won't find function 13. It cycles from 12 back to 1 again. In order to bring up the Advanced Setup functions, you have to press the ESC button for a few seconds. Function 13, like function 11 mentioned previously, also has a large array of options.

Just a small comment on the function ordering and setout. Other than functions 11 and 13, only functions 9 and 10 contain sub-functions. I feel it would have been better to have grouped functions 2, 3, 4 and 5 together (Test, Test & Verify, Verify, and Compare) and split the sub-functions in 11 and 13 down. Functions 11 and 13 contain 38 sub-functions between them. There are also sub-functions in 13, such as Underrun Protect, Overburn and Read Error Skip which could have been put with CD Burn Speed, DVD Burn Speed, Burn On the Fly from 11, for a more logical grouping. I found I had to continually refer to the manual to find where the burn speed selection was, for example.
With the HDD formatted, we could now transfer our image onto one of the disk's partitions. First though, we have to set the HDD as the source with the Select Source function (8). The controller detects if a HDD and a DVD ROM device are connected to connector 14 on any of the controller boards and allows you to choose which one will contain your image. With the Image function (9), you can transfer multiple images from one or more CD or DVD discs onto the hard disc. In the same function group, you select which image will be used for the current job.
Copying is the easy part. Put discs in all the drives, close the drive doors and go to function 1, Copy. Copying time depends on the size of the image and burning speed. There is no difference here than if you were doing it on your PC using your favourite burning software, with the advantage that you can burn up to 21 discs at a time.
One of the options available under function 11, is Eject disc. This option allows you to set what the controller does with the disc, once burning is complete. It can eject the disc, it can leave the drive door closed in which case you need to press the eject button, or it can eject the disc if the burn was successful and leave it closed if it failed. The last is the default option and is the one we used in all our tests. We did indeed have a case where 3 drives failed to open automatically at the end of a burn cycle. We put those discs aside but saw that they hadn't been written to. What had most probably happened, is that when the controller scanned the drives to detect the presence of media, these drives may have been too slow to respond and the controller simply started the job with the other drives. Out of all the test runs we did (approximately 500 discs), there were no wasted discs.