Breaking News

ADATA Sparks New AI Engines at COMPUTEX 2026 Silicon Power to Showcase “InSPire with AI” at COMPUTEX 2026 COLORFUL Unveils Four-Zone Experience Showroom for COMPUTEX 2026 G.SKILL Demo New Memory Solutions for Gaming, Server, AI, Workstation Applications at Computex 2026 LIAN LI Launches HydroShift II OLED Curved 360 AIO

logo

  • Share Us
    • Facebook
    • Twitter
  • Home
  • Home
  • News
  • Reviews
  • Essays
  • Forum
  • Legacy
  • About
    • Submit News

    • Contact Us
    • Privacy

    • Promotion
    • Advertise

    • RSS Feed
    • Site Map

Search form

Arctic-Cooling Freezer 7 PRO

Dec 7,2005 0

2. Installation


Review Pages

1. Introduction
2. Installation
3. Performance
4. Conclusion


The installation procedure for the Freezer 7 PRO is quite easy and doesn't require any experience. A few minutes and that's it. For our tests, we used a P4 650.

First step obviously, is to remove the previous stock cooler and clean any remains of thermal compound on the processor's surface.
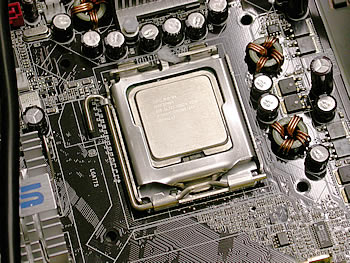
make sure you clean the CPU surface...

The good thing with the Freezer 7 PRO is that it has exactly the same mounting clips as the stock cooler, for easiest installation, without requiring that the motherboard be removed.

as we can see, the mounting clips are the same...

Remove the protective plastic cover o the thermal compound on the base of the Freezer 7 PRO.

the thermal compound has already in place...

Place the Freezer 7 PRO on the CPU. There are four clips on the Freezer and four holes on the board in a square arrangement, so there is a specific orientation when installing. However, we highly recommend you install the Freezer in such a way that the air blown from the Freezer's fan goes either to the rear of the PC case or towards the power supply, which also exhausts air from the case for better airflow within the PC case. For convenience, you can temporarily remove the fan from the cooler.
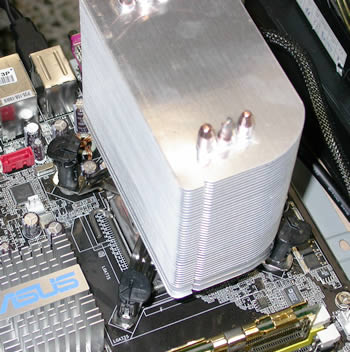
be sure to clean any remaining compound, failing to may prove destructive...
align the mounting pins in the motherboard's holes...

Now we can secure the Arctic Cooling Freezer 7 PRO heatsink to the CPU. By pressing down on the clips, you'll hear a "click" sound and that's it.
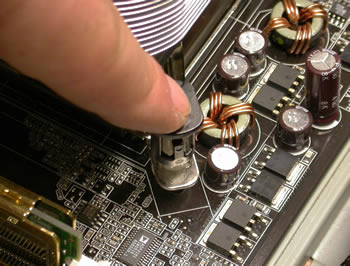
Press the clips to fasten...
connect the CPU_FAN clip...

Replace the fan, if you had previously removed it, back on the cooler and plug the power cable to the appropriate supply source on the motherboard.

connect to the CPU FAN power...

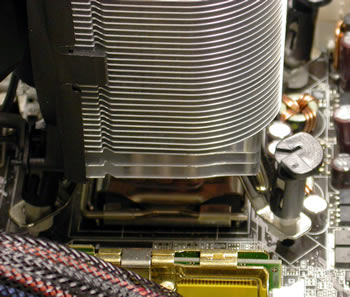
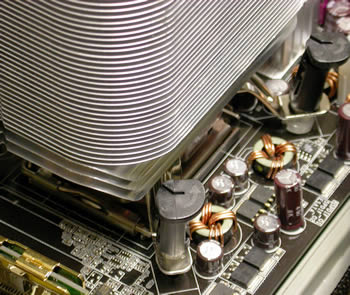
We are now ready to go. Installation completed successfully. The Freezer 7 PRO is up and working...
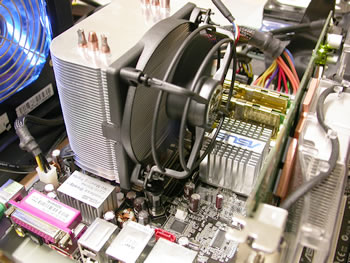
connect the CPU_FAN clip...

The installation was indeed easy as we had said. In case you want to remove the Freezer 7 PRO, turn the clips in the direction of the arrows (see below) and pull the clips up.
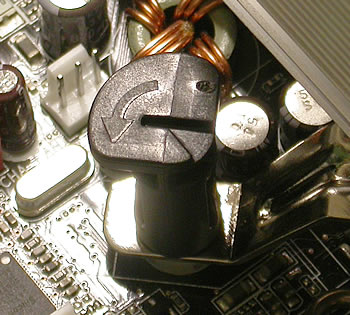
turn in the direction of the arrow...

Let's move on to the next page with the performance tests...
 

Review Pages

1. Introduction
2. Installation
3. Performance
4. Conclusion


Pages

  • « first
  • ‹ previous
  • 1
  • 2
  • 3
  • 4
  • next ›
  • last »

Arctic Cooling

Tags: Arctic Cooling
Previous Post
HP840b
Next Post
Intel Pentium 4 650

Related Posts

  • Arctic Liquid Freezer II 360 Α-RGB

  • Arctic Liquid Freezer II 280 RGB

  • Arctic Unveils the Freezer 7 X CPU Cooler

  • Keep Your AMD 3rd Gen Ryzen Threadripper Processor Cool with ARCTIC Freezer 50 TR

  • ARCTIC Unveils the Liquid Freezer II series

  • Arctic Introduces New Freezer 34 CPU Coolers

  • ARCTIC Releases New VGA Cooler Series

  • Arctic Freezer i11/A11 CPU Coolers Released

Latest Reviews

Swit NP-FZ100 Battery
Cameras

Swit NP-FZ100 Battery

The Technology Stack Behind Modern Digital Gaming Platforms
Consumer Electronics

The Technology Stack Behind Modern Digital Gaming Platforms

be quiet! Dark Rock Pro 6
Cooling Systems

be quiet! Dark Rock Pro 6

How Online Casinos Use Encryption, Verification, and Risk Controls to Build User Trust
Enterprise & IT

How Online Casinos Use Encryption, Verification, and Risk Controls to Build User Trust

Why Low-Latency Infrastructure Matters More Than Raw Specs
Enterprise & IT

Why Low-Latency Infrastructure Matters More Than Raw Specs

Popular News

TEAMGROUP Launches EXPERT P34F Find My External SSD

TEAMGROUP Launches EXPERT P34F Find My External SSD

CORSAIR announces Vanguard Pro 96 and Vanguard 96 Gaming Keyboards

CORSAIR announces Vanguard Pro 96 and Vanguard 96 Gaming Keyboards

Samsung announces Galaxy Tab S11 and Galaxy S25 FE series

Samsung announces Galaxy Tab S11 and Galaxy S25 FE series

Viltrox Showcases Upcoming Lens Lineup and New TTL Flash at IBC 2025

Viltrox Showcases Upcoming Lens Lineup and New TTL Flash at IBC 2025

MSI Launches FORGE GK600 TKL WIRELESS Special Edition Compact Mechanical Keyboard

MSI Launches FORGE GK600 TKL WIRELESS Special Edition Compact Mechanical Keyboard

Panasonic Introduces the First Ultra-Telephoto Zoom Lens in the LUMIX S Series

Panasonic Introduces the First Ultra-Telephoto Zoom Lens in the LUMIX S Series

MSI Launches DATAMAG 40Gbps Magnetic Portable SSD

MSI Launches DATAMAG 40Gbps Magnetic Portable SSD

Viltrox Joins the L-Mount Alliance, Expanding Creative Possibilities

Viltrox Joins the L-Mount Alliance, Expanding Creative Possibilities

Main menu

  • Home
  • News
  • Reviews
  • Essays
  • Forum
  • Legacy
  • About
    • Submit News

    • Contact Us
    • Privacy

    • Promotion
    • Advertise

    • RSS Feed
    • Site Map
  • About
  • Privacy
  • Contact Us
  • Promotional Opportunities @ CdrInfo.com
  • Advertise on out site
  • Submit your News to our site
  • RSS Feed