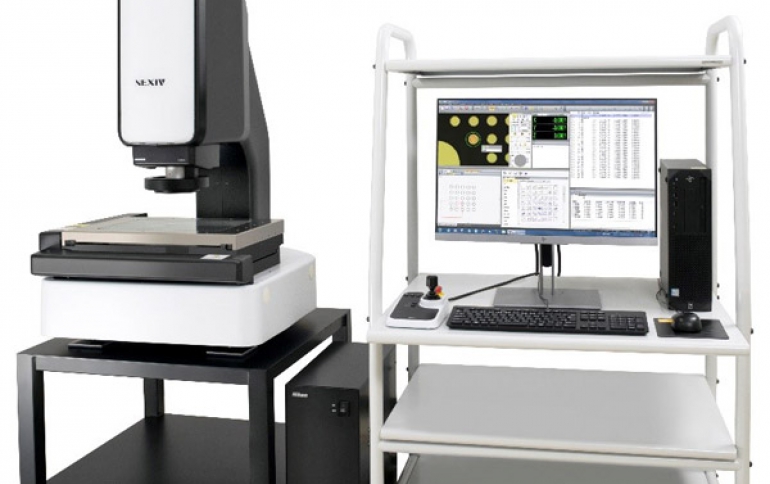
Nikon introduces the CNC Video Measuring System “NEXIV VMZ-S3020”
Nikon Corporation (Nikon) is pleased to announce the release of the NEXIV CNC Video Measuring System model range. The new “NEXIV VMZ-S3020”, which is the first lineup of “NEXIV VMZ-S” series, is most suitable for measuring semiconductor and electronic components as well as the associated tooling.
Using Nikon's proprietary optical and image processing technology, the “NEXIV” series can automatically measure the dimensions of such components by analyzing the captured images and accurately detecting feature edges. The “NEXIV VMZ-S” series has been thoroughly improved throughput while maintaining and enhancing the performance of the conventional model, "NEXIV VMZ-R" series.
In addition to the “VMZ-S3020” model, “VMZ-S4540” and “VMZ-S6555” with larger stage sizes are scheduled to be released in second half of 2021.
Product Information
| Product Name | CNC Video Measuring System “NEXIV VMZ-S3020” |
|---|---|
| Availability | From November 12, 2020 |
- *Delivery from January 2021
Product Development Background
With the growth of self-driving car sensor technology alongside the full EV market of automotive industry, the number of electronic components required and installed are greatly increasing. Strict quality control is required for these critical components and so expectations for shop floor measuring equipment is getting higher. Nikon provides the “NEXIV VMZ-S” series suitable for measuring these challenging applications.
Key Features
1. Improvement of Throughput
While maintaining the high measurement accuracy using a high-precision linear encoder equipped motion stage, the “NEXIV VMZ-S” series realize even faster stage movements and image capture and necessary processing steps compared with the conventional model “NEXIV VMZ-R” series. This has made it possible to reduce the measurement cycle times without any compromise in accuracy or reproducibility.
2. High Quality Images and Accurate Measurement Data
Nikon has designed optical systems to deliver the high quality images and so to realize accurate measurement data within the field of view. With a movable ring light and an 8-segment illumination, it is possible to capture in detail edges of complex shapes. A high-speed laser scan at 1000 points/sec can acquire the cross-sectional shape across the surface and evaluate the relative heights, meeting the measurement needs across a wide variety of samples.
3. Advanced Usability
The measurement software environment of “NEXIV AutoMeasure” realizes high accuracy, high speed, easy measurement cycles with the valuable tools available and close to hand in a user-friendly GUI. For simple shape components, measurement programming support function will automate part of the measurement program creating processes.
Also, the joystick unit used to move the stage and measurement head has been redesigned to be easier to use.
Main Specifications
| XYZ Strokes | 300 x 200 x 200 mm (Type TZ with low magnification lens: 250 x 200 x 200 mm) |
|---|---|
| Minimum readout | 0.01 µm |
| Maximum sample weight | 20 kg (Accuracy guaranteed: 5 kg) |
| Maximum permissible error (L: Length in mm) | EUX, MPE, EUY, MPE: 1.2 + 4L / 1000 µm EUXY, MPE: 2.0 + 4L / 1000 µm EUZ, MPE: 1.2 + 5L / 1000 µm |
| Camera | Black and white / color 1 / 3-inch CMOS |
| Optical magnification and FOV size on stage* |
|
| Autofocus | Laser AF (Type A is optional), Image AF |
| Illumination* |
|
| Power source and power consumption | AC100V-240V, 50 / 60Hz / 4A - 2A |
| Dimensions (W x D x H) and weight | Main body with table: 700 x 730 x 1793 mm / approx. 265 kg Controller: 190 x 450 x 450 mm / approx. 12 kg |
| Installation dimensions (W x D) | 2700 x 2400 mm |
- *Selectable from 6 types of optical heads. Types of Illuminations differ according to the type of optical heads.


