TDK Vortex 121032 CD-RW
1. Installation
Review Pages
TDK Vortex 121032 IDE CDR-W - Page 1
 Introduction:
In March 2001 TDK decided to reach the 12X recording market with a new CD-RW
drive proposal: The TDK Vortex 121032A. The company developed a new CD-RW drive
product line, trying to approach the average consumer with a reliable and affordable
solution. The TDK Vortex 121032 supports the exact specifications its brother
drives do and additional adopts the "JustLink" technology, which helps
users eliminate buffer underrun errors during the recording process. The question
is whether the new drive can stand the competition. Do we have here an alternative
solution for our burning needs? Continue reading...
Supplied Package:
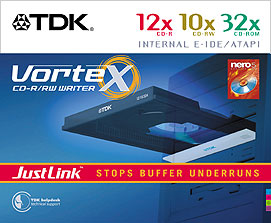 The
package supplied was the retail Europe version and included: The drive itself,
an operation manual, a quick installation guide, an emergency eject tool, 1
CD-R 74min blank, 1 High Speed RW Blank, Audio cables, an IDE cable, mounting
screws and a very useful CD-R pen. The software supplied was Nero Burning ROM
v5.0.3.0, Ahead InCD v1.8 (for packet writing use) and TDK Digital MixMaster
v3.5.
TDK Digital MixMaster is an all around solution, which contains:
-Audio player supporting Wav, Audio CDs, MP3 and VQF files
-Built-in audio equalizer
-Ripping of AudioCDs to WAV files and direct burn to CD capability. Direct conversion
of MP3, VQF audio files to WAV files and straight CD burning.
-CD-to-CD copy for both data and Audio CDs.
-Recording from analog sources capability.
-CD cover editing.
Let's take a look at the drive itself. At first look you see a typically coloured drive, except from the tray's front door, which fades to silver-grey. The TDK logo is placed in the middle, as usually. You will also see a led, the eject button and the headphone input jack/volume selector. TDK surprises the beginner user as he presses the eject button: The front of the tray is not what he sees but it comes out straight ahead, totally black and slightly see-through, after bending down the outer silver-grey door. The real tray has a white TDK and a 12/10/32A logo on its front. Here is how the drive looks at first sight:

At the back of the drive we will find the usual connectors (IDE interface, power), the jumpers for setting the drive to Master/Slave option, the analogue and the digital audio output connectors and 3 jumpers which are not used (factory reserved).

Installation:
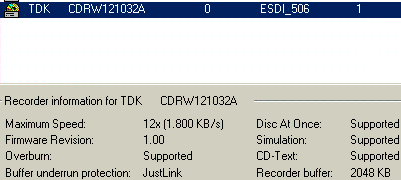 ATAPI
CDR-W drives are simple to install. Just decide what the drive should be, master
or slave, set the appropriate jumper and start! After booting, the CDR-W identified
itself as the "TDK CDRW121032A". We unchecked the Auto Insert notification,
checked DMA and rebooted. The drive was a March 2001 model with firmware revision
v1.00. For most of our tests we used the latest Nero v5.5.1.1 among with Ahead
InCD v2.11.
Test Machine:
WinMe OS
Soyo 7VCA
Celeron II 566 over clocked to 850 MHz
128MB SDRAM PC 133
WD 18GB UDMA 66
Quantum Fireball EX 6.4 GB UDMA 33
DAWI 2975 - PCI (ULTRA) SCSI Host Adapter
ATI AIW 128
PlexWriter PX-W1210A firmware v1.07 (TLA#000)
Ricoh MP7125A firmware v1.00
Acer 1208 firmware v9.GB
TDK Vortex 121032 firmware v1.00
Review Pages

