BenQ DC C-50
4. Operation and Controls
Review Pages
Operation and Controls
Despite the manual shooting modes and advanced settings available, the BenQ DC C-50 is rather easy to control, sporting proven controls layout found on many digital compacts.
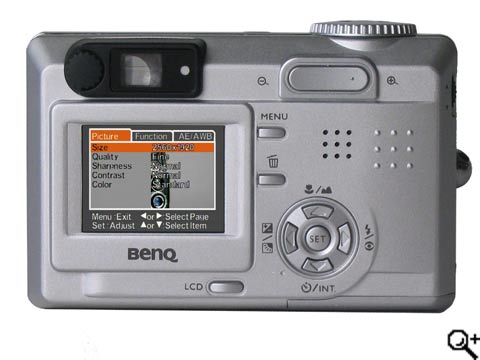
| Rear camera controls | |
| Most of the control buttons are located on the camera's back as on most models. Though the multiple options and icons may intimidate the novice, actual operation is pretty simple. Even advanced settings have dedicated buttons and are easy to access in both record and play modes, with the cross oriented buttons and the center "SET" button. The latter, when pressed brings up an instant view of the last shot recorded. The control dial at the upper right acts also as a selection button when pushed, so controlling multiple exposure settings is relatively easy and quick when mastered. A major drawback however is its small size, which is suitable only for people with small hands. The zoom control button is easy to access and has a positive feel. | |
| Top camera controls | |
| On the top of the camera are located its power button, which is recessed to prevent accidental power ons and offs. The large mode dial on the right of the camera and of course the shutter release button, which has a very good feel, making it easy to distinguish between half and full presses. | |
Display and Menus
| Record Mode | |
 |
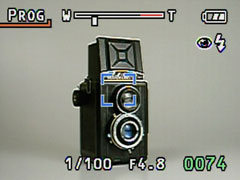 |
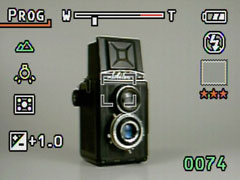
| This is a typical Record Mode scene with the camera displaying information on almost any setting available for the current shooting mode. Most of these information icons can be switched off. | By half pressing the shutter button, the camera calculates exposure and focuses on the center of the frame. When focus is achieved, the center rectangle changes to blue.
Additional information disappears from the screen.
|
 |
 |
| In case AF could not be achieved, the center rectangle changes to yellow. Notice that the camera informs you of the possibility of camera shake in low shutter speeds relative to the focal length currently selected. | Controlling
flash and focus modes is easy, and all changes apply instantly by pressing
the dedicated camera back buttons. Choosing flash mode, or switching
between macro, or manual focus presets is as simple as pressing a
button. |
 |
 |
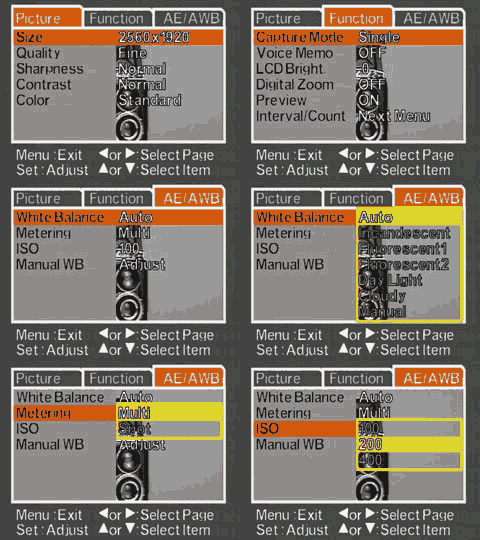
| Pressing the MENU button in record mode brings out this screen and browsing between the available settings is a no-brainer. All the aspects of the image taken, besides exposure, can be adjusted here. | The exposure compensation is also easy to select, just by pressing the dedicated "left" control button in the camera's back and rolling the control dial to adjust. |
| Play Mode | |
 |
 |
| The typical play mode screen displays nothing but the serial number of the image. | Pressing the LCD button brings out information on the exposure settings and the file size of the current image. |
 |
 |
| By pressing the zoom in button in the upper right corner, the image viewed can be magnified up to 4 times. Scrolling through the image's areas is possible with the directional cross oriented buttons. | Pressing the DELETE button symbolized by the trash can brings out this menu which allows you to delete the current image, select multiple images to delete at once or erase all of them instantly. |
 |
 |
| By pressing the zoom-out button while in play mode, the screen displays a 3 by 3 thumbnail view. Browsing through all of the images is possible with the directional keys, and the SET or zoom-in button brings the highlighted image to full view. | Choosing SET on the main mode dial brings up these screens for adjusting time and date, auto power off interval, menu language, changing between PAL or NTSC etc. |
Review Pages

