Noctua NH-U9B SE2 review
2. A closer look, installation
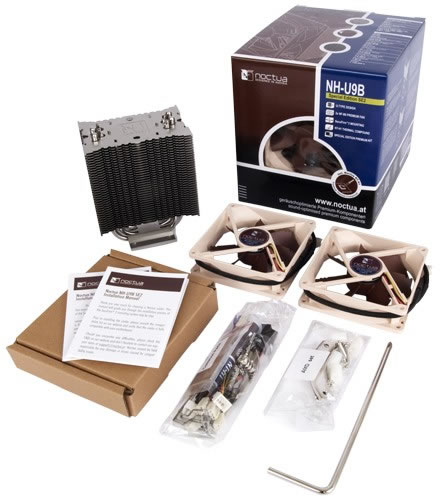
Let's have a look to the retail package of the Noctua NH-U9B SE2. Designed mainly for HTPCs, the size of the main unit is small despite the dual fans that should be installed in a push-pull configuration in order to achieve better cooling efficiency. The product retails for a relatively affordable price for a Noctua-branded cooler, at about $55.
There is not much we can say about the packaging since it follows Noctua's typical design with the semi-transparent window on the front and the basic features of the heatsink listed there:


The Noctua NH-U9B SE2 measures 125x956x71 (H x W X D) and weighs 460 grams. Adding the two 92mm fans will give you a total 640gr, a low weight if you consider that most cpu cooler nowadays weigh about 1~1.2kg.
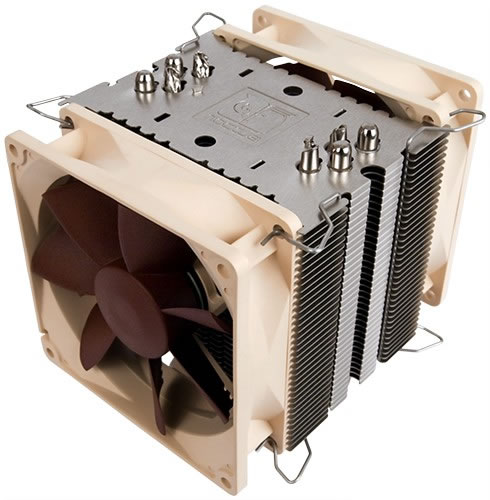
Noctua followed a typical design for the main heatsink with four U-Shaped full copper, nickel-plated heatpipes connecting the base with the aluminum fins:


The heatsink's base looks perfect made of nickel-plated copper. The bottom-surface of the cooler is optimized for the use with high-viscosity thermal compounds. As a result, we have to don't have to do with a mirror like surface.
For the installation, you should manually add the four screws in the corresponding holes found around the base:

Below you can see how the heatsink looks like after mounting the two fans in push-pull mode using the available clips. Noctua's NF-B9 92mm fans with Low-Noise and Ultra-Low-Noise-Adaptors offer flexibility in fine-tuning the cooler for quietness and maximum performance . The fans' speed can reach the 1600 R.P.M.:

The installation of the NH-U9B SE2 is easy. The cooler uses Noctua's SecuFirm2 multi-socket mounting system
for all the LGA1366, LGA1156, LGA775, AM2, AM2+ and AM3 systems. We have described the procedure several times in the past when we reviewed Noctua products. Reading the manual will give you a step-by-step guidance for the installation, which is straightforward.

What we should note here is that before installing the heatsink, make sure to secure the two "wings" on the cooler's base first as you can see in the following picture:

The cooler is ready for use installed on our test motherboard. As you can see, it is compact enough and does not interfere with r nearby components such as memory modules:


