Thermaltake Bigwater 760i
4. Installation
Review Pages
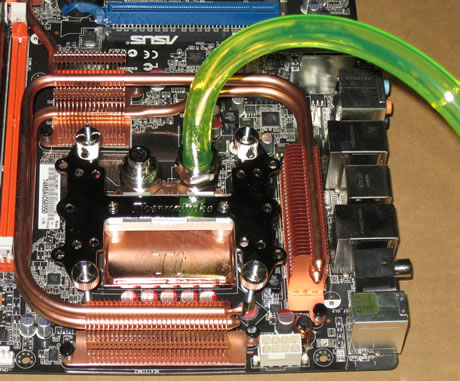
Thermaltake has placed a webpage with installation instructions and how the whole system works. We will try and give you with pictures the major steps. First you need to secure the waterblock on the motherboard. Place the metal H-type clip, cushion and insulator together below the motherboard. Use the four silver (for Socket 775 in our case) 5cm screws, don't forget the white/red washers

and use the stands offs to secure the whole structure to the motherboard.

Next step is to carefully install the waterblock and by using the thumb nuts to secure the whole thing:

Then unscrew the nut of the waterblock, insert a tube through the nut of waterblock and tighten the nut on the waterblock, you must get something like this...Do the same for the other nut and cut the tube at the appropriate length according to your case. Finally use the hose clips and female quick connector through the tube and by using pliers tighten the hose clips. It's necessary to make the properly tighten all parts to prevent water leakage.
The installation of the 2U Bay water cooling system needs two empty 5.25 bays. For our tests we used Thermaltake's Soprano case. Thermaltake suggests having the 2U bay system above the CPU level . The refill is an easy task with the included box. After connecting all the cables, make sure to power up and check the coolant level, it will drop as it starts to flow around the pump and tubes. Continue to fill the reservoir tank until it's above the low level. Secure the cap and that's all. There will be air bubbles around the tube, don't worry though, just leave the system working for at least 20 minutes and gently bend the tubes until all the air bubbles are removed from the tubes, this is an essential step. If things are getting rather difficult, tilt the chassis at an angle of 45� to the left and then to the right. This will help the air move through the system. Remember to refill the reservoir as the air is pushed out.

When everything has finished, you will notice that the 2U water cooling system is about 5cm (2") longer than a standard optical drive. Now if there isn't enough empty space between the motherboard and the 2U water cooling bay the installation may not be possible. The black tubes can be easily replaced with the included UV sensitive water tube. The fan on the top glows blue, but I guess you can easily remove it and add something else if you prefer other colors. The speed control knob included it's obviously placed in the wrong place, since it's almost very hard to use it with so many cables at the back. We assume that Thermaltake could have placed it at the front for easy access. The un installation procedure is almost the same, Thermaltake has an installation/un installation video in their webpage that you should check before doing anything.

Review Pages


