Nero Express
2. Page 1
NERO EXPRESS - Page 2
DATA BURNING
The choices for Data burning are two, to create a data disc and a data and audio CD. (CD-Extra).
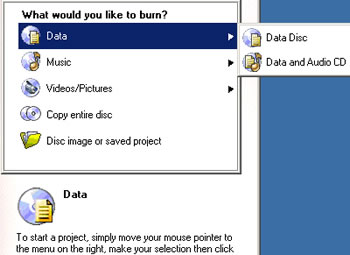
We choose Data Disc and proceed to the second window in order to add the compilation files.

The "More" button on the bottom of the window allows user to make date and time settings for his new CD.

If you choose to burn a Data and Audio disc, you are firstly requested to add the data contents with the usual add window or with drag & drop from Windows Explorer, and then you can add the audio files.

In the audio files window, there are two more choices on the right, the "normalize audio files" and the "No pause between tracks" options. Also. In the "More" button there is a language selection list box and of course a picture button, which allows you too add any pictures on the CD-Extra.

Our CD is ready for burning. The next window has the final burn settings. You can choose the recorder, the writing speed, and the number of copies. Options such as Multisession and data verification after burning are there and the "More" button allows you choose the write mode (DAO or TAO), simulation or straight writing process. You can also let the software to determine the maximum writing speed by checking the appropriate box in the same tab.

After a successful burning, you can ask the program to save a detailed log file about your PC configuration and of course the burning details of the process. You can also print these details easily with the "print" button:

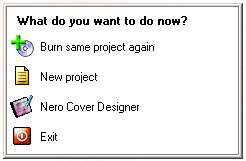 If
you press the next button, you see the following picture that asks you how you
want to continue, with a new or an existing project, or even to exit the application.
The final version of Nero Express will also incorporate the bootable CD creation option.

