Teac HD 15OT & HD-15 PUK A
2. Installation - Software
Review Pages
2. Installation - Software
3. HD Tach
4. WinBench 99
5. Performance Test v5.0
6. SiSoft Sandra 2005
7. Conclusion
Installation - Software
Installation
Both the HD 15OT and the HD-15 PUK A come with a hard disk already installed. The capacity depends on your choice from 40, 60, 80 and 100 GB as we stated in the introduction. In our case, we received an 80GB HDD installed in the HD 15OT and a 60 GB HDD in the HD-15 PUK A.
 |
| TEAC HD 15OT... |
 |
| HD-15 PUK A |
 |
 |
 |
| Mini USB connection on one end of the USB cable plugs into the TEAC device |
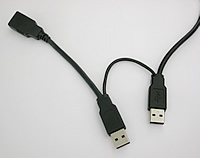 |
| USB A-A/MF and USB A on the other end of the cable connect to the PC |
You'll need to connect both USB A jacks to your PC in order for the devices to operate correctly since one jack cannot supply enough current to power the HDD. Alternatively, you can connect an external power adaptor.
As soon as you connect the USB cable to your PC system, the HD 15OT will be identified and any driver installation is handled automatically. If your operating system is Windows 98/98SE, you'll have to use the installation CD and follow the instructions in the included manual. If you are a Windows 98/98SE user, make sure you format the disk using FAT32 before you use it, since it is preformatted with NTFS which is not compatible with Windows 98/98SE.
In Device Manager, the TEAC HD 15OT is listed as FUJITSU MHT2080AT, while the HD-15 PUK A as FUJITSU MHV2060AT.
 |
| TEAC HD 15OT... |
 |
| HD-15 PUK A... |
In the event that the installation completed successfully but you cannot see the HD under "My Computer" or Windows Explorer, you'll have to do the following (Windows XP/2000):
Right click on "My Computer", and select Manage...

On the left hand side pane, select "Disk Management" and right click on the new device...
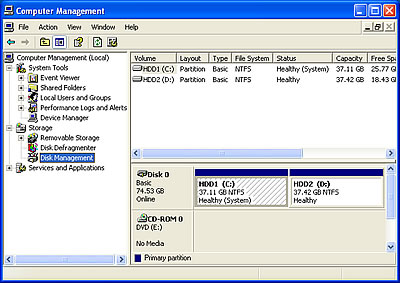
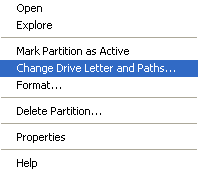
...select the "Mark Partition as Active" if it is not already active and then select "Change Drive Letter and Paths". Give the device a letter and follow the instructions to complete the task.
In order to use the "One Touch Button" function, which is available only on the HD 15OT, you'll have to install the appropriate, included software from the installation CD.
If you have Autorun enabled for your drive, then the following window will popup as soon as you insert the installation CD.
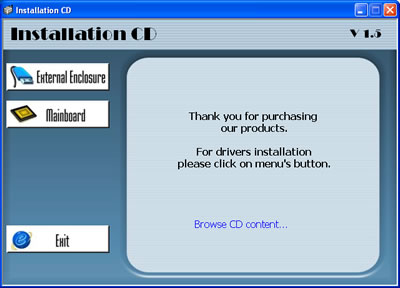
If Autorun is disabled, then use Windows Explorer to open the CD.

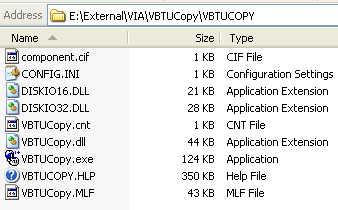
Go to the following folder and run VBTUCopy.exe.
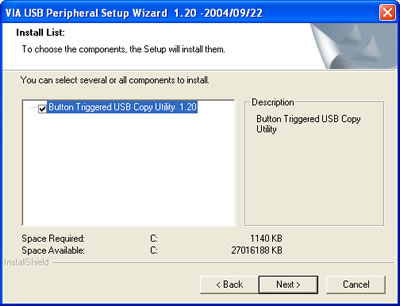
Follow the on-screen instructions in order to install the "Button Triggered USB Copy Utility".
Software
From the Start Menu, locate the program and run it.
![]()
This is what you'll see as soon as you open VBTUCopy. All HDs are listed and in our case, we had a Western Digital HDD with the OS and the TEAC listed as the FUJITSU MHT2080AT which is the ID of the hard disk in the TEAC device.

If you click on the plus to the left of the HD's name, you can read some further details about the particular disk. Click the Task button...

You need to add at least one "task" in order to be able to use the "One Touch Button" function. Click on the "Add" button...

Browse to the source directory where your data is stored and select it. This will be the folder that will be copied every time you press the "One Touch Button" on the HD 15OT. Next browse to the destination directory which in our case (see screen shot below), is the root directory of the HD 15OT. This is where the files will be backed up.

You can add more tasks. This will be necessary if you need to back up several directories. With all tasks defined, each time you press the "One Touch Button" on the HD 15OT, the specified directories will be backed up onto the HD 15OT.
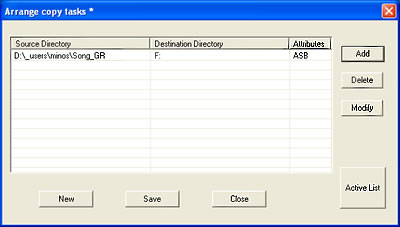
We pressed the button on our HD 15OT and the file transfer procedure started.

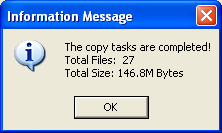
As soon as the process finishes, you will get a message which will inform you of how many files were transferred as well as the total size.
Review Pages
2. Installation - Software
3. HD Tach
4. WinBench 99
5. Performance Test v5.0
6. SiSoft Sandra 2005
7. Conclusion


