Thermaltake Element V Case review
2. Opening the package
Review Pages
The Thermaltake Element V is a full-tower case and as such, it retails in a huge box . The retail cost is around $170 depending your region and included taxes. The case's great design appears on the front side of the retail package:

Inside the box, the Thermaltake Element V is well-packaged and kept in place with two compact Styrofoam spacers. The package also includes a manual, a warranty card and several other useful tools and accessories, including many screws enough to install up to 11 devices into the case:

Here is what you will find in the package in detail:

The full black-colored case is made out of solid steel, which means it is rugged but heavy as well. According to its specifications, the Thermaltake Element V weighs14.13kg without any components installed. This means that the total weight of the ready-to-use PC could easily reach the 20kg. Regarding its size, the case is conveniently sized at 532 (H) x 220 (W) x 537(L) mm - large enough to cover your needs.
The manual also mentions that the the total height of the cpu cooler that you will use shouldn't be more than 155mm, while the height and the length for your graphics cards should be less than 335mm. These limits should not be a problem for you. For example, the Nvidia GTX 480 measures 267mm, while the ATI HD 5970 holds probably the record with a length of 309mm. That means you can easily add even the longest graphics cards to your Thermaltake Element V case.

As you can see in the picture below, the Thermaltake Element V has many fans! At the top we will find a 200mm fan installed and there is also an option to install a second one! At the left side panel there is a 230mm intake fan. The front side includes two 120mm intake fans, and an additional a single 120mm is placed at the rear side to blow out hot air from the case.
If that isn't enough, Thermaltake is also offering the option to add two additional 50mm exhaust fans at the rear side:

Our initial thought was that the case would sound like a factory with all these fans spinning. However, we could barely hear noise coming out of the box. And even if this noise is still annoying to your ears, the fan speed controller found on the top panel is available to adjust the RPM of the fans and the produced noise:


Below you see an internal view of the rear and top fans:

Here are the front 120mm intake fans:

Let's have a closer look to the top fan controller. As you see in the picture below, there are many things going on here. Besides the speed control knob, there are four (4) USB2.0 ports, an e-SATA port, power/HDD LEDs, mic/headphone jacks and reset/power buttons. The fan speed controller also adjusts the color of the backlit fans:

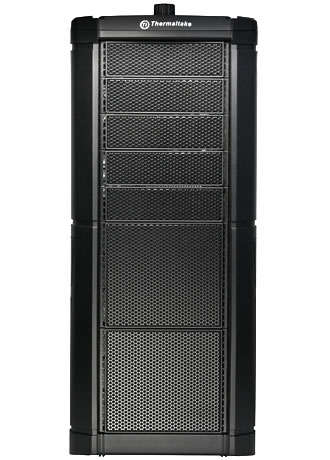
The design of the front panel quite simple.You can easily remove it from the case by pushing it at the bottom side.The front panel is is made out of plastic, meaning that you should handle it with case in case you need to remove it:


Below you see the rear side of the case. The power supply is placed at the bottom and the side panels are kept in place with thumb screws for easy handling and maintenance.

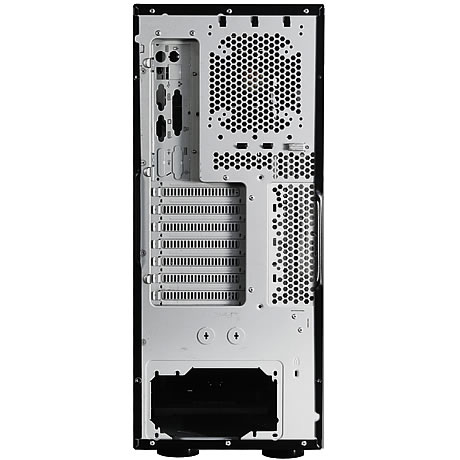
A lock is also available at the bottom right side of the rear panel:

Two holes are also available in case you need to install a liquid cooling set. The case supports 1/2" , 3/8" , 1/4" water tubes:

The left panel can be easily removed by just pushing the two sliders to the right. The installed 230mm fan is powered by a special cable and a connector designed to plug itself as soon as you close the case. So as soon as you close the left panel, the fan powers up.


Even the bottom side of the case has been specially designed to free the hot air produced around the area of the installed power supply unit:

Review Pages


