Thermaltake Max4
2. Closer Look - Installation
In this page we will take a closer look at Max4 5.25 enclosure while we will describe a little the installation procedure. The Max4 enclosure's dimensions are 270x175x55mm and weighs 1258g, making it easy to use. On top of that, the standing foot provided with the Max4 enclosure, rendering the placement of the external case to either horizontal or vertical pose.
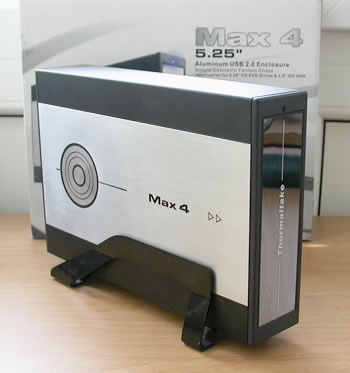 |
| The Max4 retail package contains a standing foot for vertical or horizontal orientation. |
The front panel comes with a reflect enabled Black Mirror Coating, which comes off when a DVD-ROM is installed to allow the tray to open and close freely.
 |
| Notice the retail package reflected on the front panel coating... |
In the back of the case, we clearly note the power switch, the power input and USB cable input.
 |
| the air holes help in heat dissipation.. |
In order to install any device on to the Max4 we have to firstly remove the back panel. There are two screws that have to be removed.
 |
| we used an electrical screw driver to get the work done... |
Having un-screwed the case, we found the main chipset used by the Max4 mechanism. The PCBA Chip is the Cypress AT2+ model, the same chipset used in the Muse enclosure series and the Max4 2.5 & 3.5 cases.
 |
| the Cypress AT+2 chipset... |
The interface used by the Max4 5.25 enclosure is an IDE to USB2.0, which means that the enclosure is connected via the USB2.0 port in the PC while it uses an 80pin IDE cable to connect the installed device, which can be a CD/DVD drive or even an 3.5" Hard Disk.
 |
| the IDE cable that hooks on the installed device... |
After unscrewing the back panel, we remove the enclosure cover in order to install the desired device.
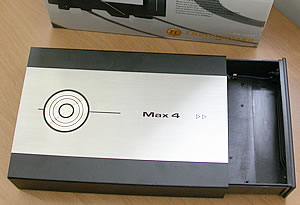 |
| The installation procedure does not differ at any point from the normal IDE device installation.. |
As the Max4 can host both a DVD-ROM device (DVD-RW, CD-ROM etc.) and a HDD drive alike, we put both devices inside for installation procedure and testing purposes. Note that the screwing of the devices in the case, is mandatory in order to secure the stability of the inserted device. For our tests we used a DVD burner from LG, the GSA-4163B model, and a Hard disk drive by Western Digital.
 |
| We removed the front mirror coating panel to free the tray... |
Make sure you properly installed the IDE and the power cables onto the device, the drive or the HD, as below.
 |
| Same procedure as with the drive... |
Normally every DVD drive has screw holes at its bottom. In order to place the drive onto the Max4 there are four screws we have to take care of. The green marks in the following screenshots indicate where the DVD drive should be placed on.

 |
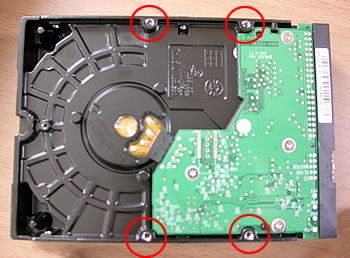
| Red marks indicate the mounting points of the HDD drive while the green marks indicate the mounting points for the DVD-RW drive. |
Much like the DVD drive, the HDD device is screwed on the bottom panel. The red marks indicates the screw points...
Last step was to screw the device on the bottom plate and put the cover back on the enclosure and the procedure was completed.

The Max4 5.25'' enclosure was ready to be put to testing. For testing the potentials of the Tt enclosure we used two benchmarks; the SiSoftware Sandra and the Passmark Performance Test.

Now lets move to the next page of this review and to the testing of the Max4 with both an HDD and DVD-RW devices.


