Thermaltake Swing VB6000BWS
5. Installation
Review Pages
Installation is rather simple, as with most PC cases, so we will only cover the important parts here.
After screwing the motherboard in the Swing case and having put the Power Supply in place, we go off to the HDD drives.
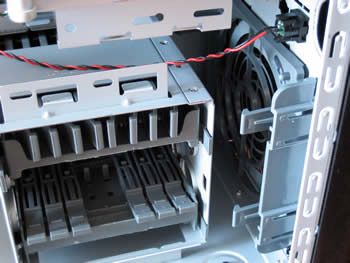 |
| The HDD slots and the sliding rail devices... |
Again, the installation of the HDD drives is tooless, and all that is needed is the installation of the plastic holdings to the HDD drives in order to slide the railings into the HDD slots. As one can see in the above picture, the plastic holdings are by default located in the HDD installation area, which must be removed and put on the drives.
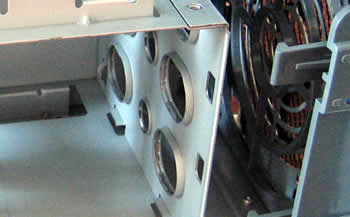 |
| the holes in the module might limit the airflow... |
One minor drawback the user should pay attention to are the fan holdings at the front side of the panel, having to do with ventilation. The HDD loading module does not have large enough "holes" on it, so the airflow might be somehow limited.
Other than that, the rest of the installation is simple and not at all time consuming, as the procedure is an entirely tooless one. As discussed earlier in this review, the HDD orientation is perfect (in space management terms) and will help a lot with SLI enabled motherboards and of course SLI graphic card owners.
 |
| Two SLI cards will fit right in, without any cable problems... |
After all the necessary parts have been assembled, we turn the PC on and take a look at the results.
 |
| Nice blue like view of the inner part of the Case.. clicking on this image will get you to a larger version of it... |
Well, that's about it. We managed to assemble the PC in less than an hour, all parts included, and we had it up and working in no time. A really enjoyable task since the tooless philosophy is followed with almost all parts of this case.
During the installation process we used the following parts:
ASUS A8N SLI Premium
Thermaltake PureStation 520W PSU
AOpen 7800GTX (x2)
Corsair XMS TwinX 1024-3200XL RAM
AMD 3800+
Thermalright XP90c
WD800JD 80GB 7200RPM
Review Pages


