Akaso Brave 7 Action Camera
4. The Device
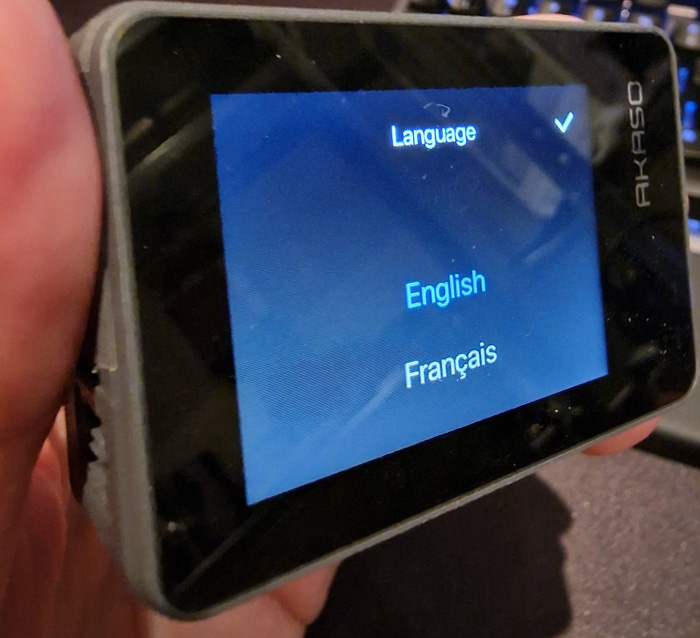
After the firmware upgrade let's see what this device looks like its menu, To Power On, Press and hold the Power button for 3 seconds. The camera beeps while the camera status light is on. When information appears on the display, your camera is on. To Power Off, Press and hold the Power button for 3 seconds. The camera beeps while the camera status light is off. First, you are welcome to select your language, it supports English/Deutsch/Español/Français/Italiano/简体中文/繁體中文/日本語.
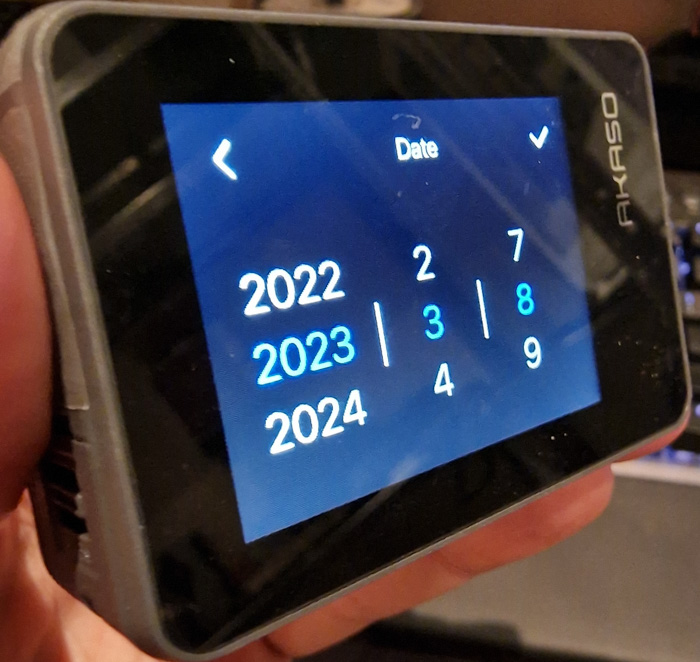
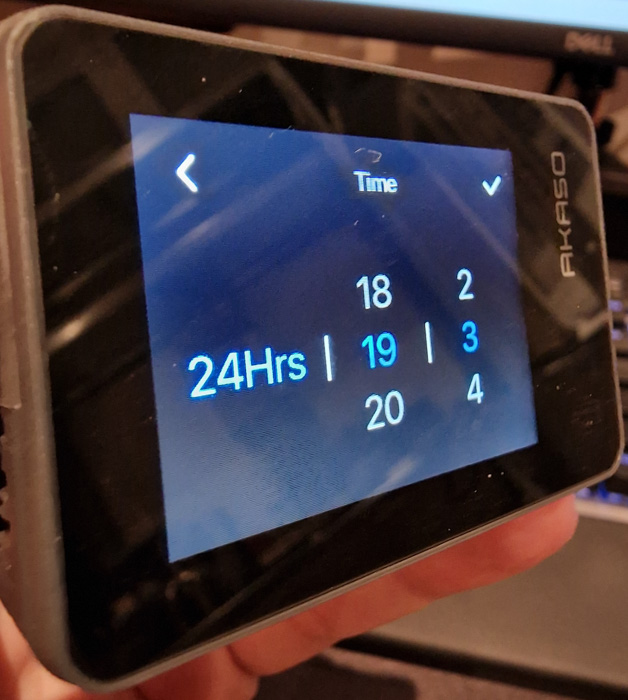
Then you can set the date and time
And then the system will show the various functions of the device.
Swipe down to Open Quick Menu
You can quickly lock your screen or power off your camera on the quick menu.
Press the Shutter button to unlock your screen.
Lock
Swipe up to Open Mode Settings
You can quickly adjust the resolution, EIS and other settings on this shortcut menu.
Swipe your finger across the screen to scroll through the options.
Tap the Current Shooting Mode Area
You can enter the video or photo shortcut menu and switch to different shooting
modes by tapping the mode icon.
Switch Between Front Screen and Touch Screen
Press and hold the Down button to switch between the front screen and the
touchscreen camera view. You can switch between the screens while the video
is recording.
Turning On and Off Wifi
Turn on the camera, press and hold the Up button to turn on Wifi . The Wifi name and password will appear on the screen. Press the Up button again in to turn off Wifi.
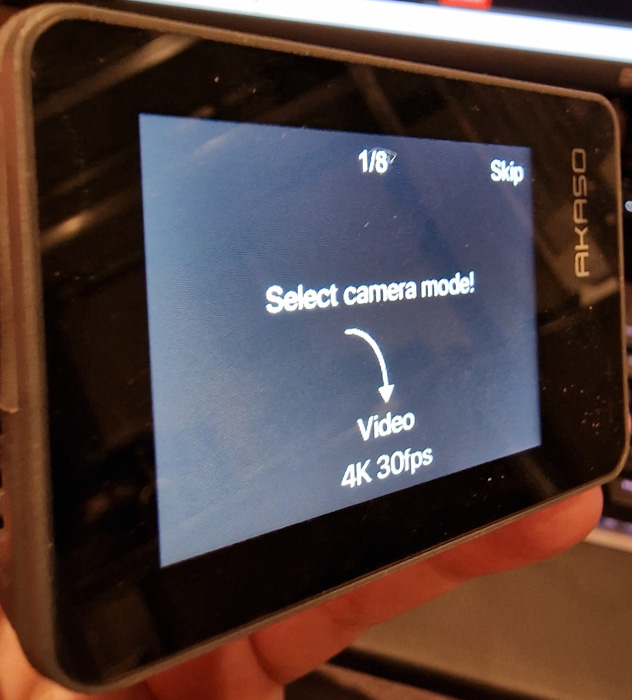
In short, there are swipes up/down/left and right that set various functions. There is also the bottom right setting button.

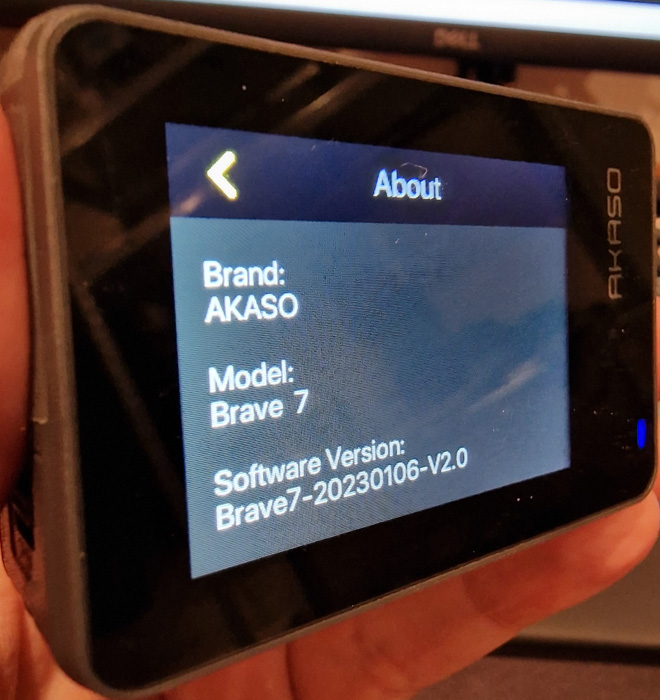
At the settings, users can also view the software version of the device
The menu has two different sections, Video, and Photo with corresponding functions for users to select.
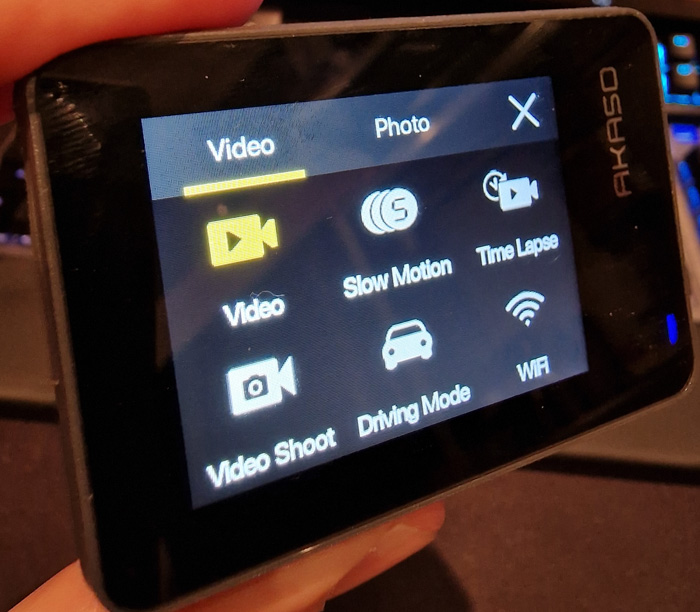
Video Mode is the default mode when you turn on the camera. In Video Mode, press the Shutter button, the camera starts recording a video. Press the Shutter button again to stop recording the video. Press Up or Down button to adjust the zoom level.
Slow Motion
In Slow Motion Video mode, press the Shutter button, the camera records a slow
motion video.
Time Lapse
In Time Lapse Video mode, press the Shutter button, the camera records videos from
frames captured at specific intervals. This allows the action to progress much
faster than in reality. Time Lapse Video is captured without audio.
Still Photo
In Still Photo mode, press the Shutter button, the camera records videos and takes
still photos at specific intervals.
Driving Mode
If you turn on Driving Mode and connect the camera with a car cigarette lighter, the
camera will turn on automatically to record videos if you start your car and will turn
off if you stop your car.
The photo menu includes more and different functions.
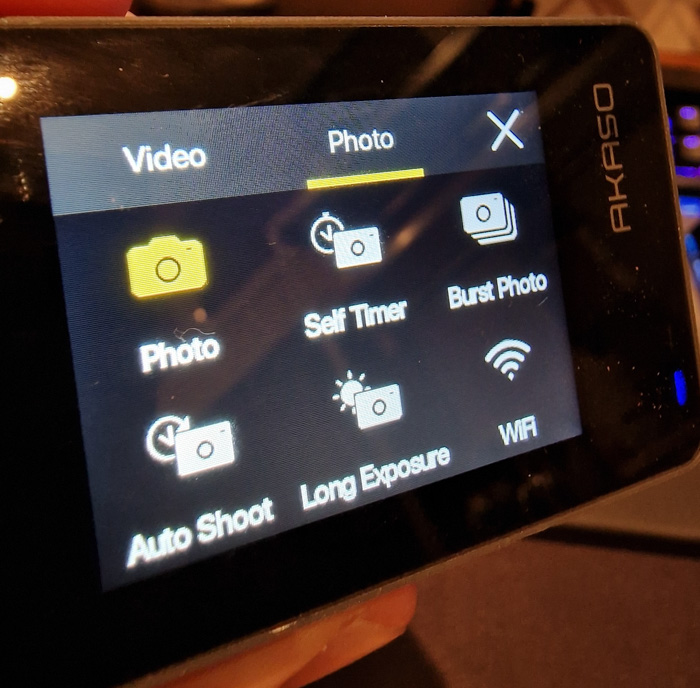
Users can use the Wi-Fi tongle to set communication with smartphones and if you have downloaded Akasa Go you can control the device or edit your videos/photos and post them at social media.
Photo
In Photo Mode, press the Shutter button to take photos.
Self-Timer
Self-Time Mode gives a delay between pressing the shutter release and the shutter's
firing.
Burst Photo
In burst mode, several photographs are captured in quick succession, so it is perfect
for capturing fast-moving activities.
Time Lapse Photo
Time Lapse Photo captures a series of photos at specified intervals. Use this mode
to capture photos of any activity, then choose the best ones later.
Long Exposure
Long exposure means using a long-duration shutter speed to sharply capture the
stationary elements of images while blurring, smearing, or obscuring the moving
elements.
Getting into the settings area you will find several options either for Video/photo as follows
1. Resolution: 4K30/2.7K30/1080P60/1080P30/720P120/720P60/720P30, default setting is 4K30. When capturing video at high resolutions or high frame rates in warm ambient temperatures, the camera may become warm and use more power.
2. Image Stabilization: Off/On, default setting is Off. This setting adjusts the footage to offset for motion during capture. The result is smoother footage, especially in activities with relatively small but fast motion including cycling, motorcycling, and handheld uses.
3. Video Encode: H.264/H.265, default setting is H.264. Video encode is basically a process of converting a given video input into a digital format that is compatible with most types of Web players and mobile devices.
4. Loop Recording Time: Off/3 Min/5 Min/6 Min, default setting is Off.
Loop recording allows your camera to overwrite old files with new files. Once the
memory card becomes full, the camera will delete the first video file to make room
for the latest file. For example, if the setting for loop recording is “1 Minute”, then the
camera will create video clips of 1 minute in length, and a 1-minute clip will be
deleted when the camera needs more memory.
5. Slow Motion: 1080P90/1080P60/720P120/720P60, default setting is 1080P90. Slow motion is an effect in film-making whereby time appears to be slowed down.
6. Time Lapse Interval: 0.2 Sec/0.3 Sec/0.5 Sec/1 Sec/2 Sec/5 Sec/10 Sec/30 Sec/1 Min, default setting is 0.5 Sec. Time lapse interval is the time that passes between two shots in a time-lapse sequence.
7. Time Lapse Duration: Close/5 Min/10 Min/15 Min/20 Min/30 Min/60 Min, dDefault setting is Close.
8. Still Photo: 4K30, Default setting is 4K30.
9. Still Photo Time: 3 Sec/5 Sec/10 Sec/30 Sec, dDefault setting is 3 Sec. The camera automatically takes photos at a specific time during video recording.
10. Audio Record: On/Off, default setting is On.
11. Exposure Value: -2/-1/0/+1/+2, default setting is 0. EV (Exposure Value) is just to measure any change of exposure. This setting is particularly useful in shots where an important region might otherwise be over- or underexposed.
12. White Balance: Auto/Tungsten/Fluorescent/Daylight/Cloudy/Dawn, default setting is Auto. White Balance lets you adjust the color temperature of videos and photos to optimize for cool or warm lighting conditions.
13. Meter: Center/Average/Spot, default setting is Average. The metering mode refers to the way in which a camera determines exposure.
14. Scene: Auto/Riding/Snow View/Night Scene, Default setting is Auto.
15. Filter: Natural/Black&White/Sepia/Retro/Gorgeous/Warm/Code/Red/Green/Blue, default setting is Natural.
Photo Settings
1. Resolution: 20M/16M/12M/10M/8M/5M, default setting is 20M.
2. Self-Timer: 1 Sec/3 Sec/5 Sec/10 Sec/30 Sec, default setting is 3 Sec.
3. Time Lapse Interval: 3 Sec/5 Sec/10 Sec/30 Sec/1 Min, default setting is 3 Sec.
Time lapse interval is the time that passes between two shots in a time-lapse
sequence.
4. Time Lapse Duration: Close/5 Min/10 Min/15 Min/20 Min/30 Min/60 Min, default setting is Close.
5. Burst Photo: 12M/10M/8M/5M/3M/, default setting is 12M.
6. Burst Photo Type: 3 shots/5 shots/10 shots/15 shots per second, you can adjust the number of burst photos taken per second.
7. Scene: Auto/Light Painting, default setting is Auto.
8. Output Format: JPEG/JPEG+DNG, default setting is JPEG.
9. Exposure Value: -2/-1/0/+1/+2, default setting is 0.
EV (Exposure Value) is just to measure any change of exposure. This setting is
particularly useful in shots where an important region might otherwise be over- or
underexposed.
10. Exposure Time: Off/2 Sec/5 Sec/10 Sec/30 Sec/60 Sec, default setting is Off.
11. White Balance: Auto/Tungsten/Fluorescent/Daylight/Cloudy/Dawn, default setting is Auto.
White Balance lets you adjust the color temperature of videos and photos to
optimize for cool or warm lighting conditions.
12. Meter: Center/Average/Spot, default setting is Average.
The metering mode refers to the way in which a camera determines exposure.
13. Sharpness: Strong/Normal/Soft, default setting is Normal.
14. Filter: Natural/Black & White/Sepia/Retro/Gorgeous/Warm/Code/Red/Green/Blue, default setting is Natural.
15. Photo Quality: Fine/Normal/Economy, default setting is Fine.
System Settings
1. Voice Control: On/Off, default setting is Off.
When you turn on the Voice Control, the Voice Control icon will appear on the screen.
| Voice Commands | Descriptions |
| AKASO Power Off | Camera shuts down. |
| AKASO Video Start | Camera starts recording video |
| AKASO Stop Video | Camera stops recording video |
| AKASO Take Photo | Camera takes a single photo |
| AKASO Wifi On | Turn on Wifi |
| AKASO Turn Off Wifi | Turn off Wifi |
Note:
1. If you are recording a video, you must stop recording before issuing a new
command.
2. When controlling the action camera using voice commands,
• Please speak at a normal speed. No need to deliberately slow down.
• Please put stress at the end of the sentence.
2. Sounds: Volume/Key Tone/Touch Tone/Boot Tone, you can turn on or off these sound effects and adjust the volume of the camera in
this setting.
3. Distortion Calibration: On/Off, default setting is Off. Turn on Distortion Calibration, it can correct the image distortion.
4. Angle: 170°/140°/110°/70°, default setting is 170°.
The angle refers to how much of the scene (measured in degrees) can be captured
through the camera lens. 170° angle captures the largest amount of the scene,
while 70° angle captures the least.
5. Diving Mode: On/Off, default setting is Off. Turn on Diving Mode, it can compensate for the lack of red light in underwater
scenes. Diving Mode is designed to be used in tropical and blue water, optimized for
use between 10 and 80 feet.
6. Remote Control: On/Off, default setting is Off.
Turn on this setting on the camera, then turn on the included remote, you can
control the camera using the remote.
7. Wind Noise Reduction: On/Off, default setting is off.
Turn on Wind Noise Reduction, it can lower the noise to an acceptable level.
8. Auto Low Light: On/Off,
Default setting is Off. Auto Low Light mode will automatically adjust settings according to lighting
conditions to achieve the best low light performance. Even if you move back and
forth between bright and dark environments, you do not need to manually adjust
the camera settings.
9. ISO: Auto/200/400/800/1600/3200, default setting is Auto.
ISO determines the camera’s sensitivity to light, and creates a trade-off between
brightness and resulting image noise. Image noise refers to the degree of graininess
in the image. In low light, higher ISO values result in brighter images, but with greater
image noise. Lower values result in lower image noise, but darker images.
10. WDR: On/Off,default setting is Off.
11. Language: English/Deutsch/Français/Español/Italiano/日本語/简体中文/繁體中文
12. Date Format: YYYY/MM/DD
13. Set Date: you can set the date of the camera.
14. Set Time: you can set the time of the camera.
15. Date Stamp: Off/Date & Time/Date,
Default setting is Date & Time.
Turn on Date Stamp, this camera adds a date stamp to the videos and photos you
take.
16. Screen Saver: Off/1 Min/3 Min/5 Min, default setting is 1 Min.
Screen saver helps to turn off the display after a period of inactivity to save battery
life. To turn on the display again, press any button or tap the screen on the camera.
17. Auto Power Off: 1 Min/3 Min/ 5 Min/10 Min, default setting is 1 Min.
The camera will power off after a period of inactivity to save battery life.
18. Power Frequency: 50Hz/60Hz, default setting is 60Hz.
19. Format Card: Cancel/Confirm,
To keep your memory card in good condition, reformat it on a regular basis.
Reformatting erases all of your content, so be sure to offload your photos and
videos first.
20. Reset: Cancel/Confirm,
This option resets all settings to their default values.
21. SD Card Capacity: You can check the card capacity and remaining space of your
memory card.
22. About: You can check the model and software version of your camera.


