EnGenius ECS2512FP Network Switch
3. Features
Before starting the installation process for any EnGenius product, you need to create a free online account. You can login either with new account or use Google/Facebook or E Partner login credentials. After we finished our EnGenius Cloud account, we then head over to the Google Play store and got the Cloud-To-Go free app. You need to use your already EnGenius Cloud account password/login in order to access the app features. After pressing Register Device you should scan the QR code that is under the device to get things started.
The device recognized immediately and after pressing register, the device will connect to the Internet and register itself at your Cloud network. So we added our first EnGenius Cloud device at our personal network. After few minutes the device will get the latest stable firmware, reboot and will be ready to get things started.
In order to access the device menu you can either type its IP through Chrome or via EnGenius Cloud Network. For the local network you can use admin/admin as default password/login (change this to secure device).

The local web admin interface includes much information, which however is locked from the EnGenius Cloud network, so it’s advised to better to over for its administration or via the Cloud-To-Go app.

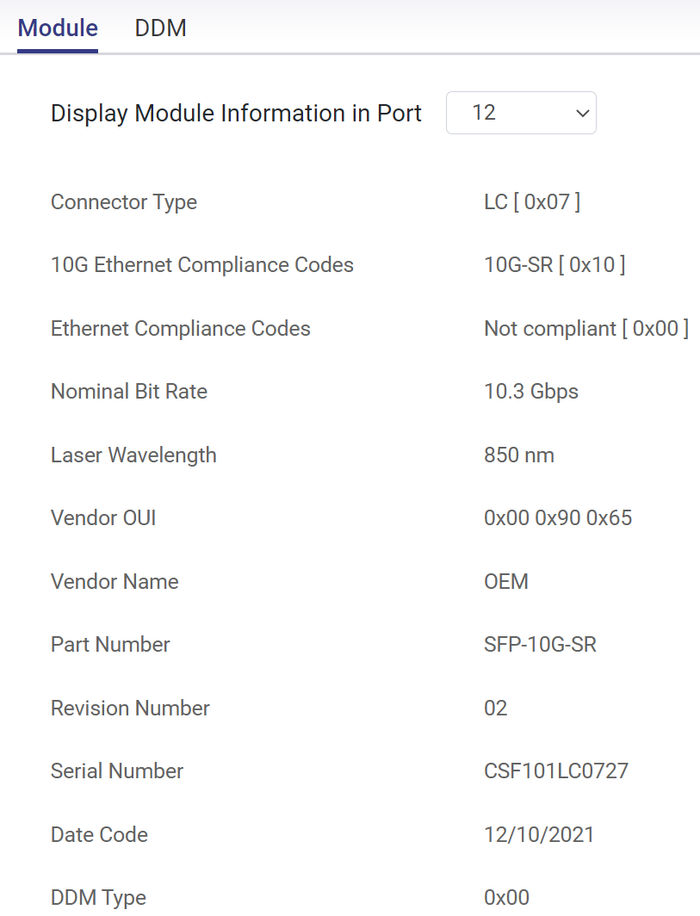
There is a lot of information at the local web interface about the used ports, its CPU usage, MAC addresses, security, etc. For the SFP+ ports there is additional information, depending the used module

