Memorex M-Flyer & TravelDrive
3. Installation
Now lets have a look at the anatomy of the USB storage device.
M-Flyer USB 2.0 TravelDrive
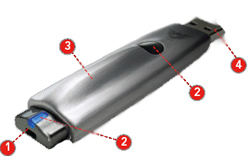
- 1: Push Button to extend USB connector
- 2: Release Button to retract the USB connector
- 3: Brushed aluminium body
- 4: USB connector
TravelDrive USB 2.0 1GB

- 1: Lanyard connector loop - to attach your lanyard to
- 2: Blue Led
- 3: Capacity (indicator level)
- 4: USB connector
- 5: Protective cap - Fits on the end of the drive when removed from the USB port
Installation
The installation of both USB memory sticks was made under Windows XP. Both devices are Plug&Play and no further driver installation needs to be done under this operating system. Win98 users will find drivers for the M-Flyer included in the CD accompanying the retail box, while for the TravelDrive. look here.

The first USB stick was identified as Memorex M-Flyer B under WinXP.

The second was identified as Memorex TD (TravelDrive) Classic 003B under WinXP.
Special Features of the M-Flyer USB 2.0 TravelDrive
-SecureTD™ Software
The SecureTD software, enables the user to protect their stored data with Password protection. This creates a hidden partition in the memory stick that only the password owner can unlock.
The procedure is quite simple and is activated by installing the SecureTD software included in the CD Drivers disc. Lets have a closer look.
First, we place the Driver disc in the drive tray. This should autorun the disc and after a while we get the following menu screen..
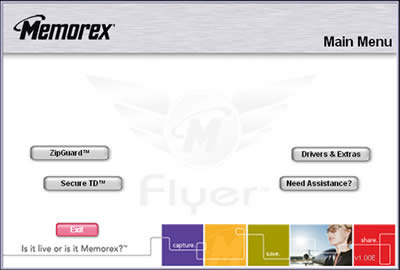
Click on the SecureTD menu button to install the software. The installation program will take you through the necessary steps to complete the procedure such as licence agreement and creation of folders and shortcuts. After a few seconds, the program is successfully installed and you should get the following screen..

This is the current status of protection on the USB stick. We can configure the amount of protected space through the "Configure size" button.

For testing, we chose to create a protected partition of 400MB.

By pressing the "Setup Password" button, we are prompted to enter the desired password including retyping it for confirmation. There's also a password hint in case you forget your password. Press the "Apply" button and...

The software informs us that the password setup was successfully and once we remove the USB stick, it will be automatically locked.
 |
| checking the password protection... |
As you can see, the procedure is quite simple and doesn't differ from the usual password protection procedures we've all become accustomed to. Memorex SecureTD is a very nice and usefully feature since usually, no protection scheme accompanies USB drives.
-ZipGuard™Software
Another nice feature of the M-Flyer is ZipGuard, a utility that allows the compression of files for storing on your M-Flyer. ZipGuard also allows you to encrypt the files you zip in order to protect them from being read by unintended users.
Once again from the installation CD, select the ZipGuard button to install the software. You should get the following screen.

Fairly self explanatory. Click on one of the three icons for the desired action. A file dialog box pops up and prompts the user for the file to create, decrypt or unzip.
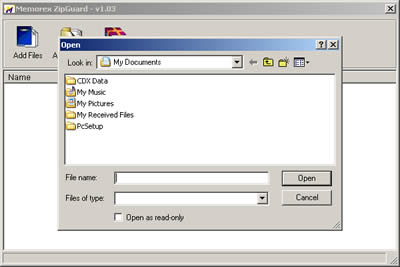
The rest is easy. Just select the required files and the program performs the desired action, much like any of the other available compression utilities.
Now that we've seen the expert features for the M-Flyer, let us move on with the testing and see how these sleek, stylish designed USB sticks perform.


