Motherboard Roundup May 2008
6. Asus Striker II Extreme- BIOS settings, Test configuration
Review Pages
2. Asus P5E3 Premium WiFi@n - Retail package
3. Asus P5E3 Premium WiFi@n - BIOS settings, Test configuration
4. Asus Striker II Extreme - Features, specifications
5. Asus Striker II Extreme - Retail package
6. Asus Striker II Extreme- BIOS settings, Test configuration
7. Benchmarks - Everest Ultimate Edition, SiSoftware Sandra
8. Benchmarks - PCMark Vantage, BAPCo's SYSmark 2007 Preview
9. Benchmarks - MAXON CINEBENCH, x264 HD Benchmark, TMPGEnc 4 Xpress
10. Benchmarks - SuperPI, wPrime
11. Benchmarks - 3DMark 06, Crysis CPU benchmark, Unreal Tournament 3 demo
12. Overclocking
13. Conclusion
The BIOS is different than what we have encountered with Intel based motherboards. It has a different structure and general philosophy.
The first tab gathers all the functions/options:

Users can start overclocking by either changing the memory settings..
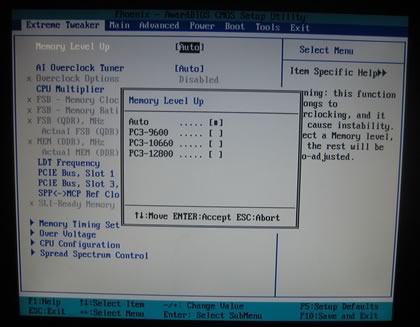
..or by manually setting up almost everything.

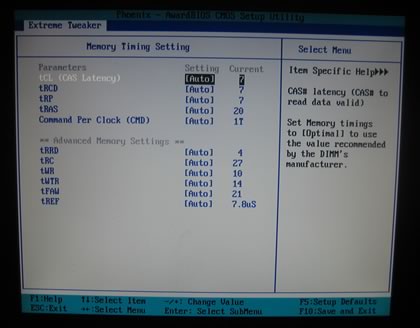
The memory options are well structured
Tons of voltage options

Spread Spectrum should be disabled for highest performance

While we navigate across the at the CPU configuration settings, we can disable the C1E and the SpeedStep technology.
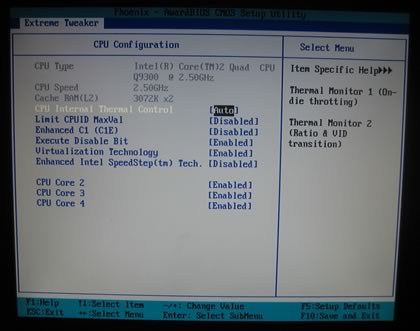
The voltage/temperature monitor levels are extensive


Performing overclocking is rather easy. You can either link/unlink the FSB/Memory and rise up the FSB/Memory depending on your needs, or change them individually. Remember that in all cases, the Sync Mode offers the highest possible performance.

The following table gives us an idea of what to expect from the sync/un-linked modes. We can have our memory synced at 1333MHz, un-linked at 1333Mhz or simply boost memory at 1600Mhz, by keeping the cpu at a normal speed, very handy for testing memory modules...

Several FSB:DRAM ratios are also available...

The unlinked mode offers the possibility to rise up memory and keep the CPU clock stable.
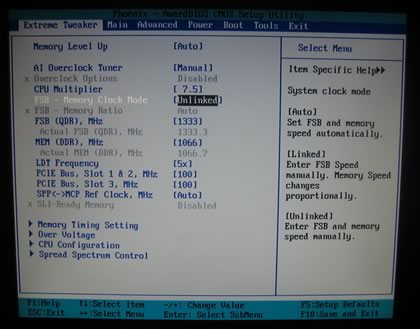
Here is a list with all the available voltages and frequencies:
- CPU Voltage setting: set [ CPU Voltage ], Range[1.1V…2.4], Interval = 0.00625V
- Loadline Calibration: Enable, Ensure Stable and Optimal CPU Voltage During Heavy Loading
- CPU PLL Voltage: set [CPU PLL Voltage], Range[1.5V…3.0V], Interval = 0.02V
- CPU VTT Voltage: set [CPU VTT Voltage], Range[1.2V …2.46V], Interval = 0.02V
- Memory Voltage: set [Memory Voltage], Range[1.5V …3.10V], Interval = 0.02V
- NB Core Voltage: set [NB Core Voltage], Range[1.3V…2.2V], Interval = 0.02V
- SB Core Voltage: set [SB Core Voltage], Range[1.5V…1.85V], Interval = 0.05V
- CPU GTL_REF0 Ratio:]: Range[+224mv…-226mv], Interval = 0.014V / 0.007v
- CPU GTL_REF1 Ratio:]: Range[+224mv…-226mv], Interval = 0.014V / 0.007v
- CPU GTL_REF2 Ratio:]: Range[+224mv…-226mv], Interval = 0.014V / 0.007v
- CPU GTL_REF3 Ratio:]: Range[+224mv…-226mv], Interval = 0.014V / 0.007v
- NB GTL_REF Ratio: Range[+160mv…-126mv], Interval = 0.010V / 0.002v
- DDRII Channel A1 Ref Voltage: Range[+250mv…-250mv], Interval = 0.0125V
- DDRII Channel B1 Ref Voltage: Range[+250mv…-250mv], Interval = 0.0125V
- DDRII Channel A2 Ref Voltage: Range[+250mv…-250mv], Interval = 0.0125V
- DDRII Channel B2 Ref Voltage: Range[+250mv…-250mv], Interval = 0.0125V
- Test Configuration
Let's see now how our CPU was identified under CPU-Z:


Review Pages
2. Asus P5E3 Premium WiFi@n - Retail package
3. Asus P5E3 Premium WiFi@n - BIOS settings, Test configuration
4. Asus Striker II Extreme - Features, specifications
5. Asus Striker II Extreme - Retail package
6. Asus Striker II Extreme- BIOS settings, Test configuration
7. Benchmarks - Everest Ultimate Edition, SiSoftware Sandra
8. Benchmarks - PCMark Vantage, BAPCo's SYSmark 2007 Preview
9. Benchmarks - MAXON CINEBENCH, x264 HD Benchmark, TMPGEnc 4 Xpress
10. Benchmarks - SuperPI, wPrime
11. Benchmarks - 3DMark 06, Crysis CPU benchmark, Unreal Tournament 3 demo
12. Overclocking
13. Conclusion

