Ricoh EncryptEase
2. Securing Data
Users can buy Ricoh's EncryptEase media in packs of 5 at the retail price of €34 (+ shipping). For our tests, we only had two samples of media. On the back of the media, there are some warnings:
- This product contains writing software, there is no need to use other writing or burning software
- Protect your password. The data once encrypted cannot be retrieved without using the original password.
- There are some drives which are not compatible with this product. Refer to this for more information
- A driver will be installed once when using this product for the first time. Please ensure that you are logged in as the Admin to install the driver. This installation is required once for each computer.
- Before using EncryptEase make sure that the date and time of your computer are set correctly. If the date/time are not set correctly, you may not be able to use EncryptEase.


When you insert an EncryptEase disc, the software starts automatically. If you have disabled auto-start, you need to double click the Autorun.exe file on the disc.


Once the driver is installed, Windows needs to be restarted.

After windows restarts, you will be prompted to insert a master password that protects all data on the specific EncryptEase disc:

We are now ready to add the files we want to protect, using the build-in wizard:

The writing options don't provide anything special:

You can drag&drop selected files, monitor the amount of available space on the disc or the size of the data compilation:

Pressing "BurnToDisc", we are given more choices, such as changing the Volume Label and use the "Compare" and "Close Disc" functions. Note that in the writing speed drop down menu, nothing else was selectable other than "Max" speed.

After pressing OK, the procedure starts and depending on your selected data compilation, can take several minutes to end:

After the writing procedure has ended, we are now able to view the contents of our disc.

By selecting either all or some files, we can extract them to our HDD/Flash Memory, provided that we know the right password:

If the password we provide is wrong, we are warned by a popup message:

After inserting the correct password, we are allowed to extract our data to HDD:


Let's now see several advanced details about our disc. Using Nero, we are able to see that there is only one session with two tracks.
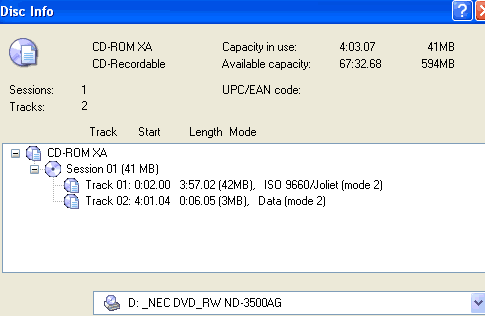

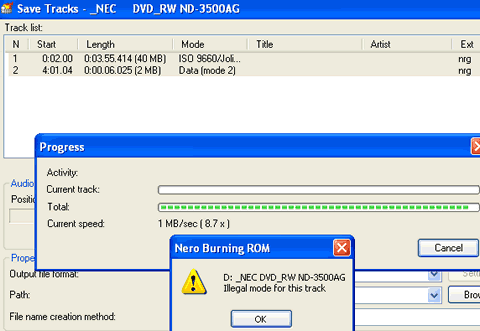
Using the built-in Save Tracks function, we were unable to extract the tracks since the drive had problems with it:
Using ISOBuster, we are able to get a more detailed view of the disc contents. We can see that there is a second session (Session 2) which contains a "Session01" folder that includes three files.

The Files.lst file contains text which can be viewed with the built-in sector viewer:

The Archive and Control.pck files are also viewable but it is not possible to determine how the files are packed or encrypted. Probably "advanced users" could attempt to reverse engineer and play around with this information to determine the type of encryption used and possibly crack the protection scheme. However, this kind of fiddling around is beyond the capabilities of even the most advanced users.


