Shuttle SG33G5M
3. Looking Inside
Review Pages
2. The Package
3. Looking Inside
4. The BIOS
5. CPU and Chipsets
6. Test Configuration
7. Everest Ultimate Edition 2007
8. SiSOFT Sandra
9. PCMARK - 3DMARK
10. Science Mark - PovRay - x264 Benchmark
11. Maxon Cinebench
12. SuperPi
13. SYSmark 2007 - WorldBench
14. Overclocking
15. Intel X3100
16. Using with VISTA
17. Conclusion
After opening the case (which was very easy), we can finally gain access to the interior. It seems very well organised and everything is well fastened.
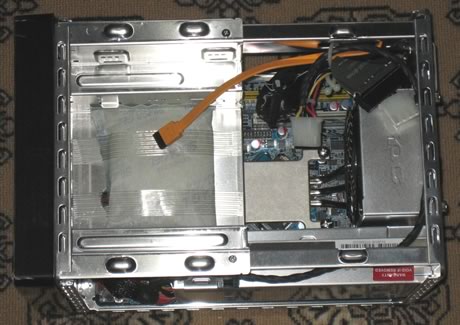
Zooming in can give us a better look. The box can accommodate two (2) 3.5" devices (2x HDD or 1x HDD, 1x floppy) and a 5.25" optical device. You can see that one SATA/IDE cable is already pre-installed. We liked the fact that the SATA cables have a secure catch.

Here is what you can expect after removing the drive bay:
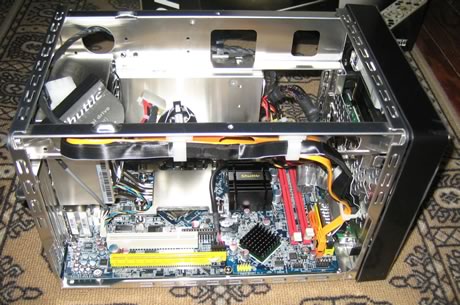
There are two more SATA slots available (remember there are no SATA cables included in the retail package). Passive cooling for the GMA3100 and G33 Intel chipsets, so don't expect high overclocking rates.

The next step is to examine the CPU cooler. It's the same on as that we found over the SD32G2, with a copper bottom. There are four mounting screws that secure the whole system to the main motherboard:
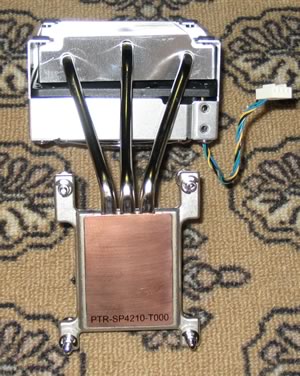
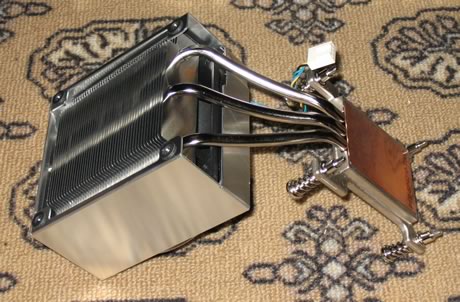
The main body is made of aluminum with three heat pipes going to the big aluminum heatsink with copper base. On top, there is a 92mm fan that blows the heat out of the box.
The supplied power supply is rated 250W (see information in photo below). Its should handle without any problems, two HDD, an ODD drive and maybe an extra PCI-e card:

For our tests, we installed a 3.5" HDD drive and an optical drive. We used the pre-installed SATA and power cables. Everything is nice and tidy and there is lots of room under the storage bay and the CPU area. But the first step is to install the memory modules
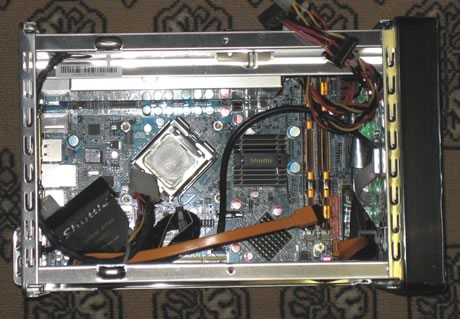
and CPU cooler:
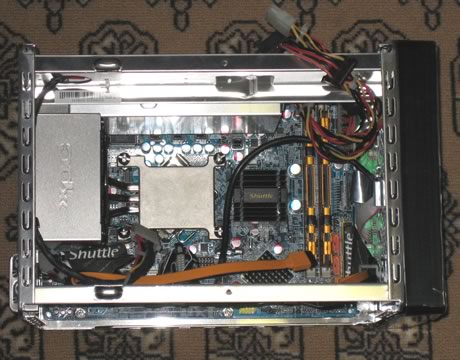
The next step is to add the HDD, install power and SATA cable:
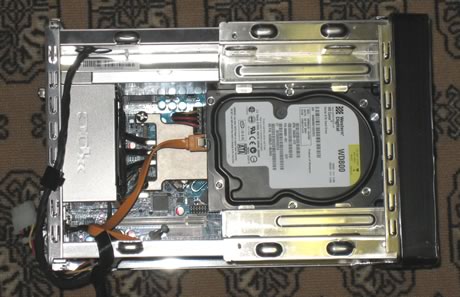
And finally the ODD drive - Blu-Ray capable ;-)
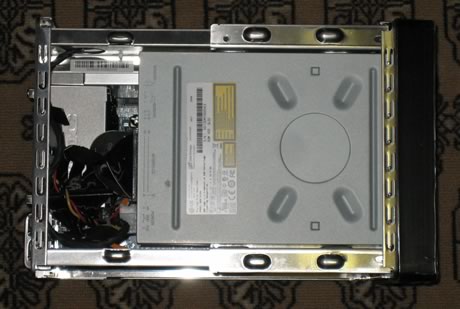
Flipping the box onto its side, we can see a lot of free space around the CPU area and especially around the HDD. Since the ODD drive is full height, there's no so much empty space around it.

Review Pages
2. The Package
3. Looking Inside
4. The BIOS
5. CPU and Chipsets
6. Test Configuration
7. Everest Ultimate Edition 2007
8. SiSOFT Sandra
9. PCMARK - 3DMARK
10. Science Mark - PovRay - x264 Benchmark
11. Maxon Cinebench
12. SuperPi
13. SYSmark 2007 - WorldBench
14. Overclocking
15. Intel X3100
16. Using with VISTA
17. Conclusion


