Shuttle XS 3510MA ION2 mini-pc
3. Powering up the device
Review Pages
- BIOS
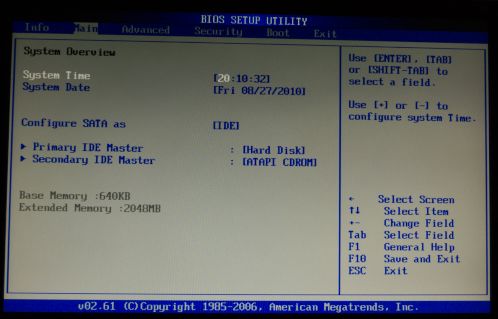
The Bios layout is nothing new for most users. The "Main" section provides information about the system time/date, the and installed memory and also allows you to configure the on-board SATA controllers:

The "Advanced" section includes the option to enable or disable the "execute-disable bit capability", which adds hardware protection to memory and also an option for controlling the wireless function of the device:

At the "Boot" section you can enable the LAN remote boot function and also set the boot device priority:

- Powering On
Before powering up the box, first plug the included power adapter, which is also noiseless. After plugging in the required devices (mouse, keyboard, monitor) you are ready to go.
The first screen that comes up is the Windows 7 Home Premium setup. Here you can configure the regional settings of the PC:

Type a name for your Shuttle box here:

Getting into Windows 7 desktop takes just a few minutes:

Review Pages


