Breaking News

SAMA Introduces the S32 WOOD, a Compact M-ATX Case Bundled with an 80 PLUS Gold PSU Thypoch Completes Simera-C Cine Prime Lineup with New 100mm T1.9 Lens CORSAIR Launches the RM1200e Power Supply with Built-in PinProtect GPU Overcurrent Protection and Platinum-certified Efficiency CORSAIR Changes the Game with PureVector, a Science-Based Personalized Aiming Technology, Launching Exclusively in the SABRE v3 PRO PureVector Mouse Series AMD FSR Upscaling 4.1 Boosts Frames and Image Quality on More Devices

logo

  • Share Us
    • Facebook
    • Twitter
  • Home
  • Home
  • News
  • Reviews
  • Essays
  • About
    • Submit News

    • Contact Us
    • Privacy

    • Promotion
    • Advertise

    • RSS Feed

Search form

Arctic Cooling NV Silencer 5

Aug 12,2005 0

2. Installation


Review Pages

1. Introduction
2. Installation
3. Performance
4. Conclusion


The Arctic Cooling NV Silencer is not difficult to install, but the whole procedure needs a little patience and care in order to avoid any possible damage to the VGA card. As you can see, the VGA card used for this test was the AOpen Aeolus 6800 Ultra.
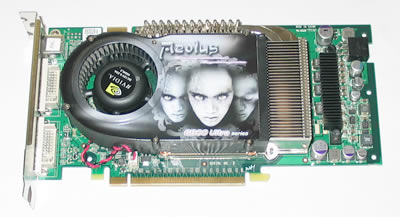
Here is our VGA card with the stock cooler.

First step obviously is to remove the previous stock cooler. Patience and care are required here also.

...many items must be removed :-)

As soon as you remove the stock cooling system, you should clean the GPU and memory chipsets of any thermal compound remains. After cleaning the surface, we should have a nice clean GPU and memories that look something like this...

original cooling system removed

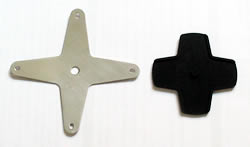
Don't forget to also remove the graphics card's mounting bracket. This is a double width bracket and will be replaced with two custom brackets included in the package which are vital in order for the NV Silencer 5 to work properly.
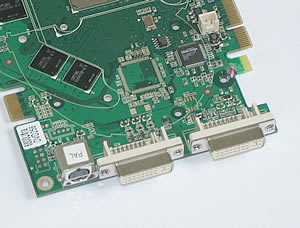
the stock mounting bracket should be removed

Our next step is to attach the new bracket. There are two different brackets, but for now we will install only the one that fits on the graphics card. The other one will be mounted on the PC case, which we will describe later.

the new mounting bracket is half-sized than the original

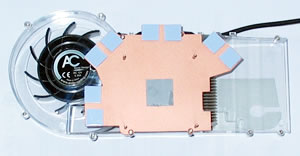
Before installing the NV cooler onto our VGA card, we peeled off all the thermal compound protective strips.
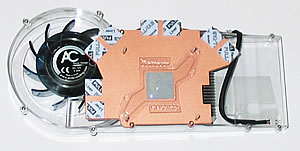
Now we can place our VGA card on the NV Silencer.

We put the VGA on the cooler...

Make sure everything is in the right position.
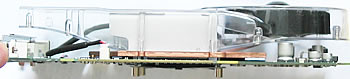
a profile view of the VGA on the cooler...

Now put the holding bracket on the rear side of the card...
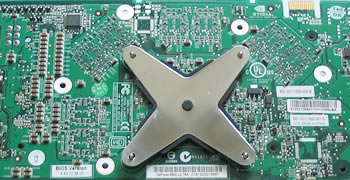
first place the rubber mount and afterwards the metallic bracket.

...and now screw in the retaining bolts.

screw the retaining bolts

Finally, don't forget to plug-in the power connector.

the power connector should be connected

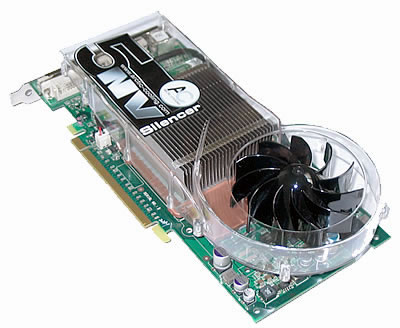
And the NV Silencer 5 is installed on our VGA card.
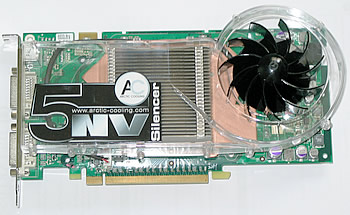
One thing we didn't like is that we had to remove a metallic heatsink from the graphics card in order for the NV5 to fit. The NV5 cooler did not cover the components cooled by this heatsink.

In order NV Silencer to fit we had to remove the above metallic heatsink.

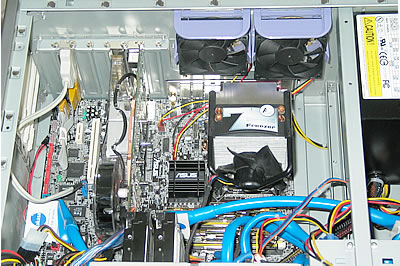
The final step is to install our VGA card in our PC case.

The second metallic bracket will be installed now...
...which provides a heat exhaust outlet from the case.

Everything set :-)


Review Pages

1. Introduction
2. Installation
3. Performance
4. Conclusion


Pages

  • « first
  • ‹ previous
  • 1
  • 2
  • 3
  • 4
  • next ›
  • last »

Arctic Cooling

Tags: Arctic Cooling
Previous Post
Apacer Steno AB320 MP3 Player Review
Next Post
AMD Athlon 3000+

Related Posts

  • Arctic Liquid Freezer II 360 Α-RGB

  • Arctic Liquid Freezer II 280 RGB

  • Arctic Unveils the Freezer 7 X CPU Cooler

  • Keep Your AMD 3rd Gen Ryzen Threadripper Processor Cool with ARCTIC Freezer 50 TR

  • ARCTIC Unveils the Liquid Freezer II series

  • Arctic Introduces New Freezer 34 CPU Coolers

  • ARCTIC Releases New VGA Cooler Series

  • Arctic Freezer i11/A11 CPU Coolers Released

Latest Reviews

be quiet! Light Wings Pro IO fan
Cooling Systems

be quiet! Light Wings Pro IO fan

Why Intelligent Firmware Matters More Than Peak Throughput in NAS Systems
Enterprise & IT

Why Intelligent Firmware Matters More Than Peak Throughput in NAS Systems

Fanxiang MP83 M.2 NVMe SSD Enclosure
Enterprise & IT

Fanxiang MP83 M.2 NVMe SSD Enclosure

Ugreen CM642 USB4.0 Enclosure
PC components

Ugreen CM642 USB4.0 Enclosure

be quiet! Dark Power 14 IO
PC components

be quiet! Dark Power 14 IO

Popular News

MSI’s Latest AMD X870E MAX & EVO Series Motherboards

MSI’s Latest AMD X870E MAX & EVO Series Motherboards

COLORFUL Launches iGame B850M ULTRA Series Micro-ATX Motherboards

COLORFUL Launches iGame B850M ULTRA Series Micro-ATX Motherboards

COLORFUL Presents Limited Edition Chitu MAG-60 Magnetic Keyboard Inspired by the Year of the Horse

COLORFUL Presents Limited Edition Chitu MAG-60 Magnetic Keyboard Inspired by the Year of the Horse

COLORFUL Launches iGame B850I MINI OC V14 Motherboard

COLORFUL Launches iGame B850I MINI OC V14 Motherboard

COLORFUL Launches the iGame X870E VULCAN W OC Motherboard

COLORFUL Launches the iGame X870E VULCAN W OC Motherboard

COLORFUL Presents iGame Z890 ULTRA-S W and iGame Z890M ULTRA Z Motherboards

COLORFUL Presents iGame Z890 ULTRA-S W and iGame Z890M ULTRA Z Motherboards

COLORFUL Expands B850 Motherboard Lineup with New CVN, Battle-Ax, and MEOW Models

COLORFUL Expands B850 Motherboard Lineup with New CVN, Battle-Ax, and MEOW Models

ASRock Adds Support for One Sub-Channel DRAM Module on Intel DDR5 Motherboards

ASRock Adds Support for One Sub-Channel DRAM Module on Intel DDR5 Motherboards

Main menu

  • Home
  • News
  • Reviews
  • Essays
  • About
    • Submit News

    • Contact Us
    • Privacy

    • Promotion
    • Advertise

    • RSS Feed
  • About
  • Privacy
  • Contact Us
  • Promotional Opportunities @ CdrInfo.com
  • Advertise on out site
  • Submit your News to our site
  • RSS Feed