Foxconn Bloodrage GTI
2. A closer look
Review Pages
2. A closer look
3. BIOS settings
4. TestBed
5. Benchmarks - Everest Ultimate Edition, SiSoftware Sandra
6. Benchmarks - PCMark Vantage, SYSmark 2007 Preview
7. Benchmarks - MAXON CINEBENCH, x264 HD Benchmark, TMPGEnc 4 Xpress
8. Benchmarks - SuperPI, wPrime
9. Benchmarks - 3DMark 06, Crysis v1.2
10. Overclocking
11. Conclusion
The Foxconn Bloodrage GTI is available for $239.99, much lower than the previous Bloodrage series of motherboards. Both share the same BIOS/performance but the Bloodrage version has an extra SAS controller onboard and it the board itself is physically designed for overclocking (accepts water-cooling, etc...).
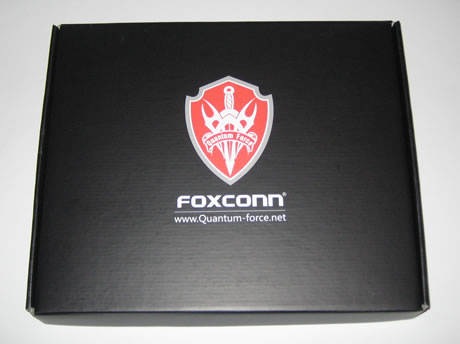
Foxconn has designed an impressive retail box for the product, with many fancy logos and graphics on it:

There are two additional black packages inside the external box. The first one includes the accessories:
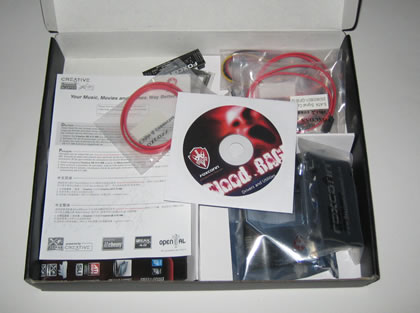
In the other box you will find the motherboard. The sound card comes as a separate module and includes the Creative Labs special software with EAX 4.0 advanced extensions.
The accessories include a software CD-ROM, SATA cables (x4), Moles to SATA power cable (x1), Nvidia SLI bridge connector (x1), a backplate, a printed manual, a quick reference guide and finally a big poster with Bloodrage GTI logos and pictures.

As you can see there is lot of free space around the CPU area. What is rather unique, is the ability to use both Socket 775 and Socket 1366 CPU coolers, which is quite useful.
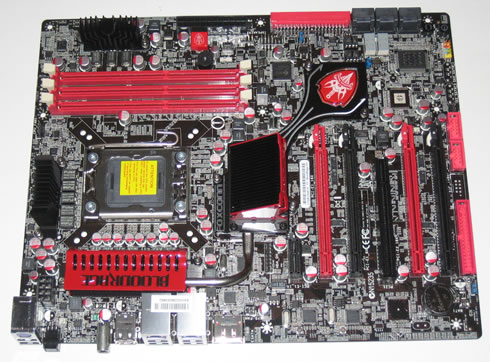
The board is equipped with three memory banks for 3ple DDR3 memory setups. Other motherboards have six (6) memory banks, but most overclockers won't use them all after all. All the memory banks support 1333/1600/1866 and 2133 memory setups, while the maximum memory that can be installed is up to 12GB.
Right above the memory banks we will find a big Red button, called "Force Reset" button. Once you push it, the system will shut down and reboot. Actually the button will reset and clear the CMOS - very useful to re-tune and optimize performance before reloading your new settings during overclocking.
You can also clear the CMOS via a special switch found on the rear side of the board.
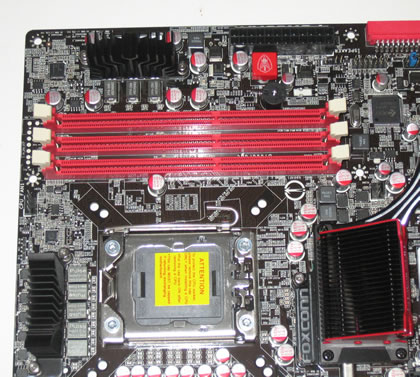
The available three passive heatsinks are connected to each other via heatpipes. The red color seems to be the favorite for Foxconn engineers since you will find it everywhere on the board adding a unique and special touch to the overall great design.
The main heatsink of the Bloodrage GTI cannot be replaced, as you can do with the Foxconn Blodrage version.
In addition to the traditional analog PWM, the board supports 14phases Hybrid PWM digital phase timing for accurate phase interleaving standing up to the demands of overclockers. This digital power management system operates with better power efficiency, a faster and more stable response to changes in power consumption, and higher output current capability to support extreme overclocking.On the left side of the board we find six (6) SATAII ports with RAID 0/1/5/10, an IDE/ATAPI slot, Dual Bios, the power & reset button and finally a debug LED, which however isn't very practical in our opinion.
The Bloodrage GTI supports 4-way CrossFireX (Quadfire) configuration with single-slot graphics cards, since the available space between the PCI-e slots is rather limited. Larger graphic cards, such as the HD4870 X2 and the GTX295 also fit (to the red slots) leaving some extra space for cooling. The system also supports 2 x 16X or 4 x 8X in Crossfire/Nvidia SLI setups.

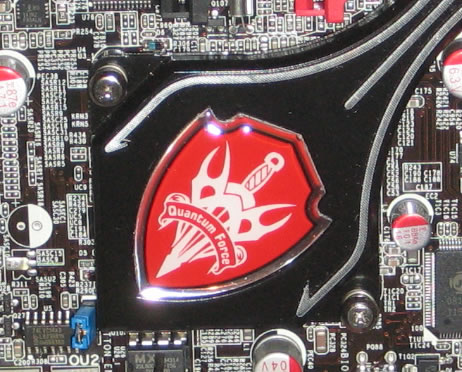
An impressive 'Quantum Force' logo covers the Southbridge chip:
The rear I/O panel has the following ports and connectors:
- 1 x PS/2 keyboard port
- 1 x S/PDIF Coaxial connector
- 1 x S/PDIF Optical connector
- 2 x eSATA ports
- 2 x RJ45 LAN ports
- 8 x USB 2.0 ports .

Review Pages
2. A closer look
3. BIOS settings
4. TestBed
5. Benchmarks - Everest Ultimate Edition, SiSoftware Sandra
6. Benchmarks - PCMark Vantage, SYSmark 2007 Preview
7. Benchmarks - MAXON CINEBENCH, x264 HD Benchmark, TMPGEnc 4 Xpress
8. Benchmarks - SuperPI, wPrime
9. Benchmarks - 3DMark 06, Crysis v1.2
10. Overclocking
11. Conclusion


