JSAUX Clear Back Shell PC0106
3. Installation
Before installing the PC0106 transparent back shell we advice you to view the following original installation video and general tear down from iFixit.
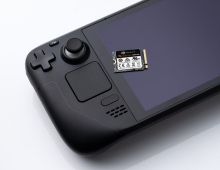
Note that the original SteamDeck screws have blue lock tile so it might need extra force to remove them the first time. Also, make sure to remove any installed microSD, or else you will break it in half!!!
JSAUX has posted several warnings before starting the procedure:
1. The transparent back cover isn’t recommended for users that have no experience in DIY and/or disassembling electronic devices. We strongly recommend carefully reviewing the iFixit videos if you choose to install them or seek the services of a professional. Any equipment malfunction caused by the disassembly of the Deck, but not by this product, shall be borne by the user.
2. Because aluminum has good thermal conductivity, it will be hotter than other areas when touched. Be careful not to touch it to avoid being burned when you use your Deck.
3. Before use, please use a heat gun or hair dryer to slightly soften the thermal grease to ensure that it fits perfectly on the Back Plate. In case of accidental contact with the skin, please wipe it off immediately, then rinse with water.
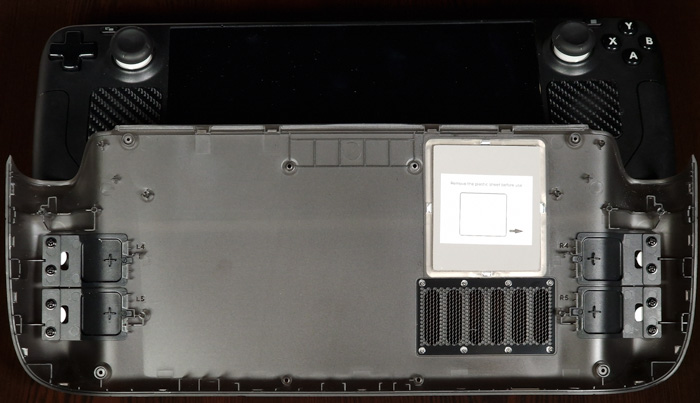
So before you start installing the backplate, we advise you to choose from the three included back buttons. We tried all three and chose the middle height. Each back button is secured via two screws at the plate. below you can see all four buttons installed.
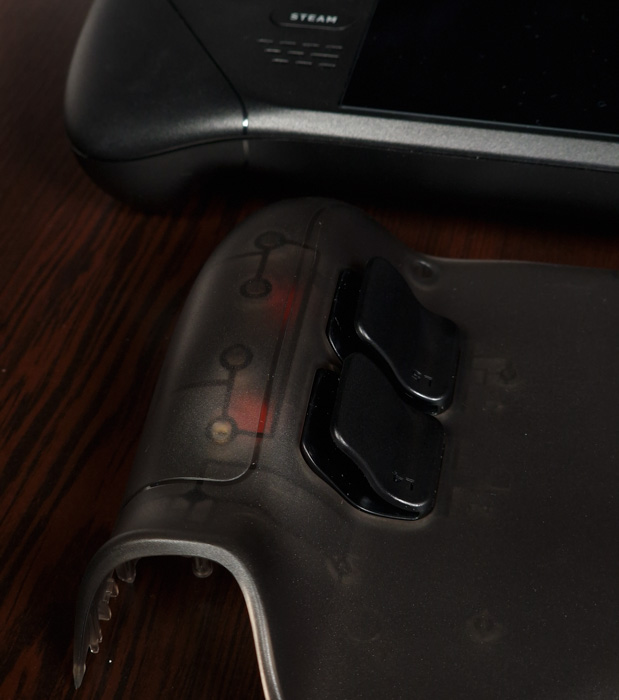
A closer look at the installed buttons.
To get things started, you have e to remove 8 mini-screws. While JSAUX has included a mini Philps P00 screwdriver, we suggest getting a Philips P01 screwdriver that will have higher surface contact with the stock screws that have already blue lock tile to prevent them from moving out. With the Philips P01 screwdriver, we didn't have any problem removing all screws.
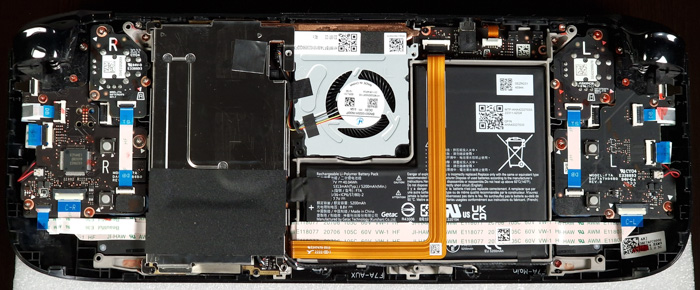
Here is our SteamDeck after removing the backplate. You don't need to touch anything.
Before installing the backplate, we advise you to use a heat gun and heat up the included thermal paste. We tried an air hair blower for like 5 minutes (remember first to remove the plastic protective film from the thermal paste) and we placed the transparent backplate from the top to the bottom. Apply some small force to hear a click (confirmation that it has been secured) and then place carefully all previously removed screws.
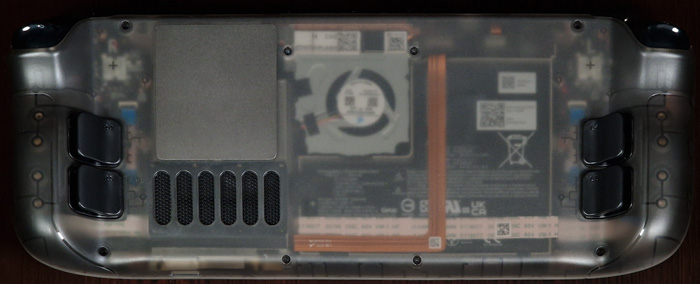
The final result is very impressive in our opinion. After placing the back cover and securing it with screws, we did notice some slight bent near the power button, from the pre-installed thermal paste. This was gone after 30mins we used the device and the thermal paste worked its magic, don't worry if you have the same issue.
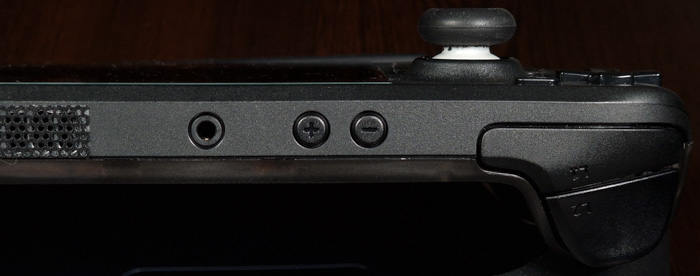
We checked at all angles and the JSAUX Clear Back shell did have perfect fit.
JSAUX has posted a FAQ which may help you answer several questions you might have.
After changing to a back plate, can it still be fit with a protective case?
The size of the transparent case is the same as that of the original. If you choose a button with a yellow or red label, it is compatible with all protective cases of JSAUX. NOTE: Not compatible if you choose to use the blue label install button.
I replaced it with a raised button (red or blue), can it fit in the valve carrying case/JSAUX case?
It cannot be put into the original valve carrying case and JSAUX-BG0102 carrying case, but it can be put into the valve carrying case/JSAUX shoulder bag-BG0105.
What is the aluminum sheet on the back? What is the use?
This is an aluminum sheet that assists the heat dissipation of the Steam Deck. Because the aluminum has good thermal conductivity, it will be hotter than other areas when touched. Be careful not to touch it to avoid being burned.
What should I pay attention to when disassembling?
1. Regarding the changes in the maintenance policy of the whole machine caused by teardown, please refer to the official information provided by VALVE.
2. To minimize risk of damage, turn on your Steam Deck and allow the battery to discharge below 25% before starting your repairs. A charged lithium-ion battery can be very dangerous if accidentally punctured.
3. Before starting, power off the Steam Deck completely and unplug all cables. Remember to follow general electrostatic discharge (ESD) safety procedures, such as washing hands before removing the housing, wear finger gloves and clothes that are not easy to generate static electricity, and maintaining indoor humidity.
4. If you have a microSD card installed, make sure to remove it before opening the Steam Deck.
5. Try not to touch other parts inside the machine, please keep the removed original parts properly.
6. Throughout this repair, keep track of each screw and make sure it goes back exactly where it came from to avoid damaging your Steam Deck.
Is it normal for the aluminum sheet to get hot?
Normally, the aluminum sheet conducts heat from the Steam Deck circuit board. In addition, because the aluminum itself has good thermal conductivity, it will be hotter than other areas when touched. Be careful not to touch it to avoid being burned.
Will the thermal grease affect the original heat dissipation of the Steam Deck?
It will not affect the original heat dissipation of Steam Deck. Because the air inlet and outlet of the steam deck heat dissipation are separate heat dissipation pipes, and the thermal grease will not block the heat dissipation channels.
What should I do if the back buttons (R4 R5 L4 L5) get stuck?
1. After installing the button, first check whether there is a gap between the button and the buckle and whether it can be pressed and rebounded normally. If there is a gap and can be pressed and rebounded normally, continue to install. If there are no gaps, loosen the button screw for 2-3 turns. This method can make the space inside the button bigger, but it will make the whole button feel loose. Add a gasket of M3 or M4 size to the yellow nut (the size of the gasket is about 5-6mm in outer diameter, 3.2mm in inner diameter, and 0.5mm in thickness. You can also trim a gasket with harder cardboard according to this size), this method increases the pressing space at the other end by raising the nut. Slightly loosen the back cover screws near the stuck button for 2-3 turns. For example, if R4 will be stuck, loosen the three screws closest to R4. This method can increases the pressing space, please be careful not to screw it too loosely.
2. Check if there is a gap at the top, because the gap is caused by deformation, and deformation may also cause the button to get stuck. If there is no gap, continue with the installation. If there is a gap, remove the thermal grease and reinstall it. There is a gap or warping after installation? Remove the thermal grease and reinstall it. When installing, press the place where gaps arelikely to appear first. It may be that the thick silicone grease causes deformation. Check whether the back cover is bent. If it is bent, you can press it with a heavy object for aperiod of time or bend it by hand to restore it.

