Noctua NH-L12 review
2. A closer look, installation
Review Pages
2. A closer look, installation
3. Thermal and noise tests
4. Closing thoughts
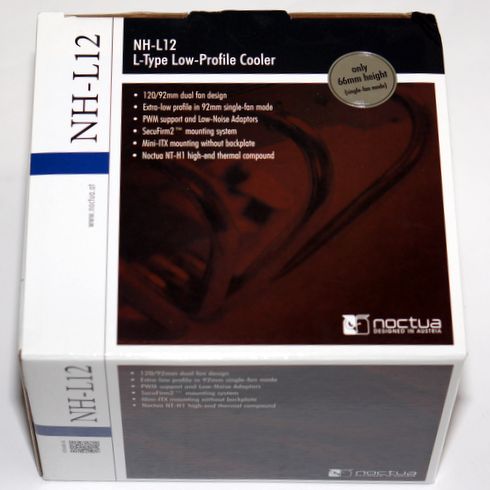
The heatsink retails in a typical Noctua packaging, already met in many products of the company. On the left is the NH-L12 naming of the cooler and above a mobile-tag. Spinning the box around we see charts, which cover the full specifications of both fans and the cooler body.
The money you'll have to spend for the NH-L12 is around $72.00, which is very much for a low-profile cooler, although we are used to see such prices from Noctua. The cooler is backed by a 6-year warranty.
The cooler offers wide compatibility with CPUs, supporting Intel LGA2011, 1366, 1156, 1155, 775 & AMD AM2, AM2+, AM3, AM3+, FM1 sockets.
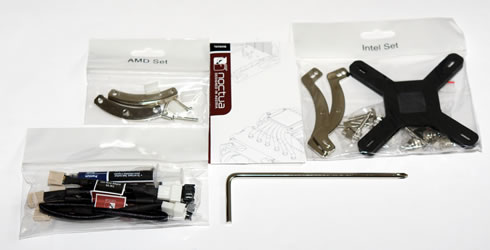
The retail package includes:
- 1x Noctua NH-L12 product
- 1x NF-F12 PWM premium fan
- 1x NF-B9 PWM premium fan
- 2x Low-Noise Adaptor (L.N.A.)
- Y-Split Cable
- NT-H1 high-grade thermal compound
- SecuFirm2 Mounting Kit (AMD/Intel)
- Mini-ITX Mounting-Kit
- Noctua Metal Case-Badge
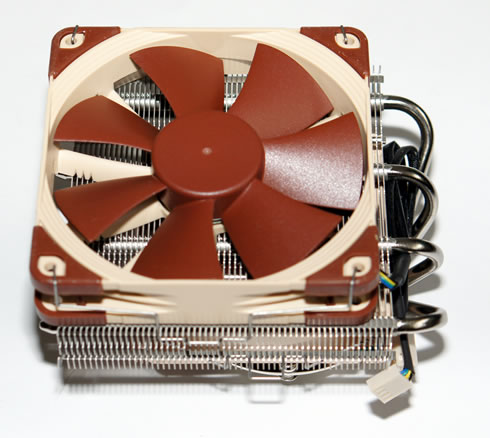
The bare heatsink stands at just 66mm high without the top 120mm fan installed, meaning that it will easily fit into HTPC cases. The main body is made out of aluminium so it is also very lightweight at 415gr. Adding both the 120mmm and 92mm fans will add some 265 grams to the set so the total weight reaches the 680gr - hopefully still acceptable for the majority of motherboards. With a top fan installed, the cooler's dimensions are 93x128x150mm:
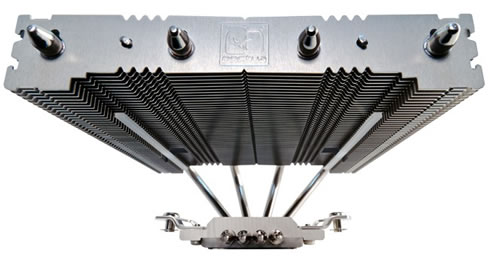
In the following picture you see the nickel plated C-shaped design of the heatsink. Its base and the four heatpipes are made out of copper. The aluminium cooling fins are in contact solid with the four heatpipes with soldered joints when required.
Build quality is good throughout, with the fans mounted and the contact plate neatly polished.

The heatsink comes with two cpu coolers pre-installed - the 120mm NF-F12 and the 92mm NF-B9. Both fans are top choices for their high air flow and low noise,. They can spin at 1500 / 1600 RPM (max) and at 1200 / 1300 RPM with L.N.A. In addition, they can also operate as slow as at 300 RPM (PWM.)
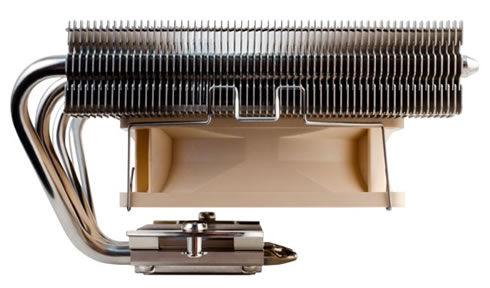
For a more quiet operation you may choose to install the 92mm fan only, but make sure your CPU is compatible with this instillation mode:

Installation of the cooler is easy due to Noctua's SecuFirm2 mounting system. In case you want to use the cooler on an assembled system, you first have to remove the mainboard from the case in order to be able to install the supplied backplate. As a note, on LGA1366 and LGA115x, the supplied backplate will install over the mainboard’s stock backplate, so the mainboard’s stock backplate must not be taken off. The next step is to put the plastic spacers onto the bolts, then add the mounting bars. Make sure that the curved sides of the mounting bars are pointing outwards. Fix the mounting bars using the 4 thumb screws. If there are residual traces of thermal paste or thermal pads on your CPU, clean them off first. Then press a small drop (4-5mm diameter) of NT-H1 thermal past onto the centre of the heat-spreader. Finally, take off the protection cover at the bottom side of the heatsink. Take off the top fan, then put the heatsink onto the CPU and screw it to the screw threads of the mounting bars.
You are now ready to connect the fan(s) to the mainboard. Use the supplied NA-YC1 y-split cable to connect both fans to one fan header. Depending on your CPU and the temperature inside the case, you may interconnect the supplied NA-RC6 and NA-RC7 Low-Noise Adapters (L.N.A.) in order to further reduce the fans operating noise. Use the NARC6 for the NF-F12 120mm fan and the NA-RC7 for the NF-B9 92mm fan.
As a note, when using the L.N.A., check the temperature of your CPU using appropriate software (e.g. the respective applications of your mainboard manufacturer), in order to evade automatic throttling of the CPU due to the increased temperature. If the cooling performance is insufficient, increase case ventilation or remove the L.N.A.
The whole process won't take more than 5 minutes to complete and in case you have never installed a cooler before, read Noctua's step by step guide available here .
Review Pages
2. A closer look, installation
3. Thermal and noise tests
4. Closing thoughts

