Breaking News

GEEKOM to Unveil World's Most Powerful AI Mini PC at IFA 2025 Dolby Unveils Dolby Vision 2 Samsung Launches All-New Sound Tower at IFA 2025 LG Display 4th-Generation OLED Panel obtains industry’s first Perfect Reproduction Verification Viltrox launches AF 56mm Ultra-large aperture F1.2 Pro E and XF (APS-C) lenses

logo

  • Share Us
    • Facebook
    • Twitter
  • Home
  • Home
  • News
  • Reviews
  • Essays
  • Forum
  • Legacy
  • About
    • Submit News

    • Contact Us
    • Privacy

    • Promotion
    • Advertise

    • RSS Feed
    • Site Map

Search form

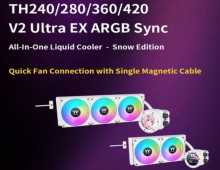
Thermaltake Lanbox Lite

Jul 11,2007 0

3. Installation


Review Pages

1. Introduction
2. The Package
3. Installation
4. Conclusion


The time has come to fully assemble a system with the Lanbox lite. First, you have to remove all the thumb screws. Then remove the top metal plate. Here is what you will see:

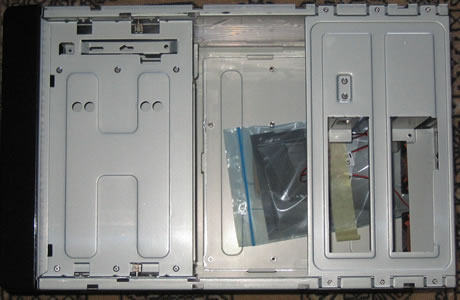
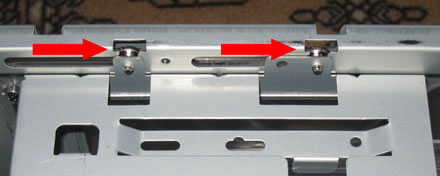
At left, we see the storage bay that has an interesting feature, it's movable on rails (shown by arrows). This makes removal and installation very easy! Neat feature...

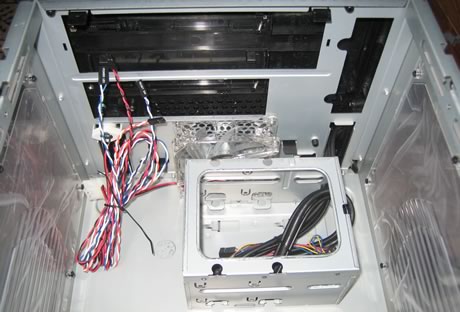
Removing the storage bay, we have better access to the internal space. We see the HDD case (holds two HDD) and the front panel where an 80mm rotating fan draws in fresh air. Note that the HDD case doesn't implement any kind of vibration absorbing mechanism, which means any HDD vibrations will be passed on to the case. This is a "problem", since our WD Raptor HDD drive makes a lot of noise...

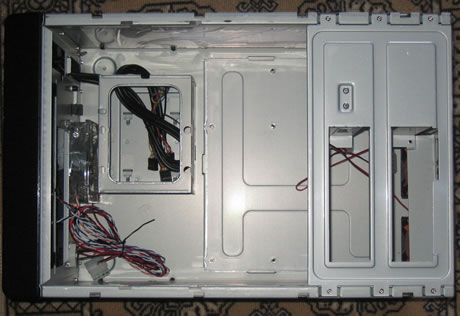
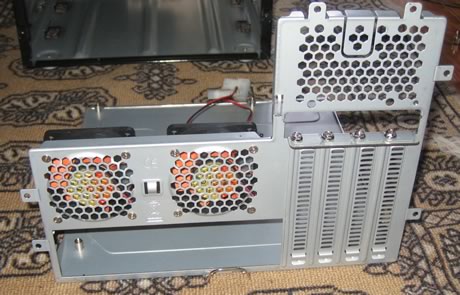
On the right we see that the motherboard bay is easily retractable from the back, so it can be removed entirely to install the mini ATX motherboard of your choice.

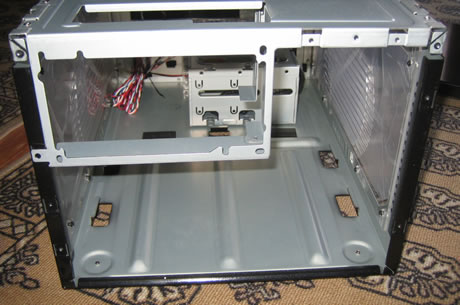
Let's now push the motherboard tray to the right and remove it entirely.

Yep, everything has been removed, the motherboard bay can be installed again very easily by placing it on the tracks as shown in the following image.

Finally, we start to build our system. First, let's install a Thermaltake 480W power supply. No problems at all. The Lanbox Lite can hold any standard size PSU.

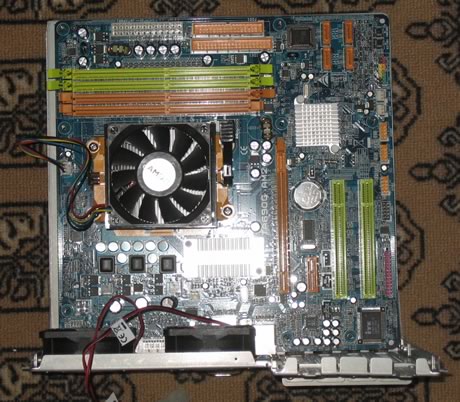
The motherboard tray in all its glory... We have removed the back cover plate and will install the corresponding one for our motherboard (Biostar TA690GAM2).

Here it is...

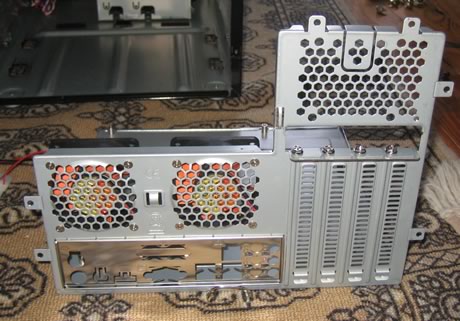
And a top view of the motherboard bay, everything installed:

Then, you apply almost no force to re-install the motherboard tray. Start putting the thumb screws back on the case:

A top view of the entire case. We still need to install the HDD, memory and optical storage drive. Probably, its best to use a modular PSU that will save some space with unwanted cables:

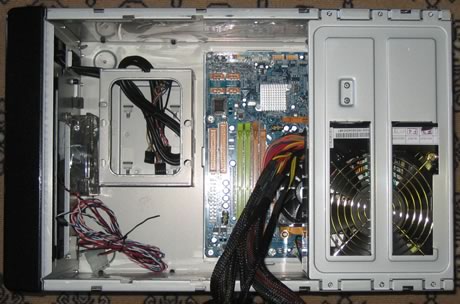
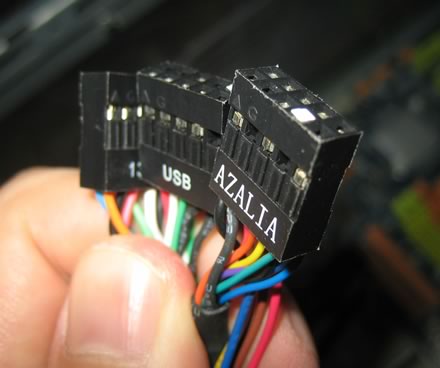
There are three cables that can be connected to the motherboard: for 1394 (firewire), USB and front Audio output:

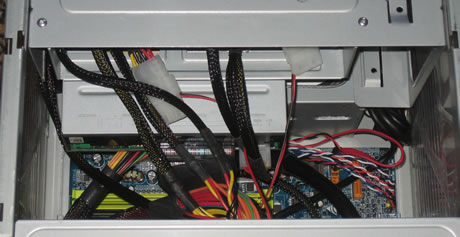
Yes, those cables are installed, as well as the power and reset switches.

HDD is also in place.

And finally, the storage bay with an LG Blu-Ray recorder.

If you intend installing something like an Nvidia 8800GTX graphics card, several adjustments need to be made.


Review Pages

1. Introduction
2. The Package
3. Installation
4. Conclusion


Pages

  • « first
  • ‹ previous
  • 1
  • 2
  • 3
  • 4
  • next ›
  • last »

SFF

Thermaltake

Tags: SFF Thermaltake
Previous Post
Tom Tom One
Next Post
Sony Ericsson K810i

Related Posts

  • Thermaltake Unveils the Massive EXTREME with Cross-flow Fan

  • Thermaltake Releases the Toughpower TF3 1300W with Support for RTX50 Series GPUs

  • Thermaltake Unveils G6 Direct Drive Racing Wheel Bundle and GM5 3DOF Motion System

  • Thermaltake Launches the TT150 LED Bag in Different Sizes and New Colors

  • Thermaltake New TH V2 Ultra EX ARGB Sync AIO – Snow Edition is Now Available Worldwide

  • Thermaltake Coolers Support New-Gen Intel and AMD CPUs

  • Thermaltake Reveals the CTE E550 TG Mid Tower Chassis with Panoramic Viewing

  • Thermaltake The Tower 300 Series Chassis Releases New Colors in Matcha Plum and Peach Fuzz

Latest Reviews

Dragon Touch Digital Calendar
Consumer Electronics

Dragon Touch Digital Calendar

Soft2bet and the unseen hardware that makes instant play possible
Enterprise & IT

Soft2bet and the unseen hardware that makes instant play possible

Noctua NF-A12x25 G2 fans
Cooling Systems

Noctua NF-A12x25 G2 fans

Akaso 360 Action camera
Cameras

Akaso 360 Action camera

Crucial T710 2TB NVME SSD
PC components

Crucial T710 2TB NVME SSD

Popular News

AsRock, NZXT, Biostar and Gigabyte announces X870 motherboards

AsRock, NZXT, Biostar and Gigabyte announces X870 motherboards

COLORFUL Introduces CVN B850I GAMING FROZEN Motherboard

COLORFUL Introduces CVN B850I GAMING FROZEN Motherboard

COLORFUL Presents CVN X870 ARK FROZEN Motherboard for AMD Ryzen 9000 CPUs

COLORFUL Presents CVN X870 ARK FROZEN Motherboard for AMD Ryzen 9000 CPUs

COLORFUL Presents the B860 Series Motherboards

COLORFUL Presents the B860 Series Motherboards

COLORFUL, AsRock, NZXT, MSI announce Intel Z890 Motherboards

COLORFUL, AsRock, NZXT, MSI announce Intel Z890 Motherboards

Intel-AMD new motherboards announced

Intel-AMD new motherboards announced

ASRock AM5 Motherboards Now Fully Support AMD Ryzen 9 9950X3D & 9900X3D Processors

ASRock AM5 Motherboards Now Fully Support AMD Ryzen 9 9950X3D & 9900X3D Processors

COLORFUL Presents the COLORFIRE B650M-MEOW WIFI Motherboard, Supports AMD Ryzen 9000 Series CPUs

COLORFUL Presents the COLORFIRE B650M-MEOW WIFI Motherboard, Supports AMD Ryzen 9000 Series CPUs

Main menu

  • Home
  • News
  • Reviews
  • Essays
  • Forum
  • Legacy
  • About
    • Submit News

    • Contact Us
    • Privacy

    • Promotion
    • Advertise

    • RSS Feed
    • Site Map
  • About
  • Privacy
  • Contact Us
  • Promotional Opportunities @ CdrInfo.com
  • Advertise on out site
  • Submit your News to our site
  • RSS Feed