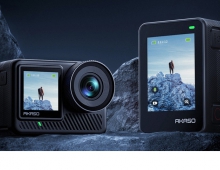
Akaso 360 Action camera
4. GUI
At the main screen of the Akaso 360 App in the top area, you will get a quick settings area, while at the bottom the working mode (Video/Photo)


Under the settings, many features can be set.

At the top, you can set Video Resolution and Frame rate, either for 5.7K or 4K.


Colour styles are present (Standard/Vivid)

White Balance is at Auto or Custom

Passing to the Photo area, you can have either 72MP or 18MP pics.

With JPG or JPG+DNG file format.

Video can be 360 VR/Wide or front or back camera.

While ready presets are ready for timelapse, the time function allows for more creative ways to get content.

To power on the camera press the Power/Mode button once to turn it on. While the camera is on, press and hold the Power/Mode button for two seconds to turn it off. There are two ways to quickly switch modes. Method 1: While on the preview screen, press the Power/Mode button to toggle swiftly between the most recently used Photo and Video modes. Method 2: Tap the mode icon in the lower-left corner of the preview screen to access the mode menu. Then, swipe left or right to select your desired mode. When in Photo or Video mode, press the Shutter button to capture photos or start video recording. To stop recording in Video Mode, press the Shutter button again. When the camera is off, press the Shutter button to power it on and start recording video automatically. To stop recording, press the Shutter Button again. The camera will then power off automatically if no further action is taken.
The Akaso 360 menu (the body not the Android App) screen gives us much information and can be controlled via touch gestures.

While users can perform swipes for different actions.


You can view the camera’s photo and video settings directly. To open the image settings, swipe left on the preview screen. In the photo settings, swipe left or right at the bottom to browse through the available options. To exit the image settings, tap the back icon in the upper left corner.
➀ Auto Exposure Mode:
The camera will automatically adjust the shutter speed and ISO value.
➁ Exposure Value Settings:
You may manually adjust the exposure value to achieve overexposure or underexposure.
➂ Manual Exposure Mode:
You may precisely control the shutter speed and ISO value of the camera.
➃ White Balance Settings:
AWB (Auto White Balance) enables the camera to capture images with accurate
color tones automatically. Alternatively, you may manually adjust the white balance
level: higher values produce warmer tones, lower values produce cooler tones.
➄ Color Settings:
You can choose the color tone for videos or photos from options like Standard or Vivid.
➅ Format Settings:
For shooting modes Photo, Interval, AEB, and TimeFusion, you may select the photo
format (e.g., JPG, JPG+DNG).


