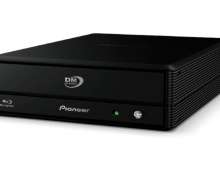
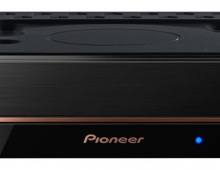
Pioneer DVR-720H-s DVD Recorder
4. The Tuner menu
Review Pages
1. Introduction
2. Packaging & Interior Look
3. Control Menu
4. The Tuner menu
5. The Video In/Out Menu
6. The Audio Out menu
7. The Language menu
8. The Recording menu
9. The Playback menu
10. Reading Tests
11. Compressed Audio (data CD/DVD)
12. Making a recording (DVD)
13. Making a recording (HDD)
14. Recording Options
15. Chase Play Feature
16. Timer Recording & Disc Navigator (DVD)
17. Editing and Finalizing a DVD-Video Disc
18. Disc Navigator (HDD)
19. Copy Menu (HDD -> DVD)
20. Copy Menu (DVD -> HDD)
21. Copy Menu (Disc Backup)
22. The Photoviewer
23. Writing Quality Tests
24. Error Correction Tests
25. Conclusion
Pioneer DVR-720H-s DVD Recorder

If we select "Auto Scan" from the "Auto Channel Setting" option, then the DVR-720H-s will automatically scan and store the available channels in your area. The process will take 5-10 minutes, and it depends greatly on the quality of the reception.


We continue with the Video In/Out menu.
Review Pages
1. Introduction
2. Packaging & Interior Look
3. Control Menu
4. The Tuner menu
5. The Video In/Out Menu
6. The Audio Out menu
7. The Language menu
8. The Recording menu
9. The Playback menu
10. Reading Tests
11. Compressed Audio (data CD/DVD)
12. Making a recording (DVD)
13. Making a recording (HDD)
14. Recording Options
15. Chase Play Feature
16. Timer Recording & Disc Navigator (DVD)
17. Editing and Finalizing a DVD-Video Disc
18. Disc Navigator (HDD)
19. Copy Menu (HDD -> DVD)
20. Copy Menu (DVD -> HDD)
21. Copy Menu (Disc Backup)
22. The Photoviewer
23. Writing Quality Tests
24. Error Correction Tests
25. Conclusion
2. Packaging & Interior Look
3. Control Menu
4. The Tuner menu
5. The Video In/Out Menu
6. The Audio Out menu
7. The Language menu
8. The Recording menu
9. The Playback menu
10. Reading Tests
11. Compressed Audio (data CD/DVD)
12. Making a recording (DVD)
13. Making a recording (HDD)
14. Recording Options
15. Chase Play Feature
16. Timer Recording & Disc Navigator (DVD)
17. Editing and Finalizing a DVD-Video Disc
18. Disc Navigator (HDD)
19. Copy Menu (HDD -> DVD)
20. Copy Menu (DVD -> HDD)
21. Copy Menu (Disc Backup)
22. The Photoviewer
23. Writing Quality Tests
24. Error Correction Tests
25. Conclusion