Primera Signature Z6 CD/DVD Printer
5. Printing Preferences
Review Pages
Primera Signature Z6 CD/DVD Printer - Page 5
Printing Preferences
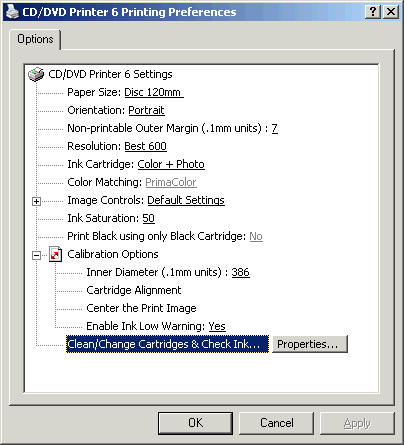
Below you can see the options available from the Printing Preferences dialog box for the printer.

From the following drop down menu you can set the diameter of the media you are about to use. There are three default sizes as well as custom where you can set your own. Custom sizes can be defined by clicking on the "Custom Page Size" button.
 |
![]()
The orientation can also be defined.

There are five choices of quality ranging from Normal 600 up to Ultra Photo
4800.

Z-Color is the only color matching option. If you remove the Photo
cartridge and install a black cartridge in its place, then you can
change to other color matching options. Otherwise if you want to
continue using the photo cartridge, then the image will need some filters
added or some colors adjusted in your image editing program. The other
options are PrimaColor, Algebraic and None. If you are printing from SureThing,
then PrimaColor is good. Otherwise, if you are using Photoshop or Corel Draw
and
you
are printing an RGB image, then set the color matching to Algebraic.
If you have the Color and the Photo ink cartridges installed, the Color Matching is set by default to Z-Color. For setting to PrimaColor, which is the best for SureThing, you have to change to another option other than Color + Photo, for activating the field. Then set to Primacolor and change once again, this time back to Color + Photo.

You can also set which ink cartridges you will use.
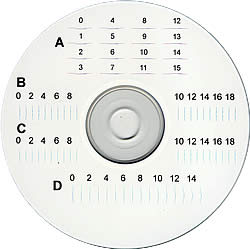
If you haven't performed a cartridge alignment calibration, you can do it as follws:

After a test printout, look for the best results, which are the straightest lines, insert each number in the appropiate field and press OK. Below you can see what the test printout looks like. Click on the image to enlarge it.
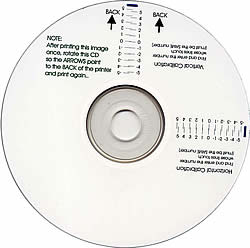
For image centering, you have to print a test image, then rotate it 180° with the arrows pointing on the printer. Once again, a test printout sample is presented below. Click on the image to enlarge it.
Once again insert the correct numbers in each field and press OK.

From the choice in the "Options" dialog box (see below), you can change the ink cartridges, clean them and read a report. Just click on the Properties... button.
Here you get a report on the condition of the ink cartridge levels.

We recommend you clean the heads frequently, especially if the printer has been out of use for a long time.
By pressing the Details button the following window will appear.

Review Pages

