Shuttle XS35GTA v3 review
2. Package, installation
Shuttle ships the XS35GTA V3 in a cardboard box with a plastic handle. The package feature all the necessary information regarding the product inside.
The device retails for about €233 Euro (plus VAT), which is more than you may spend for a Atom-based barebone without AMD graphics.

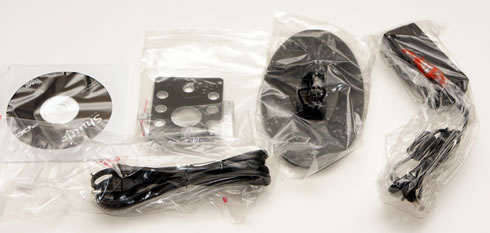
The chassis is well protected and placed next to another cardboard box, which includes the rest of the accessories. The package includes the following components.
- The Shuttle barebone
- 1x power adapter
- 1x power cord
- 1x Seatbase
- Screws for HDD support bracket
- Printed installation guide
As a note, the VESA mount comes as an optional accessory, just as is an adapter for second 2.5-inch drive.
The external PSU/power adapter is rated at 19V, 2.1A and according to Shuttle’s specification list, is rated at maximum 40W and has automatic voltage adjustment.
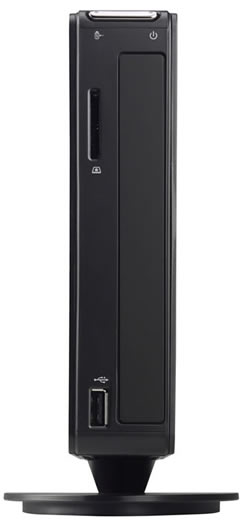
The barebone is sized at 25.2 x 16.2 x 3.85 cm, meaning that it is slim enough to be placed on your desk next to your monitor or even mounted on the rear side of a 24" monitor, saving space. It is also lightweight at 2.1kg.
The device is mostly made out of plastic but the actual build quality is quite good. The XS35GTA V3 is rated at 24/7 nonstop operation but needs to have free circulation of air and clear ventilation holes, mainly placed at the sides of the device.
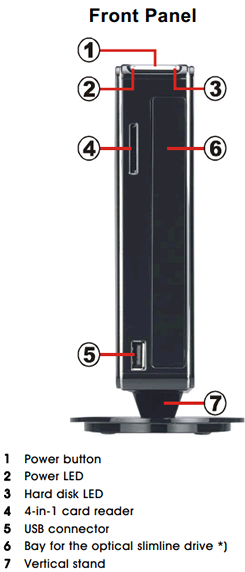
The front side features the power button with two small power and HDD activity LEDs, a USB 2.0 port, a 4-in-1 card reader and place for an optional optical drive or the second HDD (via optional accessory):
 |
 |
At the back you will find:
- 1x HDMI v1.3 digital video and audio output (the closed HDMI is from the disabled on-board Intel Graphics)
- 1x D-Sub/ VGA analog video (15 pin)
- 4x USB 2.0
- 1x Gigabit network (LAN, RJ45)
- 1x Audio Line-out (head phone)
- 1x Microphone input
- 1x DC input for the external power adapter
 |
 |
It is obvious that when paired up with the included stand, Shuttle’s XS35GTA V3 looks pretty good and it would fit your living room, in case you use it as a media player.
There is a single screw you need to get rid of in order to get to the inside of the chassis, as it holds both side panels of the XS35GTA V3.
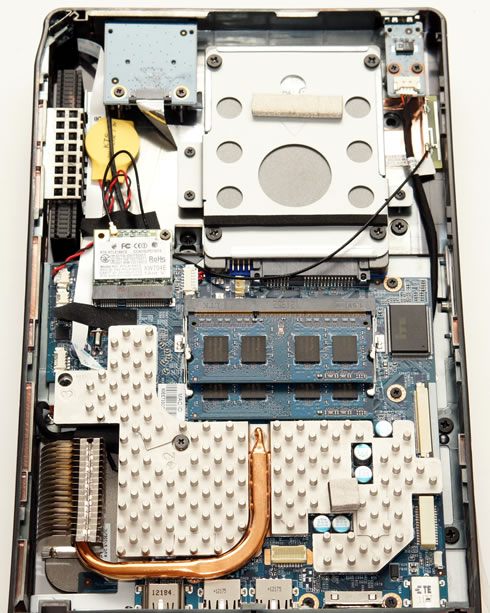
The inside features a rather large heatsink plate connected to the front heatsinks via heatpipe and a place for an optical drive or optional 2nd 2.5" SSD/HDD, after using the included bracket. You can also see the Intel 1000 b/g/n wifi module and two slots to place DDR3 SO-DIMM modules with a capacity of up to 4GB:

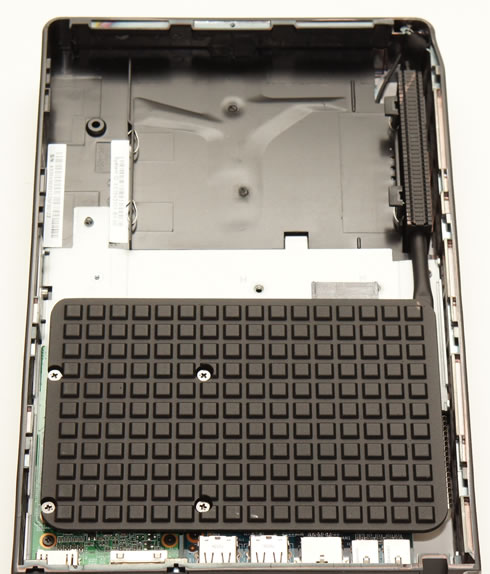
The installation of the HDD or SSD is straightforward as you simply need to screw the mounting plate to the disk.
Then you have to plug it in place and secure it with additional three screws. For our tests we installed an OCZ Vertex 4 128GB SSD and 2x2 DDR3-1066 SO-DIMM from Nanya.