Waitec IXO 334
4. Operation and Controls
Operation and Controls
The camera is aimed toward the easiness of everyday usage, and thus it isn’t as feature packed as many of the camera’s available from other brands. However this isn’t necessary a bad thing, as most people out there prefer simple to use, point-n-shoot cameras that won’t intimidate them with infinite combinations of controls and settings they have to master.
| Rear camera controls |
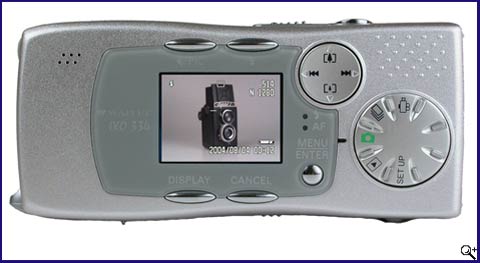
All of the camera’s control buttons except from the shutter release and the power on switch are located on the back and around the TFT screen. Actual operation is very simple once you get a look at the menus, though it might confuse the snapper used in other brand menus as it follows a bit different logic than the cameras from Olympus or Canon. Browsing through the menus is done by the multidirectional control button on the upper right corner and your thumb, the same combination that controls the zoom in/out in record mode. The 2 buttons above the screen switch between the available image resolutions/quality and flash modes, while the “Display” button bellow the TFT turns on and off displayed information or shuts the screen off. |
| Top camera controls |
|
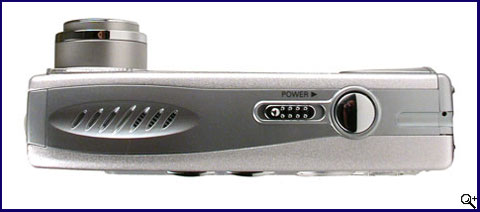
On the top of the camera you can find nothing but the sliding power-on/off switch and the shutter release button, simple and straightforward. The camera's speaker is also beneath the recessed vents at the left which also help position your left hand for a secure grip that doesn’t obstruct the flash. |
Display and Menus
| Record Mode | |
 |
 |
|
This is a typical Record Mode screen. The camera displays information on the remaining shots for the quality setting currently selected, WB setting, the flash mode and the battery level. Most of these information icons can be switched off. |
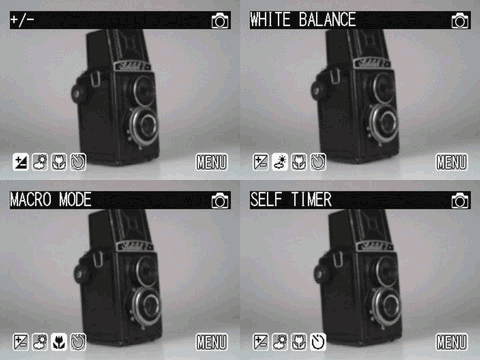
Pressing the "Menu/Enter" button in record mode brings out the available options selectable by the multidirectional button and the "Enter". "Cancel" gets you back to shooting. |
 |
 |
Exposure compensation is easy to select and modify, and the resulting changes in the image are displayed on the screen almost instantly. This setting can help you correct miscalculated exposures since sometimes the camera’s meter can be fooled. A nice feature to have, but 1/3EVsteps would be better to have than 0.5 ones. |
The camera also lets you select a focus point manually, so auto focusing can be override in difficult situations. The screen does’t give you an enlarged middle section as many advanced models do, so actually seeing the best focus point isn’t very easy. Though the display’s quality isn’t bad, it surely limits the MF functionality. |
| Play Mode | |
 |
 |
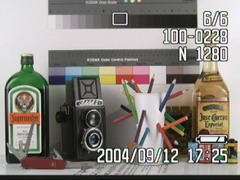
| The typical play mode screen displays the latest picture along with information the date and time of shooting, file name, picture's quality and number of pictures in the memory card. | Pressing the "Menu" in Play mode and using the multidirectional button scrolls through the available display options. |
 |
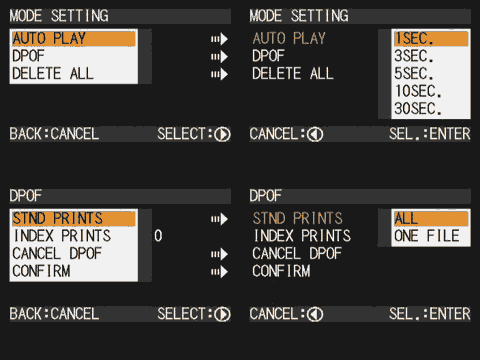 |
| Choosing the Thumbnail view, brings out a 3x3 thumbnail screen in which you can browse between images in the memory card and even delete the unwanted ones. Browsing is quite fast with all of the SD cards used for the test. | Choosing "Menu" in the Play mode menu, brings out additional options for creating an automated slideshow for viewing on a TV set, Direct printing or even deleting all the stored images. |
 |
|
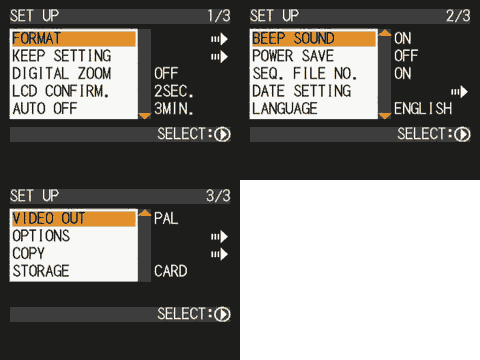
| Choosing the "SETUP" option on the main dial, brings out this menu with settings concerning the camera's operation, menu's languages, time and power saving options etc. | |

