Behringer BCD3000
3. Installation
The BCD3000 console needs drivers in order to work, at least, under the Windows operating system. We used the drivers from the included CD, since there wasn't an update online...

After installation and rebooting, we could access the main control panel of the BCD3000. There are three tabs indicating the operating modes of the console (ASIO/WDM/MIDI). The default setting is ASIO with 12ms latency,

which can be lowered down to 4ms. Note that latencies lower than 10ms are quite satisfactory, since they are not noticeable.

Pressing on Advanced mode, you can set the master out and phones out.

Under the WDM/MME tab, more options are available.

While the third tab, MIDI, you can set the way the MIDI works, mostly for the console buttons.

In standard mode, the buttons will NOT power up and it needs only one click to work. In advanced mode, button LEDs do light up, but you need to DOUBLE click for each operation. I think this is probably one of the biggest negatives of the BCD3000. Why shouldn't buttons light up and work with a single click?
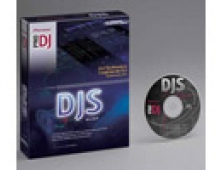
Let's now install the software that is bulked with the BCD3000 console, Traktor 3.2 LE edition.

Any user that has spent even a little time with PC DJ mixing knows Traktor 3. Unfortunately, you don't get the full edition, but a limited version (LE) for "bedroom" DJs. I imagine there should be some kind of discount for users who wish to upgrade to the full version of Traktor.

Another screen from the Soundcard properties.

When using the BCD3000 with a Mac, there are several differences in comparison to using it with Windows.
- Hardware driver is not required.
- Input A is only switchable between the Microphone and Phono input by using MIDI commands
- The outputs are dedicated: channels 1-2 are always routed to MASTER OUT and channels 3-4 are routed to PHONES.
- The properties of the MIDI interface and LED cannot be reconfigured.
- Control Panel software to control the latency is not required.

