Elby CloneCD CD-R Software
6. Interface - Options (2)
Review Pages
2. CD-Protections Overview
3. Copy Protection Detectors
4. Add-ons Patchers
5. Interface - Options (1)
6. Interface - Options (2)
7. Various Protection Tests - Page 1
8. Various Protection Tests - Page 2
9. Various Protection Tests - Page 3
10. Tests Conclusion
11. Final Conclusion
12. FAQ
13. Hardware Suggestions
14. Tips
15. Future Plans
CloneCD Guide - Page 6
Interface - Options Page 2
- Write Tab
In the "Write" tab we can see the following options:
RAW DAO: This is the default mode for CloneCD, which gives you total control over the burning process. If your CDR-W drive has this feature you will be able to backup most of current CD protections.
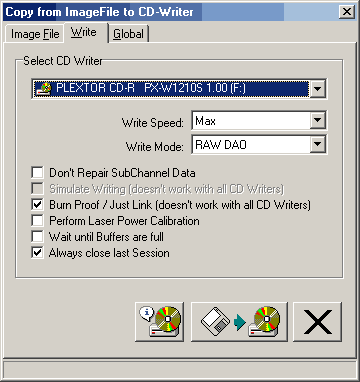
RAW SAO: If your drive is not support "RAW DAO" then, your drive possible supports "SAO RAW" mode:
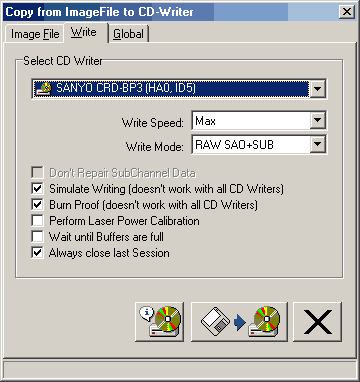 "RAW
SAO": Data is written raw, but the writer will create all the SubChannel
data. This is the "compatibility" mode. This can be used with CDs
that contains bad sectors, and doesn't have special subcode layout.
"RAW SAO+SUB": Data is written raw, PQ sub codes are generated by the CD writer, and the R-W SubChannel data (CD+G) will be written too. You will need this mode only when backuping up CD+G CDs.
There is however, another option that your drive supports both modes (RAW+SAO DAO). In that case CloneCD allows you to select from both modes (RAW/SAO) for writing. Of course in most cases RAW DAO should be your default choice. Most known drives that support that are Ricoh:
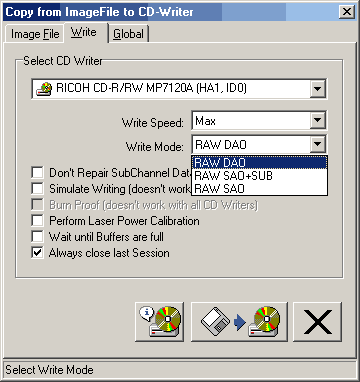
- Write Options:
Don't repair SubChannel Data: This box need to be ticked only for Playstation CDs that are LibCrypt protected. You shall not tick it for anything else. If this option can't be activated, it means that you CD-Recorder don't support writing of 96 bytes SubChannel Data: this is a hardware limitation, not a software limitation.
Simulate writing: Enable simulation of writing if your CD-Recorder supports this option.
BURN-Proof/Just Link: Latest CloneCD builds supports all anti-coaster technologies (BURN-Proof & JustLink). This means that if your CDR-W drive supports it, you will not have buffer underrun problems. Also this feature could be used for coming "on the fly" CD copy mode!
Perform Laser Power Calibration: Usually you don't have to check this box since the CDR-W automatically adjusts the laser power. The Laser Power calibration helps to find bad CDR media without doing a real write, e.g. writing 12x with uncertified media. It *does* cause problems with some Philips writers, that's why it is off by default.
Wait until Buffers are full: If ticked CloneCD will wait until all buffers are file before the write operation is started. Usually you don't to check it because buffers are filled while the lead-in of the CD is written.
Always close last session: Normally that option should be ticked. However if you wish to backup *special* multi-session console CDs (aka Utopia DC boot disc) you need to Un-check it in order to get a working copy.
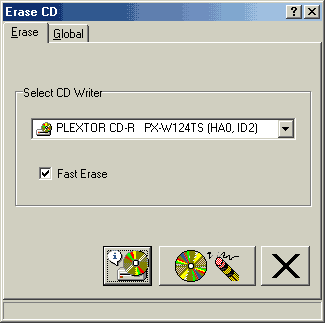
- EraseCD Tab
You can also erase RW CDs (full/fast) with CloneCD so there is no need for external
software:
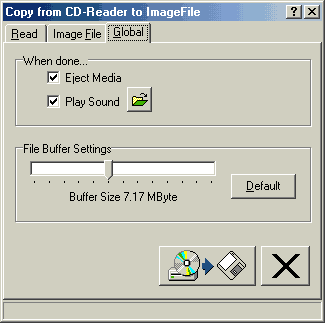
- Global Tab: You can adjust the buffer, which CloneCD will use for writing the image. The best value here is the default one. If you still have problem you could possible increase it.
 -
CloneCD Settings
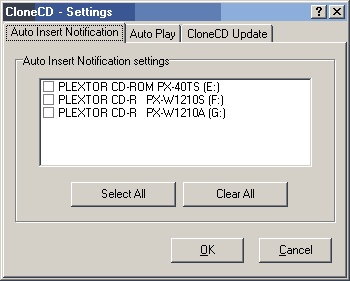
Under Tools you can find the settings option, which leads to programs settings.
What you can find there?
Auto Insert Notification: You can remove the Auto Insert Notification from drives.
Auto Play: You can select to play automatically Data or AudioCDs.
CloneCD Update: Enables automatic/manual check for new CloneCD versions (Requires Internet Explorer 4 or better). If you check it, CloneCD will automatically check once per week for newer builds and download them.
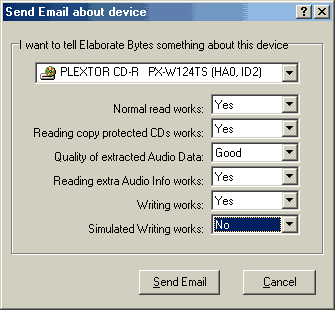
Email Author: Last another cool option that CloneCD has is that you can send an e-mail to author about how well CloneCD performs with the CD-ROMs or CD-Writers you might have:
- CloneCD Skins
CloneCD supports also "Skins". That means you can change the way that program looks like with your own graphics! Under "Tools">> Select Skin you can setup where your skins are located and select from them. The default directory for put your skins is under "CloneCD/Graphics" directory. You can get more skins from CloneClinic website. If you wonder how you can make your own skins visit this page.
Review Pages
2. CD-Protections Overview
3. Copy Protection Detectors
4. Add-ons Patchers
5. Interface - Options (1)
6. Interface - Options (2)
7. Various Protection Tests - Page 1
8. Various Protection Tests - Page 2
9. Various Protection Tests - Page 3
10. Tests Conclusion
11. Final Conclusion
12. FAQ
13. Hardware Suggestions
14. Tips
15. Future Plans


