Pioneer DVR-720H-s DVD Recorder
12. Making a recording (DVD)
Review Pages
2. Packaging & Interior Look
3. Control Menu
4. The Tuner menu
5. The Video In/Out Menu
6. The Audio Out menu
7. The Language menu
8. The Recording menu
9. The Playback menu
10. Reading Tests
11. Compressed Audio (data CD/DVD)
12. Making a recording (DVD)
13. Making a recording (HDD)
14. Recording Options
15. Chase Play Feature
16. Timer Recording & Disc Navigator (DVD)
17. Editing and Finalizing a DVD-Video Disc
18. Disc Navigator (HDD)
19. Copy Menu (HDD -> DVD)
20. Copy Menu (DVD -> HDD)
21. Copy Menu (Disc Backup)
22. The Photoviewer
23. Writing Quality Tests
24. Error Correction Tests
25. Conclusion
Making a recording (DVD)
In this section we take you through the process of making a recording on DVD from live TV, in order to evaluate the DVR-720H-s capabilities, performance and ease of use.
While the DVR-720H-s supports both DVD-R and DVD-RW discs for recording, most
of our tests here were done with DVD-RW media. This was intentional, as we feel
that most people who will buy this product will want to use rewritable discs,
as these
can be written again and again, just like a normal VCR tape.
So, when using a DVD-RW to record video, we have to choose between two recording formats: DVD-VR and DVD-Video. These are logical formats, and have nothing to do with the kind of discs used. The only limitation is that only DVD-Video can be used on DVD-R discs, while both formats can be used for DVD-RW discs. The DVD-VR format has quite a few advantages, like giving the user the ability to edit/modify the recorded video, defining chapters, and other features that facilitate editing. On the other hand, DVD-Video is more restrictive, but the most compatible choice if the recorded disc is to be used on other standalone DVD players. Also, there are some other issues with discs recorded in DVD-VR format, like incompatibilities in playback with other players.
At the time of this review, as a rule of thumb you can use DVD-VR if you just want to record some video and perform the necessary editing using the DVR-720H-S, and the produced disc will be mainly played back in the same device. On the other hand, if you want to record something that you want to be sure your friends will be able to play back on their DVD players, use DVD-Video format.
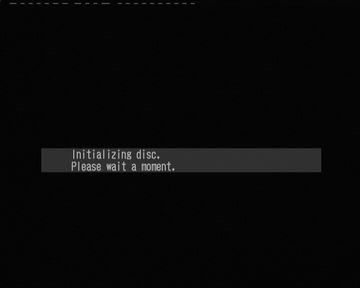
When a blank DVD-R/DVD-RW disc is inserted into the DVR-720H-s it has to be initialized in order to be able to be used for recording. The DVR-720H-s can be configured to initialize blank discs automatically if that is desired (DVD-RW Auto Init menu option, VR or Video mode). The process is very short and takes 10-15 seconds to complete.
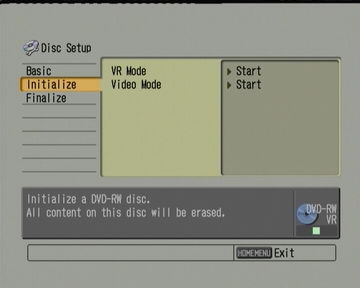
If the disc is not blank, you can initialize it manually by using the Disc Setup menu available from the Home Menu.
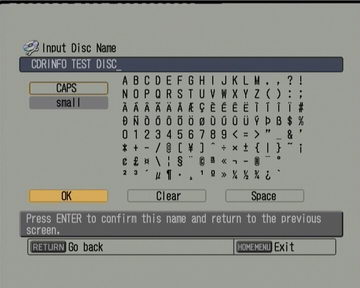
You can also assign a volume label to the disc, lock it so that the DVR-720H-s cannot erase it without first unlocking it. Think of it as the write protect tab that VCR tapes have.

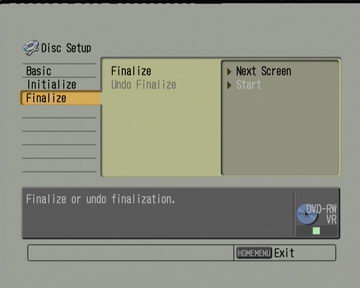
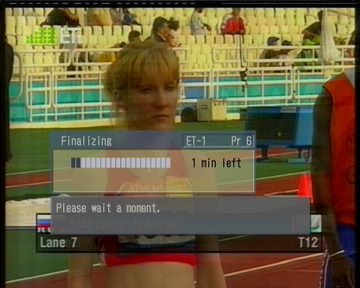
The disc has to be finalized as well, if we want to prevent any more video writes to the disc as well as playable on another DVD players (standalone or computer). In the case of DVD-RW discs, they can be un-finalized as well. This process can take from one minute to half an hour, depending on the recording format used, and the amount of video time recorded on the disc.
Read on to the next page where options on making recordings using the hard drive are discussed.
Review Pages
2. Packaging & Interior Look
3. Control Menu
4. The Tuner menu
5. The Video In/Out Menu
6. The Audio Out menu
7. The Language menu
8. The Recording menu
9. The Playback menu
10. Reading Tests
11. Compressed Audio (data CD/DVD)
12. Making a recording (DVD)
13. Making a recording (HDD)
14. Recording Options
15. Chase Play Feature
16. Timer Recording & Disc Navigator (DVD)
17. Editing and Finalizing a DVD-Video Disc
18. Disc Navigator (HDD)
19. Copy Menu (HDD -> DVD)
20. Copy Menu (DVD -> HDD)
21. Copy Menu (Disc Backup)
22. The Photoviewer
23. Writing Quality Tests
24. Error Correction Tests
25. Conclusion

