Terramaster TD2 Thunderbolt 3
2. Retail Package
The Terramaster TD2 Thunderbolt 3 comes with a minimal design and the needed specs printed at a side sticker. The version we tested costs around 270 Euro as found over Amazon.com / Amazon.de / Newegg. Terramaster also offers another model, higher priced called TD2 Thunderbolt 3 Plus that costs around 320 Euro and offer in addition two USB3.1 hosts and 1Gbit LAN (network interface provides a network only for your computer – It cannot convert your hard drive into a network drive.). The box is medium sized and rather minimal:

At the side users will find product information and part number. The chassis is well protected and placed next to another cardboard box that includes the rest of the accessories. Opening the box, we will find the package contents:

Unpacking the contents, users will find
- Host unit (x1)
- Power cord (x1)
- Thunderbolt 3 cable (40Gbps) * 1
- Quick Installation Guide (x1)
- Power adapter (x1)
- Screws (several)
- Limited Warranty Note x 1

In case you register your product with Terra-Master you get additional 6-month warranty (2 years + 6months). In order to get the NAS server running of course you need either 3.5" or 2.5" HDD/SSD drives. Terramaster lists several drives certified to work, users should visit this page to get more information. In short, Terramaster lists Seagate, Samsung, Sandisk and WD Red SSD drives, while for normal HDD, suggests Seagate Barracuda Pro, Exos, Skyhawk, Ironwolf/Ironwolf Pro and WD Red/Red Pro, Purple, Gold, Surveillance and Toshiba NAS N300 series. Of course other HDD may work, but make sure the used drive is built for NAS use, else your data may be in danger.
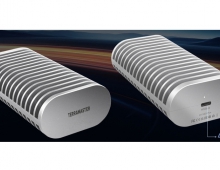
The product has small dimensions (227 x 119 x 173 mm) and weights around 1.40kg without any drives installed. The material used is aluminum and gives a good overall aesthetics and feel to the product. At the top there is a useful handle to carry your external case in case you need it.

At the front users will find two (2) slots for inserting HDDs. At the left area there is the power button and several led indicating how many drives have been installed and the operation of the system.

LED Operation |
|
| Hard drive tray | Fix hard drive |
| Hard drive indicator | Red: Faulty |
| Hard drive indicator | Blinking green: Reading or writing |
| Hard drive indicator | Orange: RAID synchronization |
| Hard drive indicator | Off: No hard drive (or in sleep mode) |
| Power indicator | On: Powered on |
| Power indicator | Off: Powered off |
| Power button | Short press to power on |
| Power button | Press and hold for 3 seconds to power off |
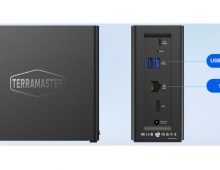
At the back, we will find one 80 mm x 25mm fan (rated 18.6dB(A) , along with various connection port
| Power jack | DC 12V |
| Thunderbolt 3 interface 1 | Interface for computer (compatible with USB) /charging |
| Thunderbolt 3 interface 2 | Only for a daisy chain connection, not to connect to a computer! |
| DisplayPort 1.4 | Connect to monitor, up to 8K |
| RAID switch | Rotate to switch RAID mode |
| Reset button | Press and hold for 5 seconds to let the newly-set RAID mode take effect |


Before start using the drive, we recommend to read the online guide from Terra-Master that explains the install process and the general operation of the unit.


