Asus P5Q Deluxe
3. Bios settings, test configuration
Review Pages
2. Retail package, overview
3. Bios settings, test configuration
4. Energy Process Unit (EPU)
5. Benchmarks - Everest Ultimate Edition, SiSoftware Sandra
6. Benchmarks - PCMark Vantage, BAPCo's SYSmark 2007 Preview
7. Benchmarks - MAXON CINEBENCH, x264 HD Benchmark, TMPGEnc 4 Xpress
8. Benchmarks - SuperPI, wPrime
9. Benchmarks - 3DMark06, Crysis v1.2, Unreal Tournament 3 Demo
10. Overclocking
11. Final words
The BIOS layout follows what Asus has been using for sometime now. For this test, we used the 0904 revision of BIOS for the majority of our tests. By the time these lines are written, Asus has released the newer v 1306, which slightly increases the memory overclocking margins.
The BIOS settings are available in several tabs. Each tab features several sub-menus with different settings.
The first tab typically includes information about the date, the installed devices on the SATA ports and other general system information.

Opening the second tab or "AI Tweaker" reveals tons of other features, as you can see below:
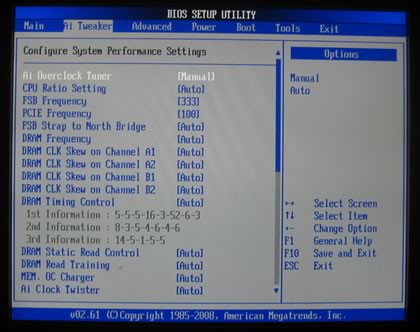
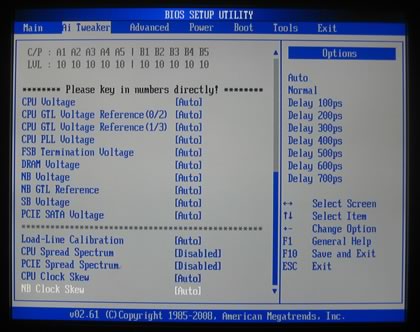
The motherboard features an overclocking system called Ai Overclock Tuner, which allows you to either manually adjust/set the overclocking parameters or load the standard settings for the system by leaving all parameter at the "Auto" setting.
We used the manual settings for all the hardware tests.
The FSB Strap to North Bridge can be set to 400MHz max. Most users will leave this option to Auto.

There are many memory dividers to play with. The memory dividers are affected from the selected FSB, so in order to have the highest possible options, you should better leave the FSB to auto. The BIOS reads the memory timings and displays them in a drop down menu.
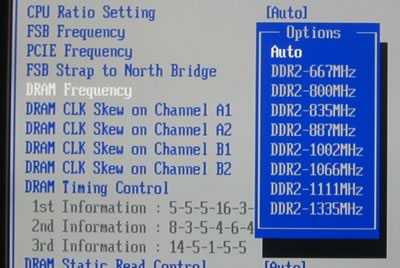
We also noticed that when the Ai Overclock Tuner is set to Auto, there is a DDR2-1200MHz option available in the DRAM Frequency selection tab:
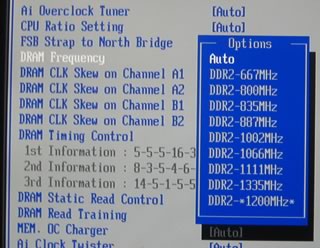
The DRAM CLK offers various options to improve stability and performance:
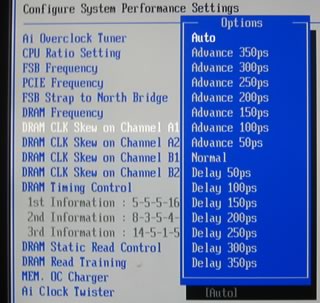
Many different modes are available for memory regulation that affect either the performance or the stability of the system. Here is a list with all the available voltages and frequencies:
- FSB from 200~800MHz with 1MHz step
- Frequency bus PCI-E from 100~150MHz with 1MHz step
- CPU Voltage: 0.85000v - 2.1000v (0.00625v steps)
- CPU PLL Voltage: 1.50v - 2.78v (0.02v steps)
- FSB Termination: 1.20V~1.90V with 0.02V interval
- DRAM Voltage: 1.80v ~ 3.08v (0.02v steps)
- NB Voltage: 1.10v - 2.06v (0.02v steps)
- SB Voltage: 1.15v - 1.40v (0.10v steps)
Proceeding to the Advanced tab, we can find more settings for the SpeedStep, C1E support and of course CPU multiplier:

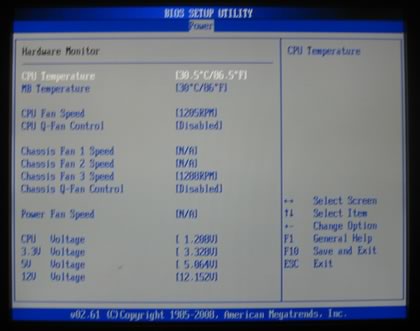
Under the Power tab, there are the usual temperature readings, with the NB/SB temperatures to be absent here.
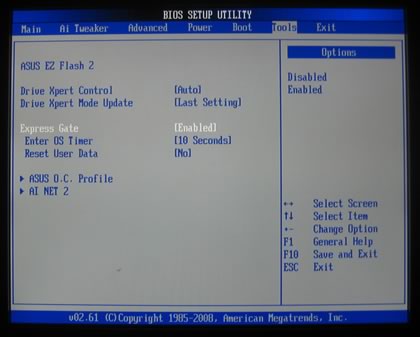
Finally, under the "Tools" tab we find the Express Gate option, which can be enabled or disabled according to your needs.
- Test Configuration
CPU-Z provides information about the motherboard and our system in general, as we are ready to start the benchmarks.


Before firing up the tests, let's take a look to the Asus Energy Process Unit..
Review Pages
2. Retail package, overview
3. Bios settings, test configuration
4. Energy Process Unit (EPU)
5. Benchmarks - Everest Ultimate Edition, SiSoftware Sandra
6. Benchmarks - PCMark Vantage, BAPCo's SYSmark 2007 Preview
7. Benchmarks - MAXON CINEBENCH, x264 HD Benchmark, TMPGEnc 4 Xpress
8. Benchmarks - SuperPI, wPrime
9. Benchmarks - 3DMark06, Crysis v1.2, Unreal Tournament 3 Demo
10. Overclocking
11. Final words


