Asus P6T Deluxe Vs Foxconn Renaissance
13. Overclocking tests - Asus P6T Deluxe
Review Pages
2. Asus P6T Deluxe/OC Palm Edition - Opening the box
3. Asus P6T Deluxe/OC Palm Edition - BIOS
4. Foxconn Renaissance - Specifications
5. Foxconn Renaissance - Opening the box
6. Foxconn Renaissance - BIOS
7. Testbed
8. Benchmarks - Everest Ultimate Edition, SiSoftware Sandra
9. Benchmarks - PCMark Vantage, BAPCo's SYSmark 2007 Preview
10. Benchmarks - MAXON CINEBENCH, x264 HD Benchmark, TMPGEnc 4 Xpress
11. Benchmarks - SuperPI, wPrime
12. Benchmarks - 3DMark 06, Crysis v1.2
13. Overclocking tests - Asus P6T Deluxe
14. Overclocking tests - Foxconn Renaissance
15. Conclusion
Overclocking
Before starting the overclocking procedure let's take some notes. In order to achieve the best possible results, it is advised to disable the Turbo mode and the EIST technologies under BIOS. Disabling the C-STATE Tech will eliminate any reason that could had a negative effect on the results.
Generally, both motherboards gave the same processor overcloking performance when we set similar voltages at vCore and memory. However, the overclocking procedure was different for each motherboard so we present these tests separately for each system.
Asus P6T Deluxe
We enjoyed the overclocking procedure with the Asus P6T Deluxe motherboard. The Bios includes all the needed options/parameters to achieve the highest performance gathered on a single window, which would make your life easier. It is suggested to use the Manual mode to get things in your hands and start experimenting.
We found that the Auto mode produces much higher voltages (vCore,) than the cpu is actually requiring for a stable operation. This behavior is not positive since loading the CPU with extra voltage increases its temperature and may affect its life span. Therefore you may start by leaving the settings at Auto but after a while you 'd better lower the voltages either under DOS or via the Asus TurboV software, which actually works very well. Speaking about the TurboV software, it allows you to change all the main settings of your main board under Windows, as you are exploring its overclocking margins. At the same time, running a stretch software like Prime95 will give you an idea of your system's stability and limits.
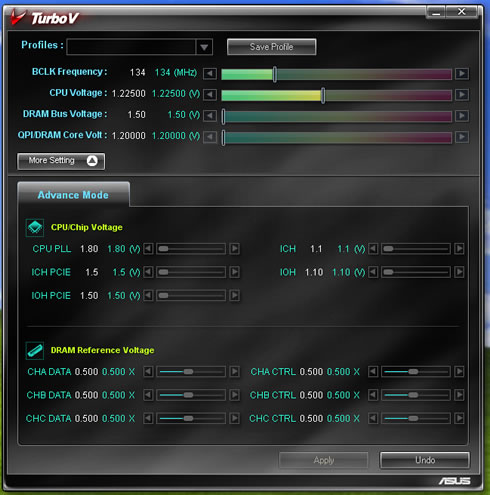
Note that the spread spectrum options should be disabled.
So let's see what we have accomplished here. The CPU's Turbo function is enabled by default and gives additional ~116MHz to the CPU without any effort:

Disabling it limits the CPU Multiplier at x20:
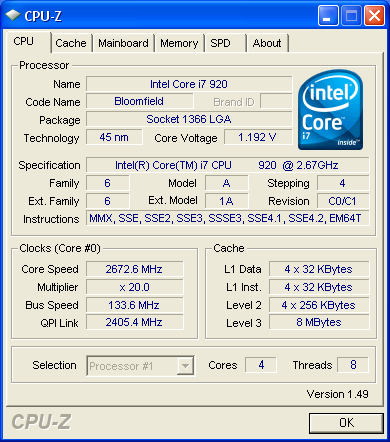
Starting our journey, we set all options to Auto and we try to get the Crucial DDR3-1066 memory run at 1333Mhz. The Asus P6T Deluxe chose CL9 for that speed. When we select 1600MHz, the mainboard kept the CL9 setting and the DRAM voltage was 1.80V! (Auto).
Pushing even higher with the 1866MHz divider, the motherboard set the DRAM voltage at 1.90V, which sounds rather high. In all cases we manually lowered the max DRAM voltage at 1.66V and we got the following numbers:
Memory Speed (Crucial DDR3-1066 Rated) |
Memory Bandwidth |
Memory Latency |
Cache & Memory |
1067 (7-7-7-20-1T-1.65V) |
17.52GB/sec |
79ns |
57.55GB/sec |
21.22GB/sec |
70ns |
62.74GB/sec |
|
23.98GB/sec |
65ns |
64.70GB/sec |
|
26.88GB/sec |
60ns |
67.08GB/sec |
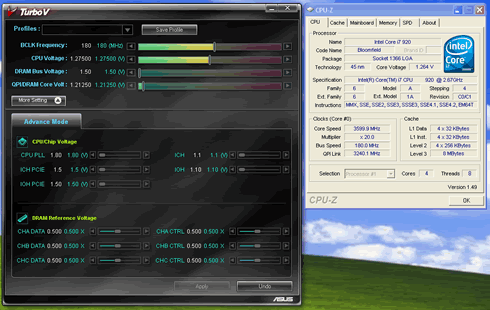
Getting into absolute cpu tests, we had no problem reaching the 3.60GHz under auto settings. At this frequency, the vCore is around 1.27V, which sounds very good
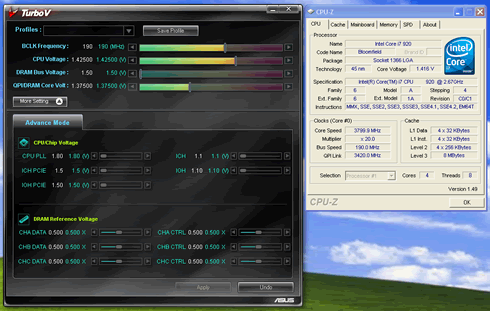
We pushed the CPU up to 3.80GHz and still everything was running smoothly under Auto settings. However, the vCore was increased at 1.425V
Going up further to 4.0GHz things are more or less the same, although the system starts losing its stability.
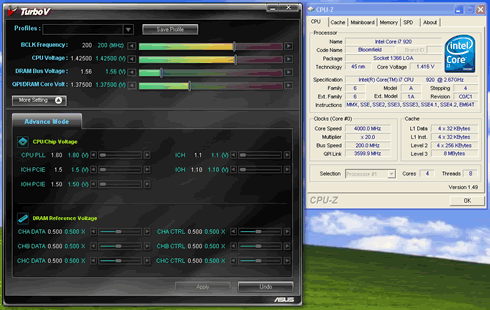
So far we have seen that the 3.80GHz CPU frequency can be achieved easily and it the system is totally stable. Could we also reach the 4.0GHz without any problems? Yes, just lower the CLK to 191MHz and use the Turbo Boost Function. Just set the 1600MHz divider and 1.66V for DRAM:
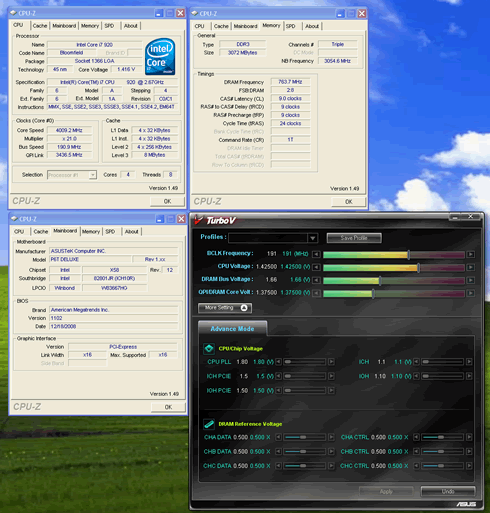
To sum up, we are more than pleased with the overclocking performance of the Asus P6T Deluxe/OC Palm Edition mainboard. The procedure is easy and you can easily select higher DRAM speeds than 1067MHz and benefit from higher memory performance.
Getting the Core i7-920 CPU work at 4.0GHz might require another approach than directly increasing the CLK and for sure, you will need a strong aftermarket cpu cooler.
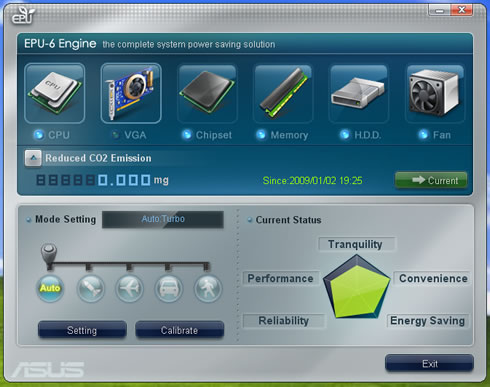
As a last note, the EPU-6 Engine cannot be used while overclocking is performed but nevertheless is useful if you wish to save some energy from your system.
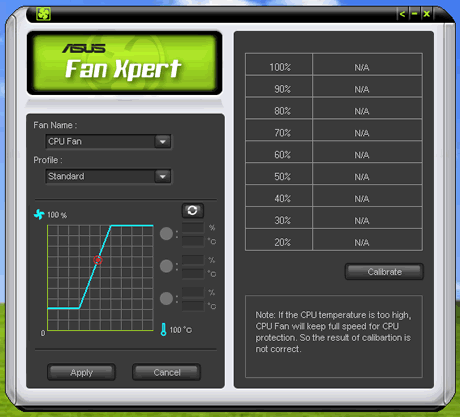
The Fan Xpert utility might be useful to further reduce the produced your system's noise.
Review Pages
2. Asus P6T Deluxe/OC Palm Edition - Opening the box
3. Asus P6T Deluxe/OC Palm Edition - BIOS
4. Foxconn Renaissance - Specifications
5. Foxconn Renaissance - Opening the box
6. Foxconn Renaissance - BIOS
7. Testbed
8. Benchmarks - Everest Ultimate Edition, SiSoftware Sandra
9. Benchmarks - PCMark Vantage, BAPCo's SYSmark 2007 Preview
10. Benchmarks - MAXON CINEBENCH, x264 HD Benchmark, TMPGEnc 4 Xpress
11. Benchmarks - SuperPI, wPrime
12. Benchmarks - 3DMark 06, Crysis v1.2
13. Overclocking tests - Asus P6T Deluxe
14. Overclocking tests - Foxconn Renaissance
15. Conclusion

