EnGenius Wi-Fi 7
3. Installation
Review Pages
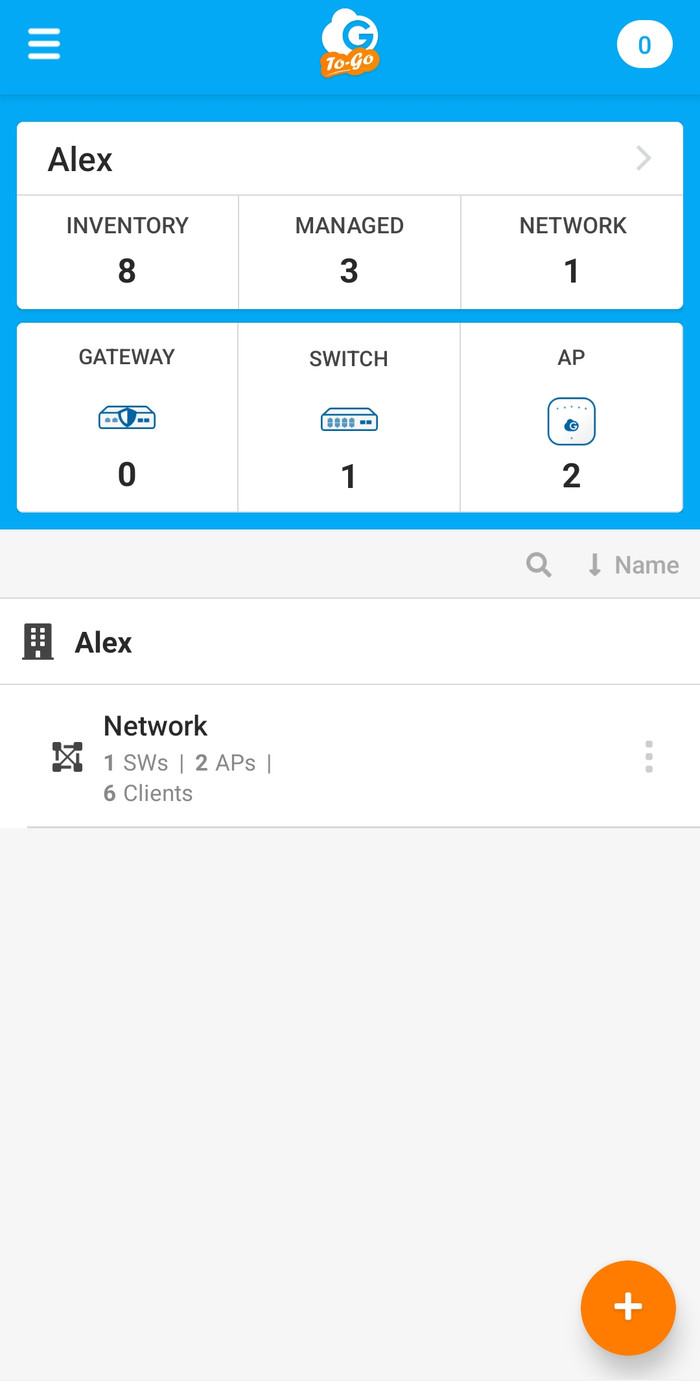
Before starting the installation process, it's advised to create a free online account that can be used to control EnGenius Networking products via either HTTP or the Cloud-To-Go free app. After validating your free account, login at the Cloud-To-Go app and move down to the + button.
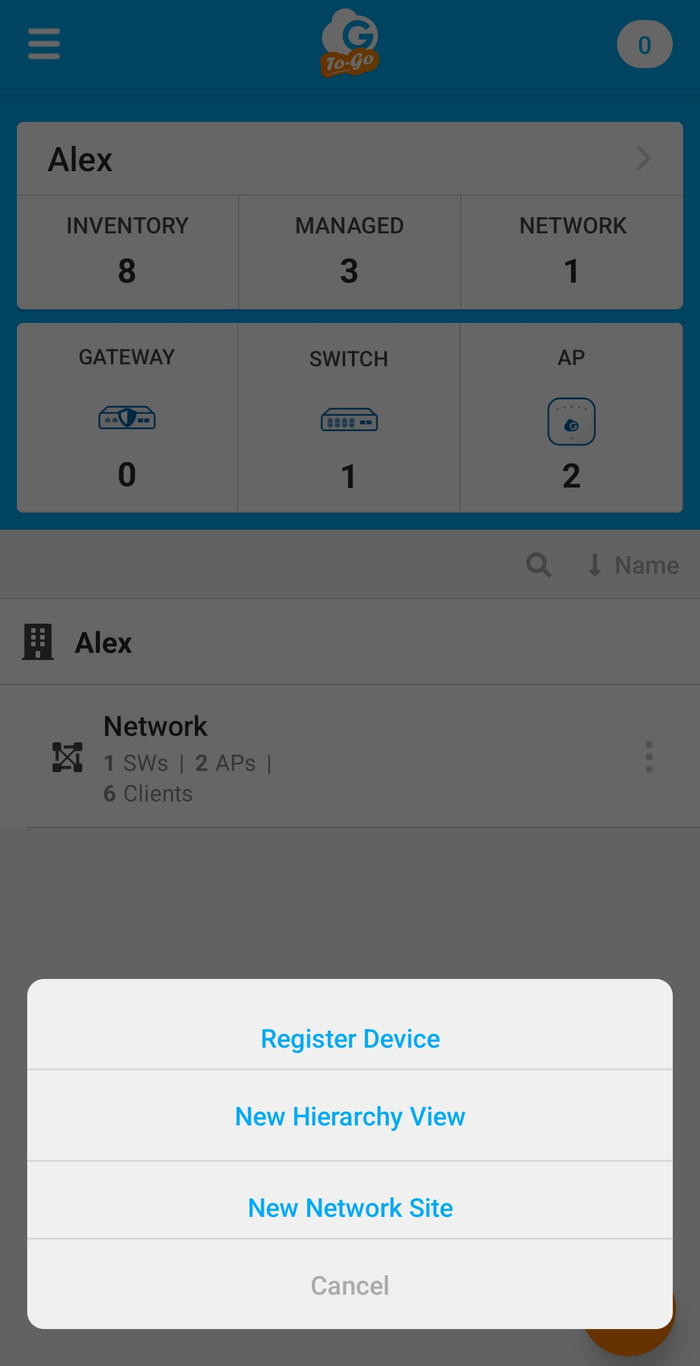
Select register device
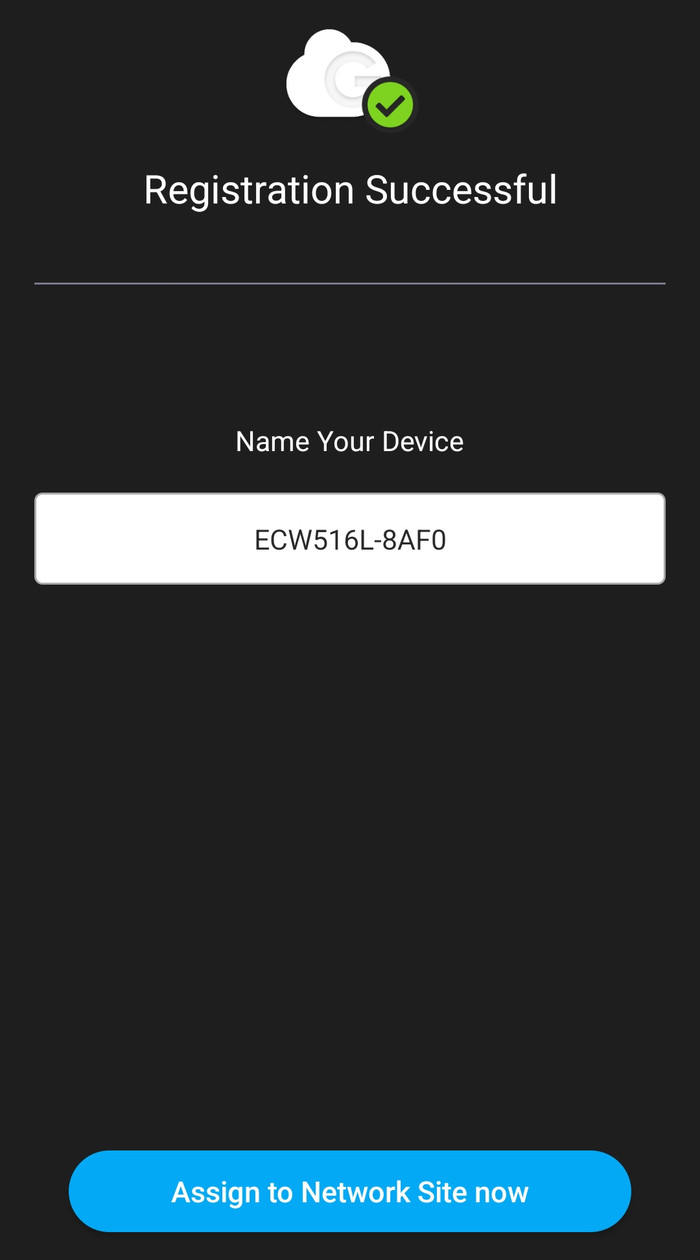
The app will require camera permissions and you need to scan the included QR code at the bottom and automatically, the AP information will be displayed.

The Cloud-To-Go app includes a nicely designed wizard to help you out with the whole installation process.


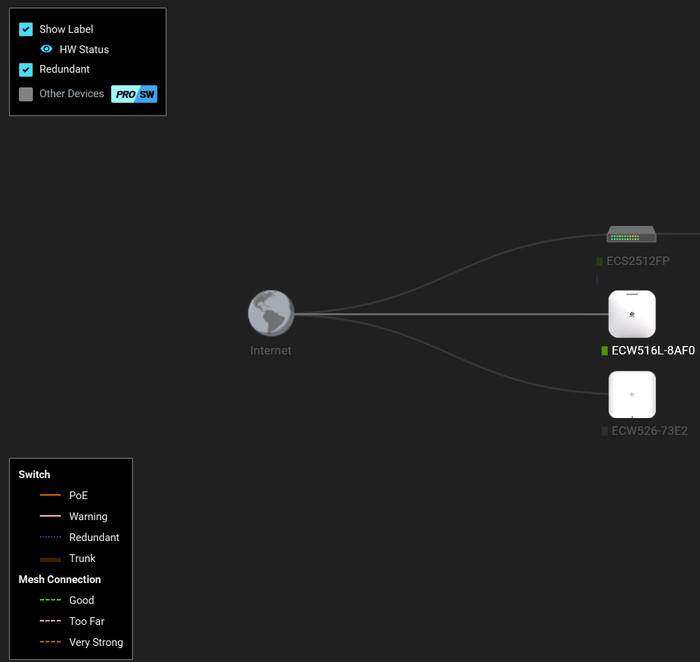
After we press Finish, we can start viewing our installed devices under the AP tab.

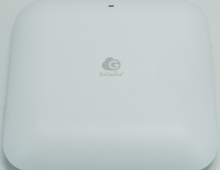
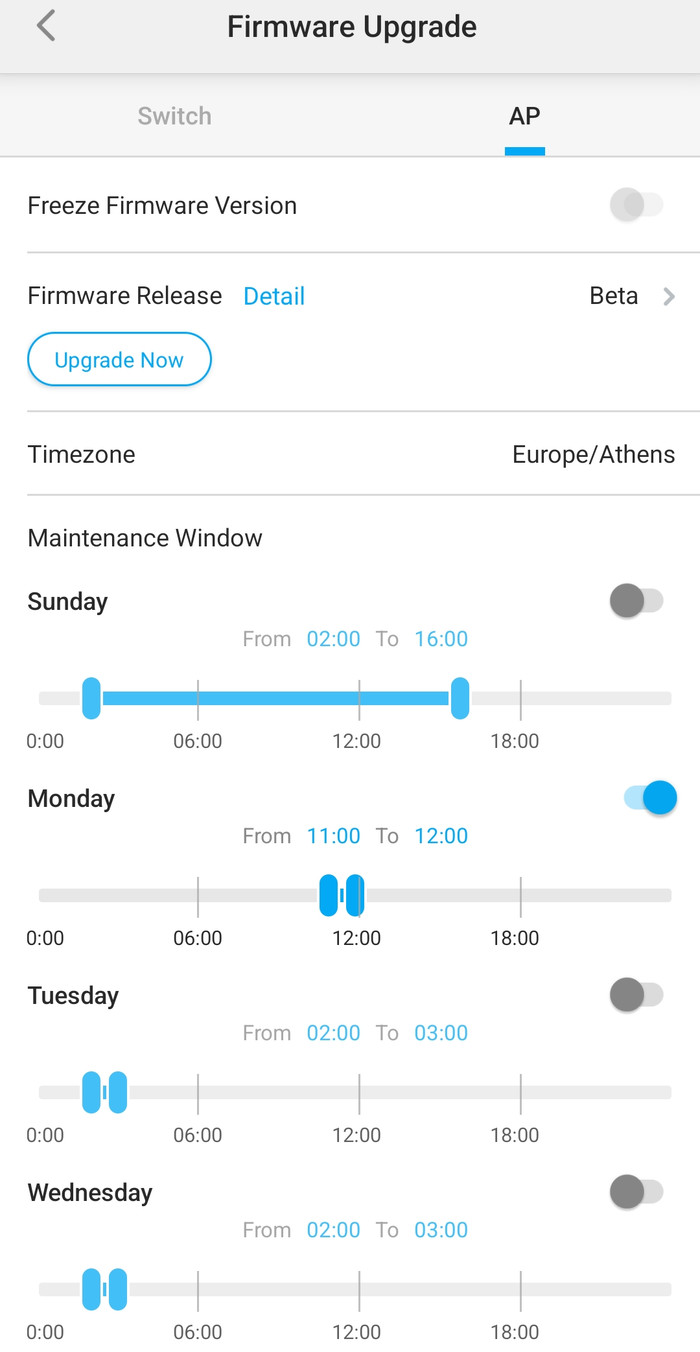
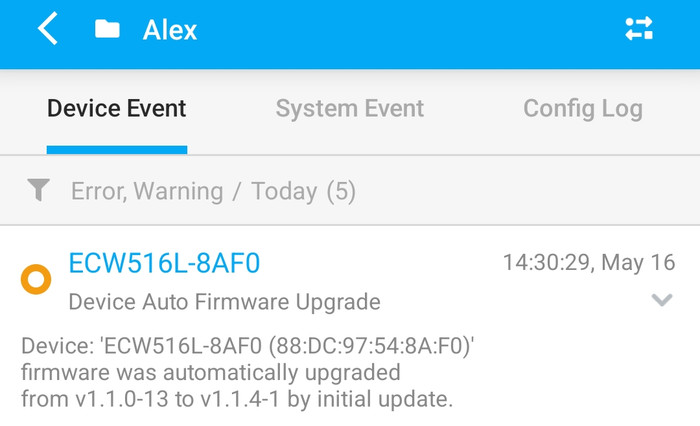
Selecting the ECW516L gives us many different options to choose from, the device has already a newer firmware update, which we apply before testing it.
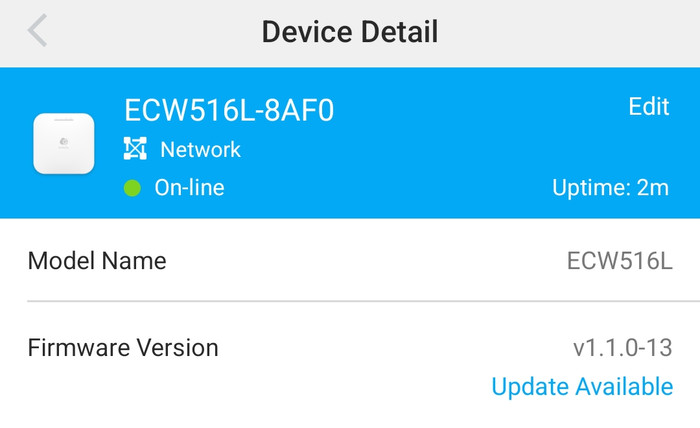
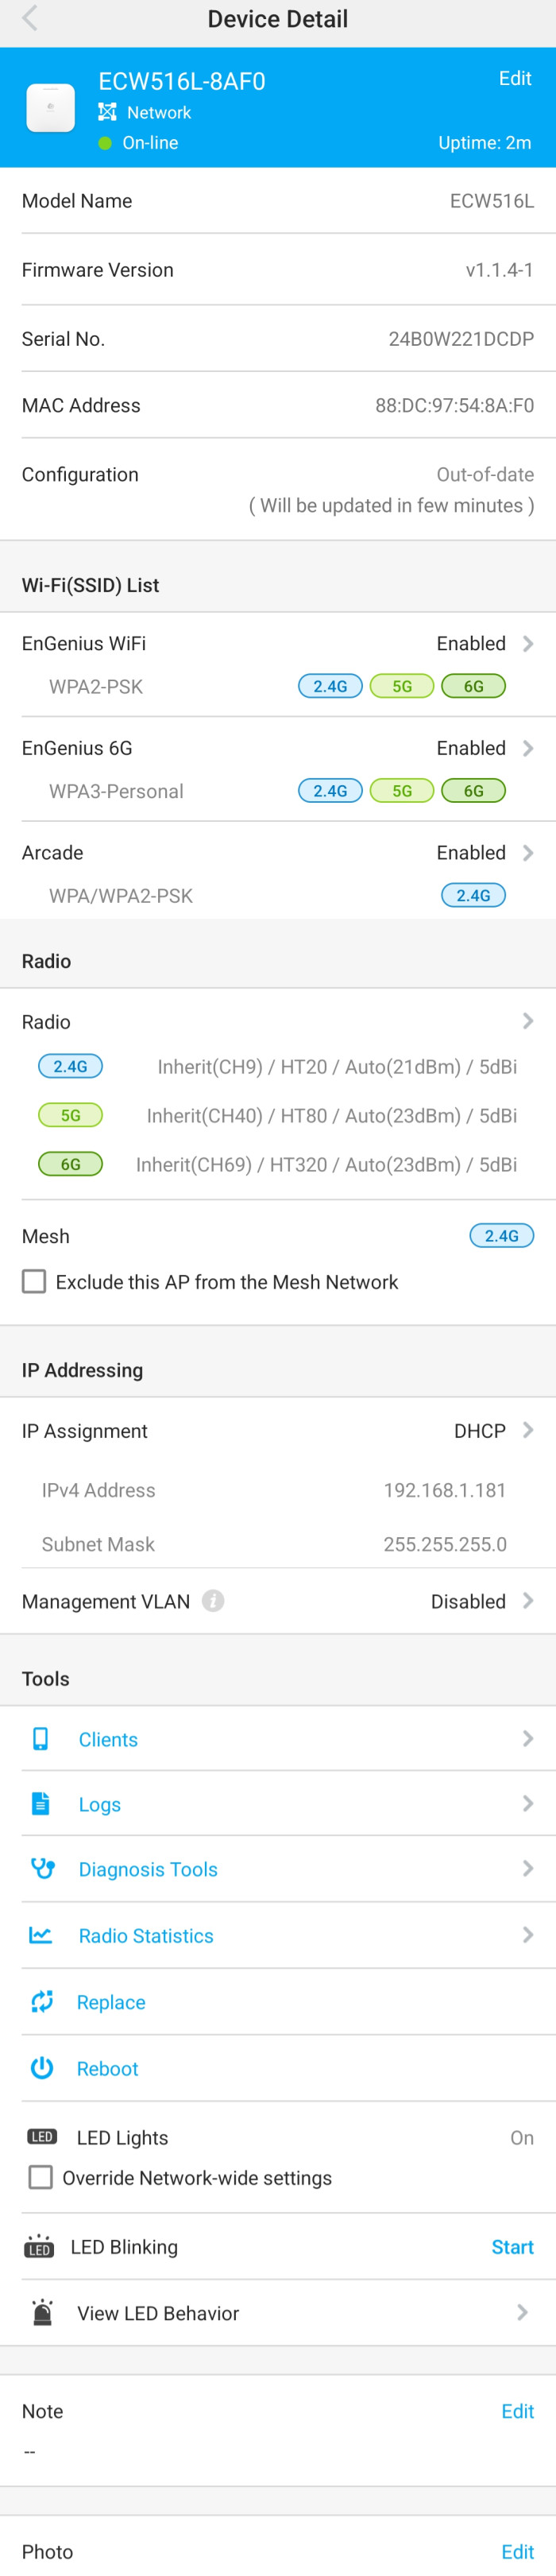
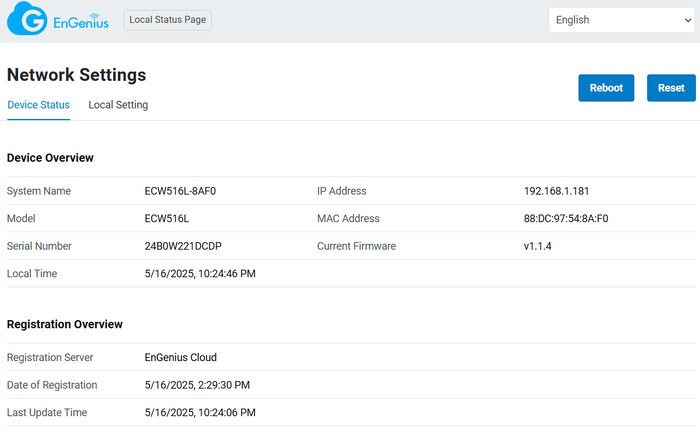
The Device detail displays all the needed information about the AP and you can fully control its functions.
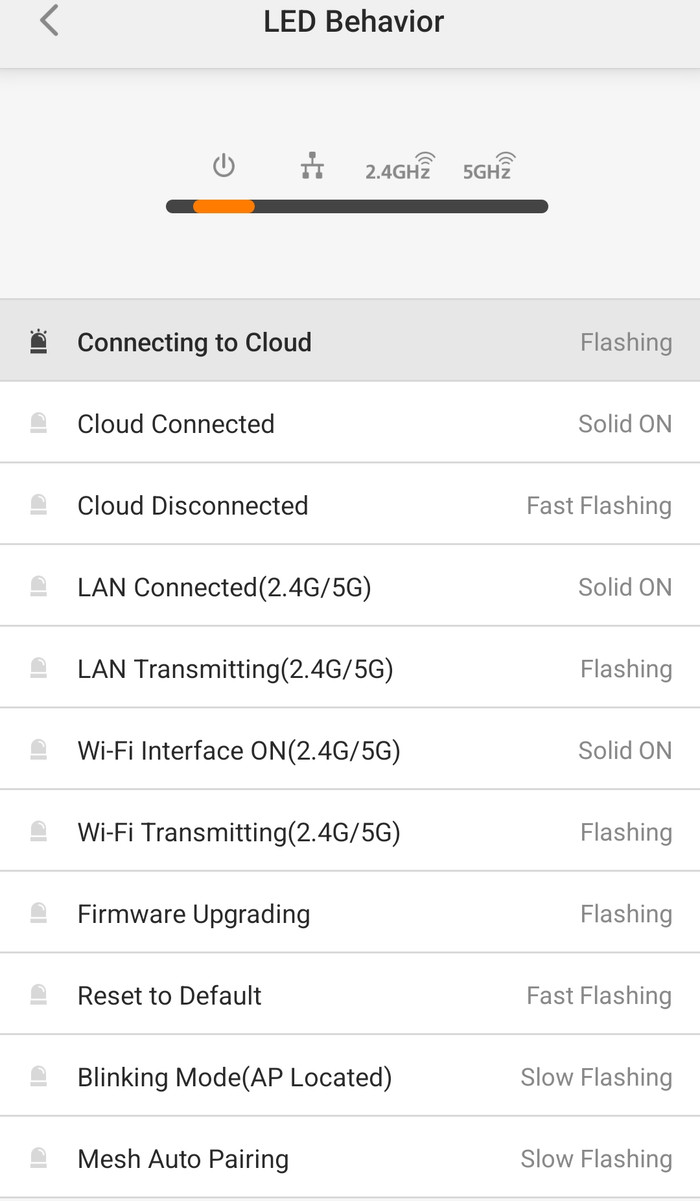
The LED behavior is also displayed in case you are wondering what exactly its LED displays.
While the Cloud-To-Go app is useful, users can also control all EnGenius Cloud devices via the EnGenius Cloud. You can see most of the features of the device and also set many different parameters as well.
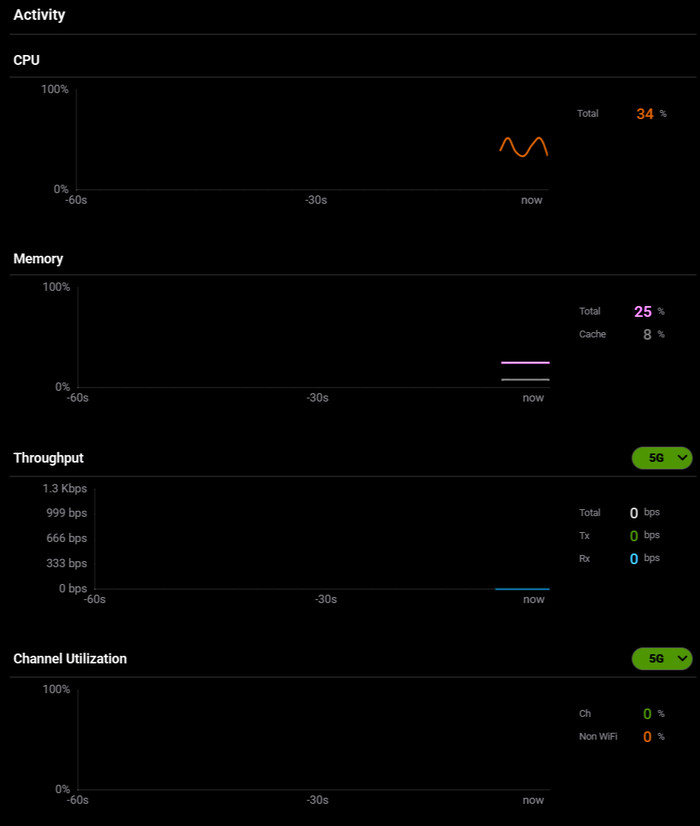
Under the Diag Tools, users can find very useful information about the % CPU usage of the device, and its connectivity to the Internet and scan the surrounding WiFi to find the least busy Wi-Fi channels with the lowest number of clients. Packet Capture is also present for auditing your local network.
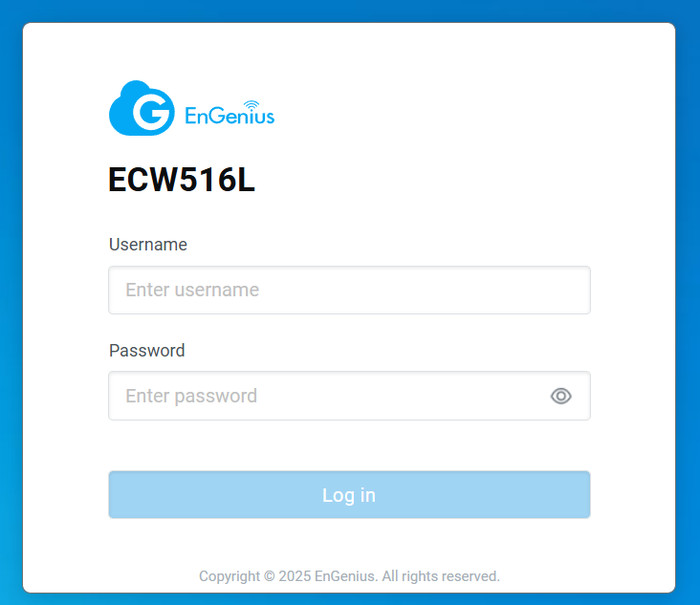
Note that users can also access all EnGenius AP products via local IP address and the default p/l is admin/admin.
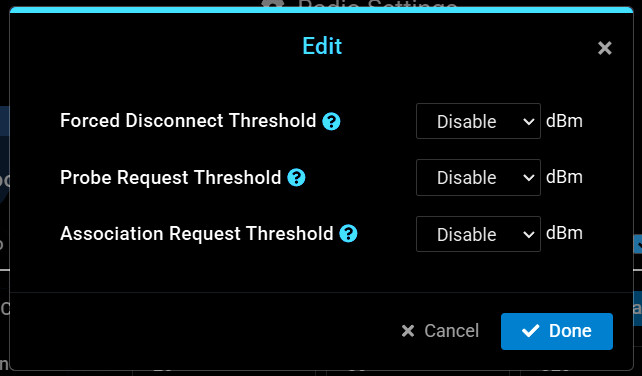
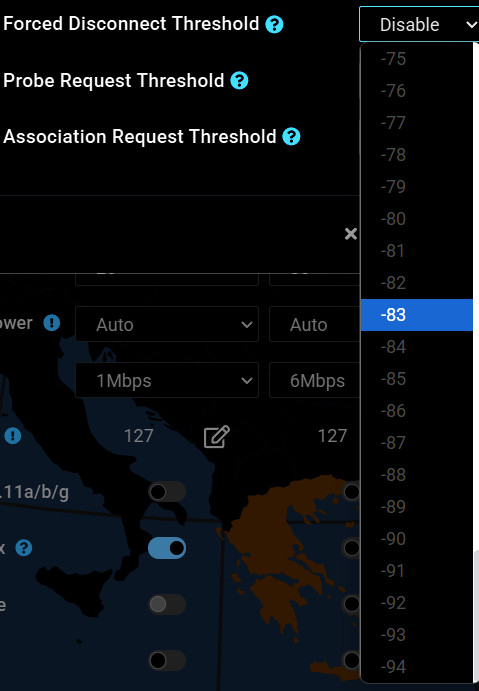
Under the Radio Settings users can set preferences for their Wifi Networks as well, Target Tx Power and the recently added RSSI Threshold

That can force rules for the connected WiFi-enabled devices.
Review Pages