Breaking News

Toshiba to Showcase High-Performance AI and Petabyte-Scale Storage Solutions at Cloudfest 2026 The SAMA V62 brings panoramic design to modern PC builds ASUS Republic of Gamers Announces New Strix OLED monitors PlayStation Plus Game Catalog for March 2026 Intel Announces New Intel Core Ultra 200S Plus Series Desktop Processors

logo

  • Share Us
    • Facebook
    • Twitter
  • Home
  • Home
  • News
  • Reviews
  • Essays
  • Forum
  • Legacy
  • About
    • Submit News

    • Contact Us
    • Privacy

    • Promotion
    • Advertise

    • RSS Feed
    • Site Map

Search form

Terramaster F4-210 NAS Server

Nov 20,2020 0

3. Install/Power up


Review Pages

1. Introduction
2. The Package/Overview
3. Install/Power up
4. TOS System
5. Apps/Performance
6. Conclusion


In order to install HDDs, you need to unlock the slots, be gentle to lift up the plastic level and slide out the needed slots.

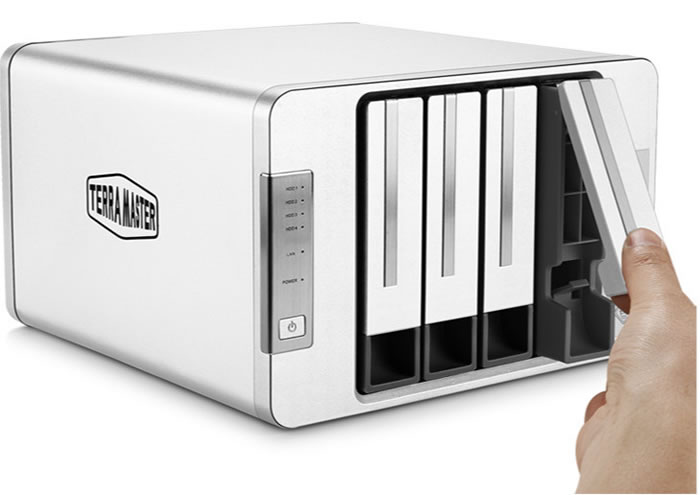
After removing all slots we can get a better view of them, the used material is hard plastic for all of them.

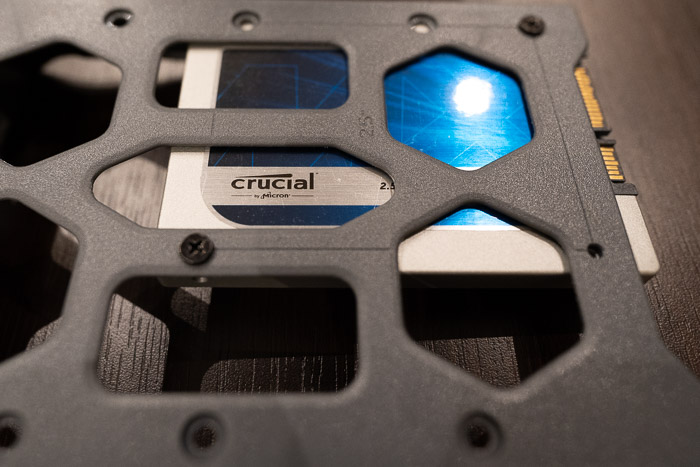
For our testing purposes we used two (2) 2.5" SSD from Crucial we had spare in our labs, both with 500GB capacity.

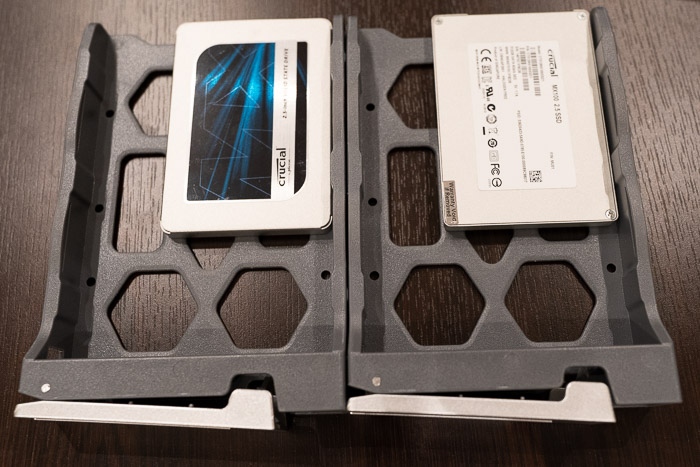
In order to secure them, users should look for the 2.5" mark and tigthen the included black screws.

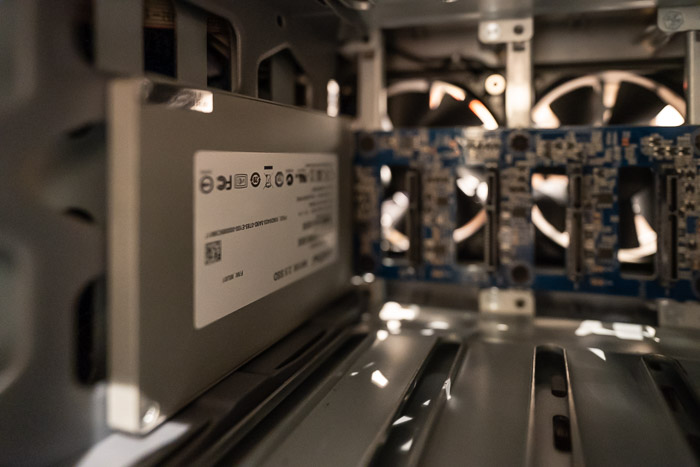
The installation procedure again in reverse, you need to slide the tray inside and put down gently the front level. Below you can see the three remaing slots.

After that step, users have to connect the device with the included LAN cable and power adapter and pres the front power button....

- Powering up

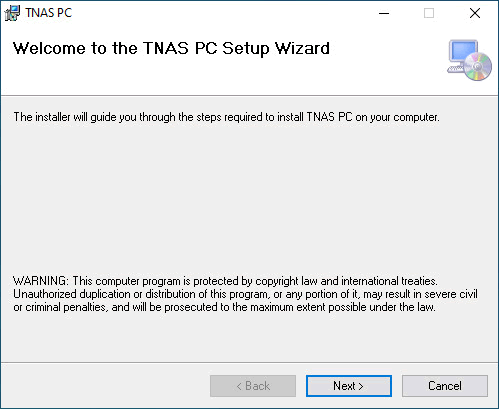
The device might take sometime to power up. Terramaster suggests to download their appliacatio either for MAC/Windos or Mobile device in order to setup the device. For our tests, we used a Windows based machine and the installation for the TNAS software is simple:

In short this software will help you locate the installed NAS and open up the login page for further steps.

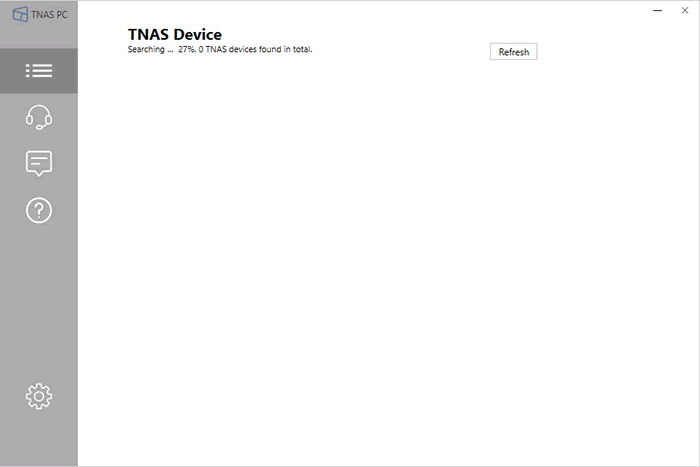
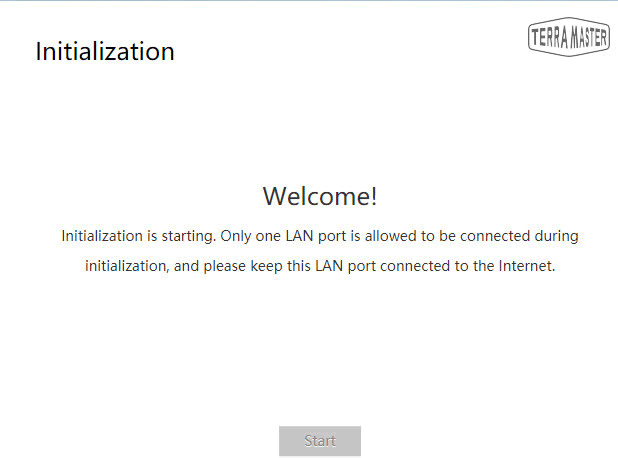
After pressing the login button, the software will point to the used IP address to proceed. The initialization wizard is rather easy to navigate:

Both disks identified and being check for any serious problems...

After checking all disks, wizard is ready to continue:

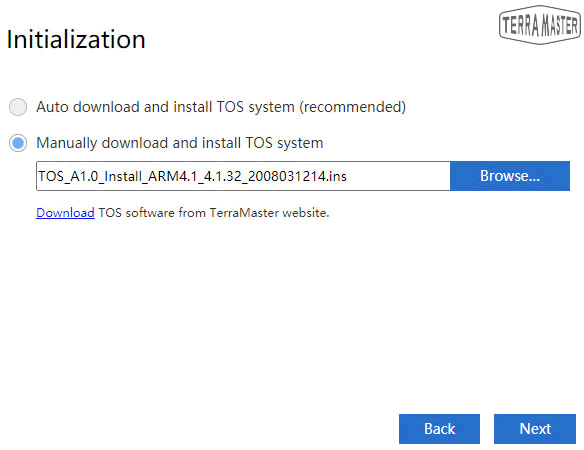
Before the installation proceed. you can update the installed operating system, Terramaster calls it TOS:

In our case we had already downloaded the 4.1.32 build and we updated the box

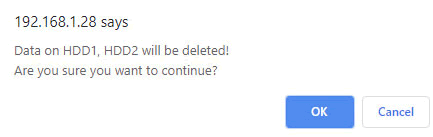
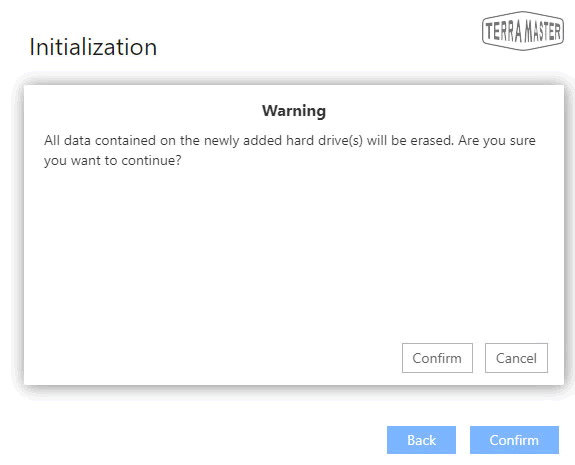
After this step, the wizard prompt that all data on both disks will be deleted:


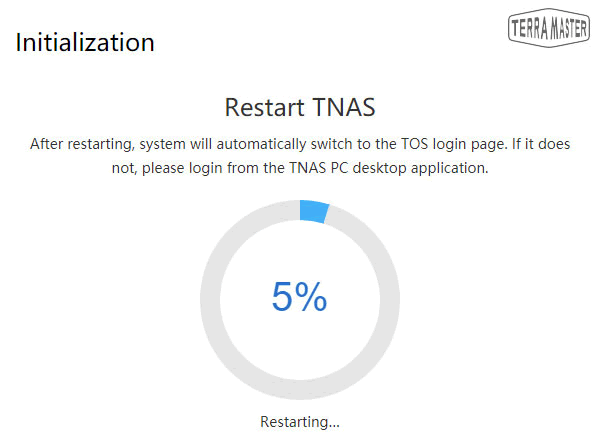
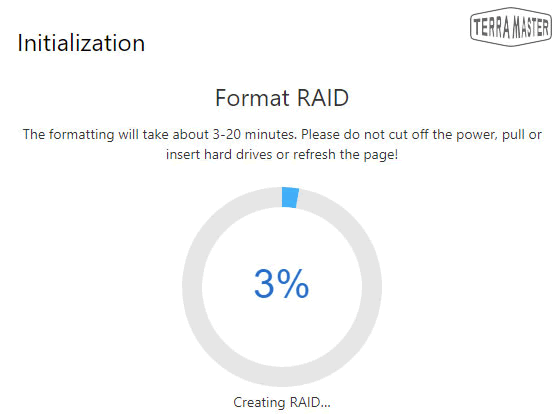
The installation of new operating system started:

After the first reboot, user must place a strong password, the admin login name cannot be changed. more over user must insert a security email in case password is lost:

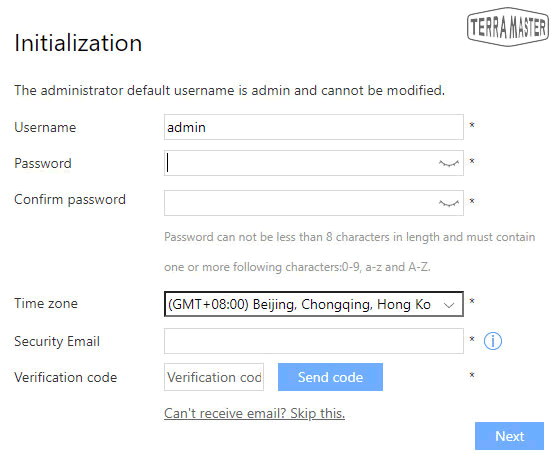
After that step, we must configure our storage space

since we had two disks we made a RAID 1 with 500GB space.

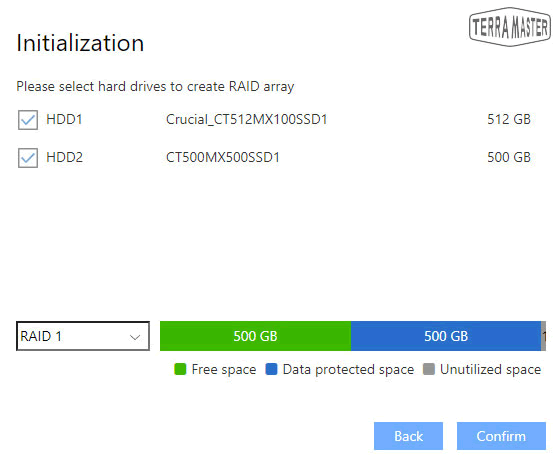
the file system can be either Ext4(default) or Btrfs which Terramaster offers for more advanced users:


Review Pages

1. Introduction
2. The Package/Overview
3. Install/Power up
4. TOS System
5. Apps/Performance
6. Conclusion


Pages

  • « first
  • ‹ previous
  • 1
  • 2
  • 3
  • 4
  • 5
  • 6
  • next ›
  • last »

TerraMaster

Tags: TerraMaster
Previous Post
8 Best Tips to Improve MacBook Performance
Next Post
How Smartphones are Changing Industries

Related Posts

  • TerraMaster Spring Sale Up to 30% Off NAS & DAS Storage

  • TerraMaster launces D1 SSD Pro 80Gbps Thunderbolt 5 Enclosure

  • TerraMaster TOS 7 Beta Now Open Worldwide

  • TerraMaster Black Friday & Cyber Monday 2025 Mega Sale Is Here

  • TerraMaster Unveils TOS 7 Insider Preview

  • TerraMaster Launches F2-425 2-Bay NAS

  • TerraMaster Launches D1 SSD Plus

  • TerraMaster Offers Up to 25% Off on Amazon Prime Day 2025

Latest Reviews

Why Streaming Live Casino Games Demands Smarter Tech
Enterprise & IT

Why Streaming Live Casino Games Demands Smarter Tech

Kioxia Exceria Plus G3 512GB microSD
Cameras

Kioxia Exceria Plus G3 512GB microSD

SoundPeats Cove Pro
Consumer Electronics

SoundPeats Cove Pro

Asustor AS5404T 4-Bay NAS System
Enterprise & IT

Asustor AS5404T 4-Bay NAS System

be quiet! Pure Power 13M 1200W
PC components

be quiet! Pure Power 13M 1200W

Popular News

COLORFUL Presents CVN X870 ARK FROZEN Motherboard for AMD Ryzen 9000 CPUs

COLORFUL Presents CVN X870 ARK FROZEN Motherboard for AMD Ryzen 9000 CPUs

TEAMGROUP Launches EXPERT P34F Find My External SSD

TEAMGROUP Launches EXPERT P34F Find My External SSD

Samsung announces Galaxy Tab S11 and Galaxy S25 FE series

Samsung announces Galaxy Tab S11 and Galaxy S25 FE series

Viltrox Showcases Upcoming Lens Lineup and New TTL Flash at IBC 2025

Viltrox Showcases Upcoming Lens Lineup and New TTL Flash at IBC 2025

CORSAIR announces Vanguard Pro 96 and Vanguard 96 Gaming Keyboards

CORSAIR announces Vanguard Pro 96 and Vanguard 96 Gaming Keyboards

Panasonic Introduces the First Ultra-Telephoto Zoom Lens in the LUMIX S Series

Panasonic Introduces the First Ultra-Telephoto Zoom Lens in the LUMIX S Series

MSI Launches DATAMAG 40Gbps Magnetic Portable SSD

MSI Launches DATAMAG 40Gbps Magnetic Portable SSD

MSI Launches FORGE GK600 TKL WIRELESS Special Edition Compact Mechanical Keyboard

MSI Launches FORGE GK600 TKL WIRELESS Special Edition Compact Mechanical Keyboard

Main menu

  • Home
  • News
  • Reviews
  • Essays
  • Forum
  • Legacy
  • About
    • Submit News

    • Contact Us
    • Privacy

    • Promotion
    • Advertise

    • RSS Feed
    • Site Map
  • About
  • Privacy
  • Contact Us
  • Promotional Opportunities @ CdrInfo.com
  • Advertise on out site
  • Submit your News to our site
  • RSS Feed