Shuttle SZ270R8 review
3. Component installation
Review Pages
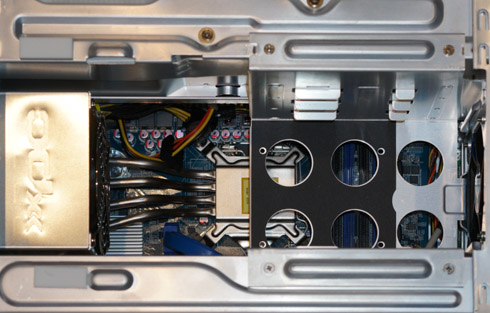
It's time to have a look at the chasis internals. All you have to do is to unscrew the three thumbscrews of the chassis cover, slide the cover backwards and upwards, unfasten the rack mount screws and remove the rack:

Below you see a description of the main parts of teh mainboard:
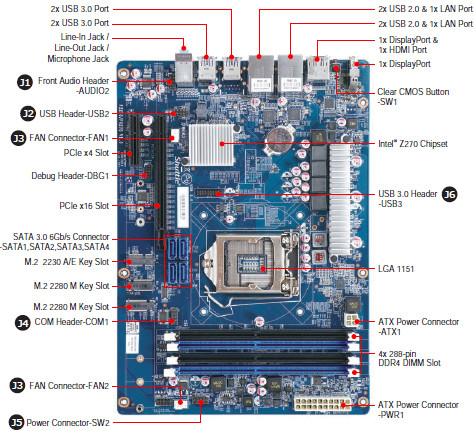
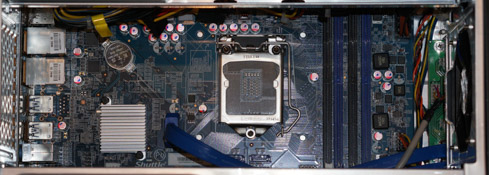
Focusing on the CPU area, there you can mount the latest Socket LGA 1151 processors, namely Intel 6th Gen (Skylake) and Intel 7th Gen (Kabylake) Core i3/i5/i7, Pentium, and Celeron 95W. According to Shuttle, you can play a bit with the frequencies of the CPU, although the company's SZ270R9 model more appropriate for overclocking.
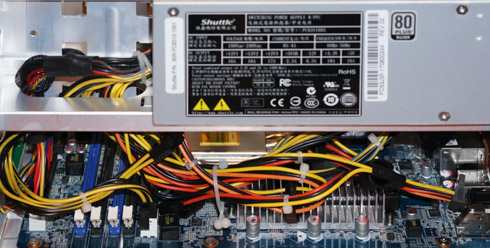
The chasis is equipped with an 80 Plus Sliver 500W power supply, which should be enough for your power needs. You can use the power calculator at Shuttle's webpage in order to calculate the power needs of the components you have chosen to install and whether the 500W PSU covers you. According to Shuttle, an Intel 7700K and an Nvidia 1080 graphics card cofiguration os completely covered by the provided PSU.
Continuing our motherboard inspaction, a PCI-Express x16 v3.0 (PEG, for graphics cards only) and a PCI-Express x4 v3.0 slots are found at the right side of the board, with the latter to be open-ended in case you need it.
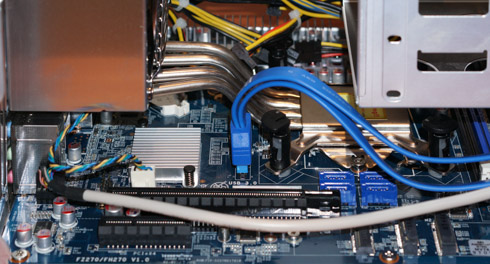
There are also two M.2 2280 with type M (1x PCI-Express Gen. 3.0 X4 max. 32 Gbps interface) and and one M.2 2230 with type A/E slots to install M.2 SSD and a WiFi card, or other compatible device. Both support M.2 cards with a width of 22 mm and a length of 42, 60 or 80 mm (type 2242, 2260, 2280), M.2 SSDs with SATA or PCI-Express interfaces.

Below you see the 80 Plus Sliver 500W power supply:

The mainboard has four DIMM slots that support up to 64GB (4x16GB) DDR4-2400.
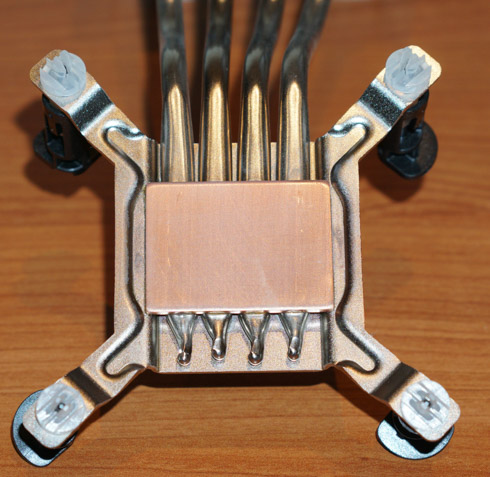
Removing the CPU cooler is easy; just unfasten the ICE fan thumbscrews on the back of the chassis, then unfasten the four ICE module attachment screws and unplug the fan connector. The Shuttle XPC cube features Shuttle’s ICE 2 heat pipe technology. It uses convection cooling to dissipate heat away from the CPU. The ICE2 copper tubes, coated in nickel for enhanced tube hardness and rust-proof protection, are filled with distilled water to channel heat. The SZ270R8 is specially is configured with four heat pipes instead of three, in order to provide even better cooling performance:
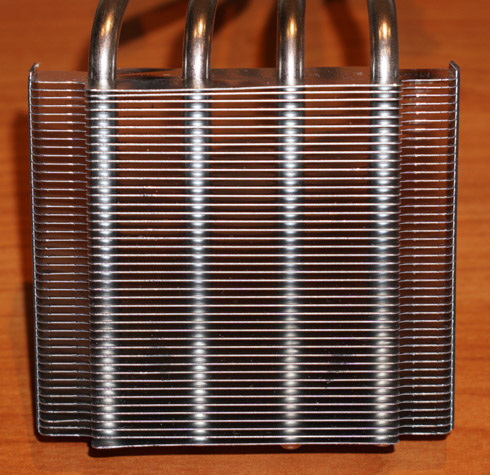
The included 92mm fan supports PWM and proved to be strong enough during out tests:

Installing the CPU and memory is very easy, but if you haven't done it before, just follow the instructions bundled wit the package. Have in mind that the 1151-pin socket is fragile and can be easily damaged. Use
extreme care when installing a CPU and limit the number of times that
you remove or change it. Before installing the CPU, make sure
to turn off the computer and unplug the power cord from the power
outlet.
Please be aware of the CPU orientation, DO NOT force the CPU into
the socket to avoid bending of pins.
Make sure to orientate the CPU correctly and align the CPU notches with the
socket alignment keys. After making sure that the CPU sits perfectly horizontal,
push it gently into the socket. Close the metal load plate, lower the CPU socket lever and lock in place. Then spread thermal paste evenly on the CPU surface.


Review Pages


