Roxio Easy Media Creator 8
3. Interface and Manual
Review Pages
2. Features
3. Interface and Manual
4. Music Features - Page 1
5. Music Features - Page 2
6. Photo Features - Page 1
7. Photo Features - Page 2
8. Video Features - Page 1
9. Video Features - Page 2
10. Backup/Copy Features
11. DVD/CD Features - Page 1
12. DVD/CD Features - Page 2
13. Conclusion
The manual: As we have already stated, the manual comes in 5 languages. But don't expect a lot from the manual. The english manual is about 17 pages and explains the basic functions such as the installation procedure, the interface, and a brief description including main features of the various applications included in the suite. Fortunately, this is not the only help available. Roxio's online help and tutorials, found on the Roxio website, offers complete documentation for each application and you can also contact Roxio by phone or e-mail.
Easy Media Creator Home: The Home screen is the starting point for Easy Media Creator. It is the first screen you will see when you run the suite, from which you can access the various components and tools for all of your digital media projects.
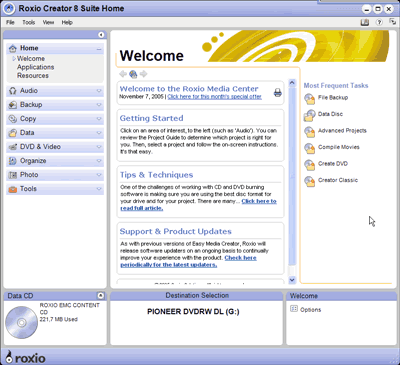
The Easy Media Creator 8 interface - Home screen
In the left pane, we have the Project Panel. From here, we can launch the various tools. You can also minimize the project tabs to save space. In the right pane, you can navigate to the most frequent tasks and in the middle pane, you can find more information about Easy Media Creator or read a description of the task that you have selected from the project panel.
Below these, we have the Control Panel. The control panel stretches across the bottom of the application window. It consists of three main areas:
- The media information display on the left. This display is a visual representation of the disk or the hard disk that is the destination for your project. You can find here, information such as the format and capacity of the disc, the title, amount of free space and the number of discs that are needed to complete the current project.
- The input panel, is used to display a drop down menu that lets you to select the burning drive for the current project or browse for a file or location on your hard drive. You can also see the progress of the active project and the audio and video playback controls.
- The Action area: Located on the right side of the control panel, helps you not execute a project or to cancel it and also includes the option button, which opens a group of panels you can use to set project options.
The Mini Mode: Two versions of the project launcher interface are available: full-size and a miniature version called Mini mode. In case you find the full-size version too big and annoying, you will love the Mini Mode.

The Mini Mode
Drag-to-Disc Center: Drag-to-Disc lets you back up or save your data and files onto recordable CD or DVD media, just as you might do with a floppy disk or memory drive. Drag-to-Disc lets you add files to your disc by simply dragging them, and you can even use Windows Explorer.
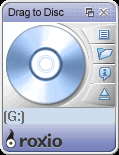
You can now easily add files with Drag to Disk
I found the Control Panel and the Project Panel very useful and easy to use and I don't think that they could have been designed any better.
Review Pages
2. Features
3. Interface and Manual
4. Music Features - Page 1
5. Music Features - Page 2
6. Photo Features - Page 1
7. Photo Features - Page 2
8. Video Features - Page 1
9. Video Features - Page 2
10. Backup/Copy Features
11. DVD/CD Features - Page 1
12. DVD/CD Features - Page 2
13. Conclusion

